etrailer | Saris Bones Trunk Mount 3 Bike Rack Review
Автор: etrailer
Загружено: 2014-01-22
Просмотров: 215428
Click for more info and reviews of this Saris Trunk Bike Racks:
https://www.etrailer.com/Trunk-Bike-R...
Check out some similar Trunk Bike Racks options:
https://www.etrailer.com/trunk-bike-r...
Click for more info and reviews of this Saris Trunk Bike Racks:
https://www.etrailer.com/Trunk-Bike-R...
Check out some similar Trunk Bike Racks options:
https://www.etrailer.com/trunk-bike-r...
Click for more info and reviews of this Saris Trunk Bike Racks:
https://www.etrailer.com/Trunk-Bike-R...
Check out some similar Trunk Bike Racks options:
https://www.etrailer.com/trunk-bike-r...
Click for more info and reviews of this Saris Trunk Bike Racks:
https://www.etrailer.com/Trunk-Bike-R...
Check out some similar Trunk Bike Racks options:
https://www.etrailer.com/trunk-bike-r...
Click for more info and reviews of this Saris Trunk Bike Racks:
https://www.etrailer.com/Trunk-Bike-R...
Check out some similar Trunk Bike Racks options:
https://www.etrailer.com/trunk-bike-r...
https://www.etrailer.com
Don’t forget to subscribe!
/ etrailertv
Full transcript: https://www.etrailer.com/tv-review-sa...
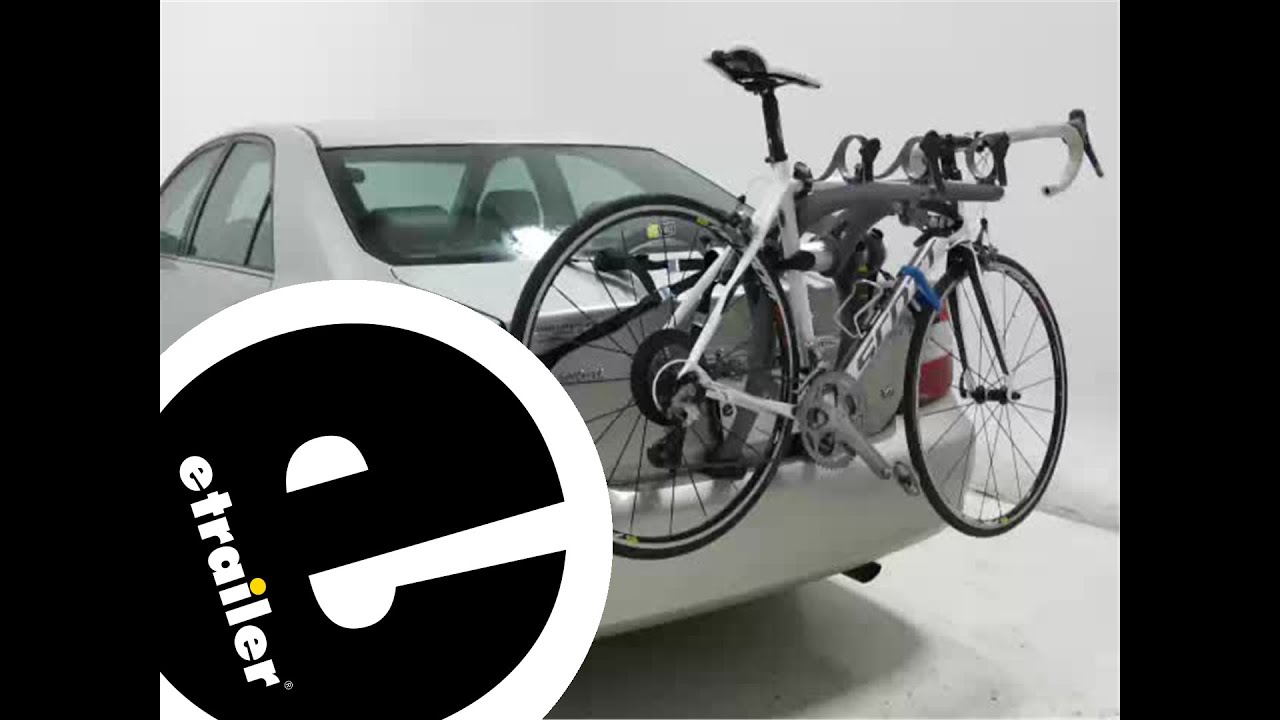
Today, we're going to be taking a look at the Saris Bones Trunk Mounted 3 bike rack in gray, part number Sa801. This bike rack is also available in a wide variety of colors. The Saris Bones is made of 100% recyclable material that is strong, durable, and completely rust resistant. The top set of arms on this bike rack is arched, as you can see, to fit around a lot of the newer vehicles with the spoilers. The top set of feet as well as the bottom set of feet are a soft rubber that's going to protect the vehicle's finish along with the hooks as well that are coated in a nice rubber paint to also help protect your vehicle's finish. This bike rack is completely adjustable. With these grooves here, you can loosen up these black knobs and adjust the arms to accommodate almost any make and model of vehicle. It's also equipped with these nice ratcheting straps.
It provides a nice strong hold for your bike in the cradles while you are traveling down the road. Also equipped, are the anti-sway cradles. This is going to wrap around the vertical bar on your bike and help prevent it from swaying back and forth, coming into contact with your other bikes or the bike rack itself. The Saris Bones has a carrying capacity of three bicycles with a weight capacity of 35 pounds per bike. It is made in the USA and comes with a limited lifetime warranty. Now, we'll go ahead and show you how to install it. Directly out of the box, the bike rack comes ready to install on the vehicle. First, you need to begin by setting the bottom set of feet on the upper tier of the rear bumper.
We'll then need to loosen up the black knobs here at the top to adjust the arms to fit the trunk. Do this on both sides. Now, we're not going to tighten them down just because we haven't really established a set position yet. Now, we're going to raise up our cradle arms just a little bit so that the bottom feet will fit a little bit better on the top of the bumper. Now, we'll go ahead and raise up the cradle arms, which is going to allow us to position the feet a little bit better. Now they adjust the same way just by loosening up these black knobs.
We'll bring them towards the center and then kind of bring them up a little bit just to get them out of the way and then just tighten them down loosely. Now with the bottom set of feet free, we'll go ahead and place the feet onto the bumper making sure the majority of the pad is touching the vehicle. We'll go ahead and rotate these feet down, then bring it forward just to see how our placement looks on the trunk. They seem to be a little bit too far up so what we're going to do is just slide the arms out again and then readjust them. Now that we have the arms kind of in position then we'll just tighten down the black knobs to secure them in place. Now that we have the bike rack fitted to the trunk, we're ready to secure it by the clips. Now, there are three clips here on each side of the bike rack.
You'll know which clip is which because they are labeled and actually the top clip is going to be the fattest one. We'll go ahead and do that one first just to help us hold the bike rack up, then hook it in place, tighten down the strap just a little bit just to help us keep the bike rack in place. We'll then repeat the same process with the other side top strap. Now, with the top set of straps in place, we'll go ahead and secure the bottom set. Now, the bottom set of straps is going to have the skinniest of the three clips. Then simply place it into the bottom of the trunk. Now, depending on your application, you made need to open up your trunk to get the clips in place. We'll then tighten it down just a l
Доступные форматы для скачивания:
Скачать видео mp4
-
Информация по загрузке:


![[2026] Feeling Good Mix - English Deep House, Vocal House, Nu Disco | Emotional / Intimate Mood](https://imager.clipsaver.ru/cxLdtvzf2sI/max.jpg)
