Expensive DWS Double Wishbone Suspension Upgrade for Mini-Z MA-020/MA-030EVO (MDW100)
Автор: Sammybaka Mini RC
Загружено: 2023-12-28
Просмотров: 6260
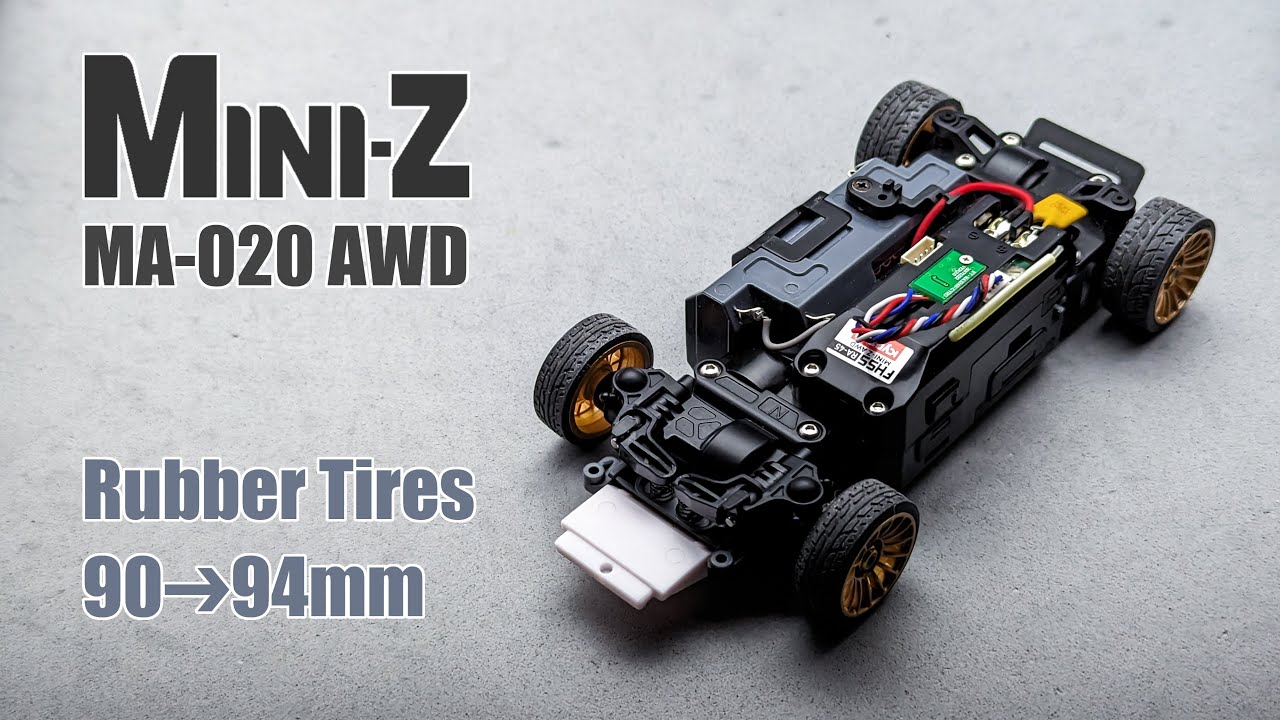
My Mini-Z MA-020 has been getting a lot of play time. Last time we extended the car to wide and 98mm. Today I'm going to install the DWS conversion which changes the rear suspension to a double wishbone setup. Why do this? Let's first check how the stock suspension works. The front uses single wishbones with kingpins. It's pretty smooth. The back side is a different story. It uses a basic sliding pillar design which doesn't slide smoothly in practice. Because of the wheel is offsetted from the kingpin, there's lateral force pushing the pins against the mounting holes. As a result, the sliding action feels notchy and unpredictable. It's possible to apply kingpin grease or oil to smoothen the action, but that feels too much like a band aid fix.
Is it a serious problem for how I use the MA-020? No, since I mostly just mess around with it. Kyosho has a solution for this problem, though it can be argued it should have been there to begin with. MDW100 is the MA-020 Rear Double Wishbone Suspension Set. It comes in a box full of parts, and a price to match the size. This may be the priciest upgrade from Kyosho for the chassis. Inside the box, we have various bits in different bags not organized in any particular manner. This is definitely the most comprehensive instruction manual for an upgrade part. And yes it's very necessary. The DWS is mostly plastic except metal pins for the lower suspension arms and ball studs for the upper arms.
(That gear diff is not part of the upgrade kit)
One super cool feature of the upgrade kit is it includes parts to build a "compact" version of the DWS for 90mm or 94mm wheelbase, but also another for 98mm. In this video I will build the version for 98mm. There's no need to buy the extension blocks and long spur gears!
The bulkhead holding the diff came together quickly. Moving on to the lower suspension arms, the first step is installing grub screws to control droop. Building suspension arms requires patience in getting all the joints free of binding but with minimum play. I used a 1.9mm drill bit to help clean up the 2mm hole. I get to choose 3 or 4 degree rear toe in. I picked 3, the default. With the lower arms attached, the whole thing is starting to take shape. My experience in building 1:28 chassis is coming in handy. I do whatever it takes to build all moving parts properly. Not quite a full turnbuckle, but there's still a need to thread links into ball cups. There's also some binding with the upper arms. I cleaned out some excess plastic and freed up the pin holes.
Here's the most painful part of the build. These ball cups on the upper arms are too tight. Use a pair of pliers to squeeze the cups. This hasn't been a straightforward build so far. It's manageable, but Kyosho can do better.
It is done! The build needed more time than I'd expected. As mentioned already, expect to file down and clean up plastic parts to remove any binding. Also, there are many small fiddly parts to handle and there's a real chance of things getting lost. Please be careful.
Despite some hiccups, the DWS works well mechanically. The suspension action is super smooth and solid. DWS also allows for easier tuning for camber, droop, ride height, and dampening. Attaching the DWS backend to the rest of the chassis is similar to the stock backend. I built mine for 98mm, but it's possible to shorten it by changing two pieces. In the 98mm configuration, an optional 5x8x2.5mm bearing can be added to provide additional security for the long spur gear.
With the DWS backend, my MA-020 is looking fancy. When MA-020 first came out in 2013, it had DWS as standard, but at some point down the road, Kyosho stopped including it in RTR. Even MA-030EVO doesn't have DWS out of the box. Regardless, I'm impressed by how well the suspension performs! It feels quite plush and smooth, much more predictable than stock. I think this car is going to drive better too, both on a track or messing around at home.
Is it worth the relatively high cost (5742 JPY or $40)? Probably not! But it functions well and provided a few hours of RC fun. It's the most solid way of extending an MA-020 to 98mm, plus without sacrificing 90 and 94mm.
How about body compatibility? The DWS seems to stick out more in the back. Nervously, I tried on the McLaren Senna body. It's pretty low behind the rear view window. Luckily, the shock tower and shocks clear the back, just barely! The clearance is so tight that Kyosho must have verified this. Yeah, it's that close over there.
Thanks for staying with me during this long build video. I hope you had an amazing 2023! I managed to publish 39 videos this year. In terms of quality, I think they were better than previous years. Hope you've found this channel useful. This is Sammy and thanks for watching! See you in 2024!
Music: "Journey to the Stars", Savfk ( • Journey to the Stars by Savfk [CC-BY royal... )

Доступные форматы для скачивания:
Скачать видео mp4
-
Информация по загрузке: