How to Apply Skim Coat for a Smooth Finish Wall: A Step-by-Step Guide
Автор: Amazing Home DIY
Загружено: 2020-12-05
Просмотров: 36203
How to Apply Skim Coat for a Smooth Finish Wall: A Step-by-Step Guide
A smooth, flawless wall finish is a key aspect of any professional-looking room. Applying a skim coat is a great way to cover imperfections and prepare the wall for painting or wallpapering. Here’s a comprehensive guide on how to apply a skim coat for a smooth finish wall.
#### 1. Gather Your Tools and Materials
Before you start, make sure you have all the necessary tools and materials:
Skim coat mix (either pre-mixed or a powder you can mix yourself)
Mixing bucket and drill with mixing paddle (if using powdered mix)
Plastering trowel
Hawk
Jointing knife or putty knife
Sandpaper (medium and fine grit)
Drop cloths or plastic sheeting
Primer and paint (for finishing)
Safety gear (gloves, mask, and goggles)
#### 2. Prepare the Surface
Preparation is crucial for a smooth finish.
*Clean the Wall:* Remove any dust, dirt, or loose paint from the wall. Use a brush or vacuum to ensure the surface is clean.
*Repair Any Damage:* Fill any holes or cracks with a suitable filler and let it dry. Sand down any rough patches to create a smooth surface.
*Cover and Protect:* Lay down drop cloths or plastic sheeting to protect your floors and furniture. Mask off any adjacent areas with tape to avoid getting skim coat on them.
#### 3. Mix the Skim Coat
If you are using a powdered skim coat mix, follow the manufacturer’s instructions to mix it. Typically, you’ll mix the powder with water until it reaches a smooth, creamy consistency, similar to pancake batter.
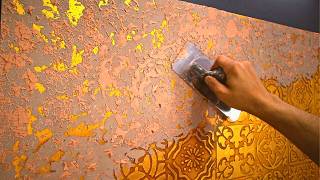
#### 4. Apply the Skim Coat
*Load the Hawk:* Scoop some skim coat onto your hawk.
*Use the Trowel:* With your plastering trowel, take a small amount of skim coat from the hawk.
*Apply to the Wall:* Start at the top of the wall and work your way down. Apply the skim coat in thin, even layers, spreading it with broad, smooth strokes.
*Feather the Edges:* Feather the edges of each stroke to blend the skim coat seamlessly with the surrounding wall. This will help avoid lines and ridges.
#### 5. Smooth and Level the Skim Coat
*Consistent Pressure:* Apply consistent pressure on the trowel to ensure an even application. Adjust your angle and pressure to achieve the desired thickness.
*Work Quickly:* Skim coat can dry quickly, so work in small sections to ensure you can smooth out the surface before it starts to set.
*Check for Evenness:* Periodically step back and check for any uneven areas or lines. Smooth them out immediately with the trowel.
#### 6. Allow the Skim Coat to Dry
Let the skim coat dry completely according to the manufacturer’s instructions. This usually takes about 24 hours, but drying times can vary depending on the product and environmental conditions.
#### 7. Sand and Finish the Surface
*Sand the Surface:* Once the skim coat is dry, use medium-grit sandpaper to smooth out any rough areas or imperfections. Follow up with fine-grit sandpaper for a perfectly smooth finish.
*Remove Dust:* Wipe down the wall with a damp cloth to remove any dust.
*Prime and Paint:* Apply a primer to the skim-coated wall before painting. Once the primer is dry, paint the wall to your desired finish.
Tips for a Professional Finish
*Keep Tools Clean:* Clean your tools frequently to prevent dried skim coat from affecting your work.
*Consistent Mix:* Ensure your skim coat mix is consistent to avoid lumps and achieve a smooth application.
*Feathering Technique:* Use a feathering technique to blend each section seamlessly, avoiding visible lines and ridges.
By following these steps and tips, you can achieve a perfectly smooth wall finish with a skim coat, enhancing the overall appearance of your room. Happy plastering!
---
*Subscribe to Our Channel:* For more DIY tips and home improvement guides, make sure to subscribe to our channel and hit the notification bell!
*Leave a Comment:* Have any questions or tips of your own? Leave a comment below!
*Like and Share:* If you found this guide helpful, give it a thumbs up and share it with your friends!
Hashtags:
#DIY #HomeImprovement #SkimCoating #SmoothWalls #SkimCoatTips #DIYSkimCoating #HomeRenovation #HowToSkimCoat #WallFinishing #InteriorDesign #DIYProjects #HomeRepair #DoItYourself #SkimCoatingTechniques #Plastering #WallPreparation #SkimCoatMix #PlasteringTools

Доступные форматы для скачивания:
Скачать видео mp4
-
Информация по загрузке: