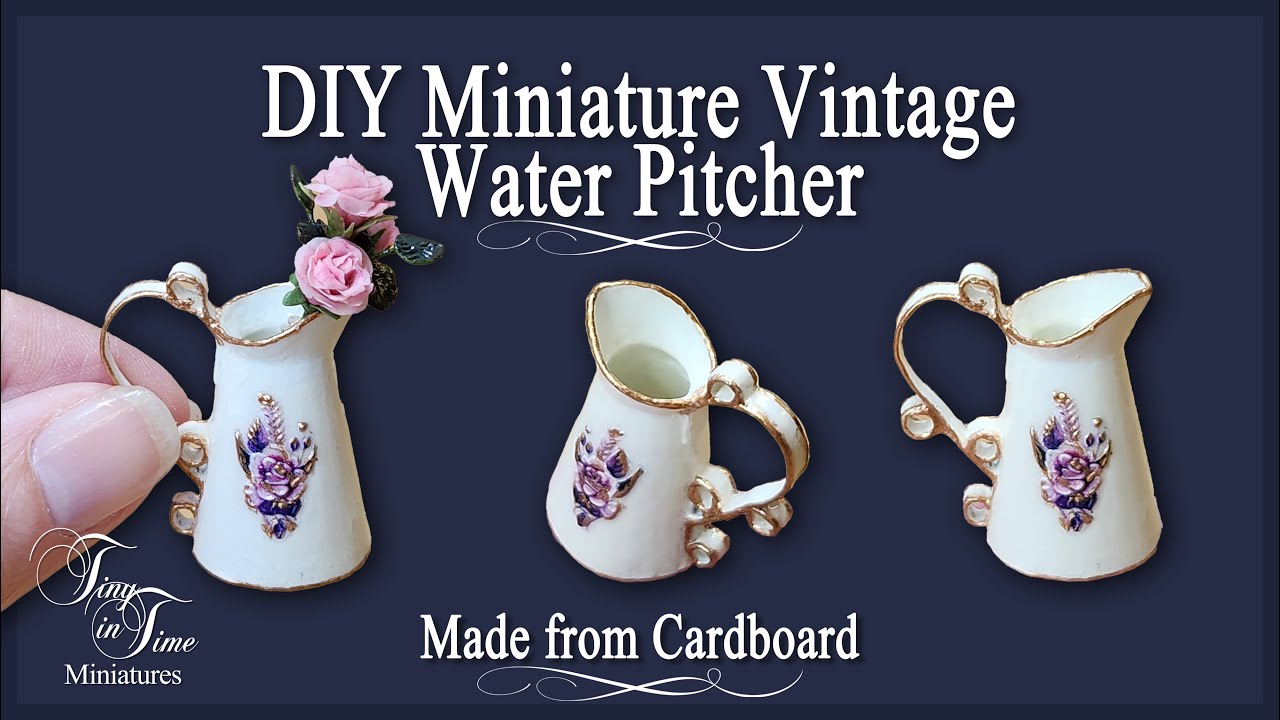
How to Make Miniature Vintage Water Pitchers from Cardboard |
Автор: Tiny in Time Miniatures
Загружено: 2026-01-09
Просмотров: 5045
In this tutorial, I’ll show you how to create charming miniature vintage water pitchers in 1:12 scale using simple, affordable materials like cardboard and acrylic paint.
This project is perfect for both beginners and experienced miniaturists. It’s relaxing, beginner‑friendly, and a lovely way to add personality and vintage charm to your dollhouse scenes.
__________________________________________________________________________________
🧰 Materials Used
• 240gsm cardboard
• Nail stickers
• White gesso
• Tacky glue
• Acrylic paint (warm white + gold)
• Triple Thick acrylic gloss varnish
__________________________________________________________________________________
🪄 Step by Step Instructions
• Draw the 2D shape of your water pitcher or jug.
The measurement of this jug are as follows:
Base Cone = 25mm high, 20mm diameter at the base and 10mm diameter at the top
Top/Spout cone = 6mm high, 10mm diameter join edge, 16mm diameter on the top, before shaping the spout
• Extend the diagonal lines until they meet
• Use these guidelines to draw the curved arc for each section
• Cut out each piece, checking the size as you go
• Assemble the pieces using tacky glue
• Cut a thin strip for the handle, shape it, and glue it in place
• Seal the entire piece with white gesso
• Apply two coats of acrylic paint
• Add nail stickers for decoration
• Paint the gold detailing
• Finish with two coats of Triple Thick gloss varnish
__________________________________________________________________________________
💛 Love Simple Miniature Projects?
If you enjoy easy, beginner friendly miniature builds, explore the rest of my channel for more DIY dollhouse miniatures, step by step tutorials, and relaxing mini craft ideas.
Доступные форматы для скачивания:
Скачать видео mp4
-
Информация по загрузке:


![♻️Из того, что выбрасывают, сделала то, что нужно! Декор дома [diy]](https://image.4k-video.ru/id-video/xRxeYwLFXG8)


![♻️Дизайнерское зеркало. Имитация керамики из картона [diy]](https://image.4k-video.ru/id-video/qjBGkMtL5BI)


