Normal & Displacement Maps from ZBrush – Multi Map Exporter to Maya
Автор: Vertmode
Загружено: 2026-01-16
Просмотров: 16
High-poly detail only matters if it survives the pipeline.
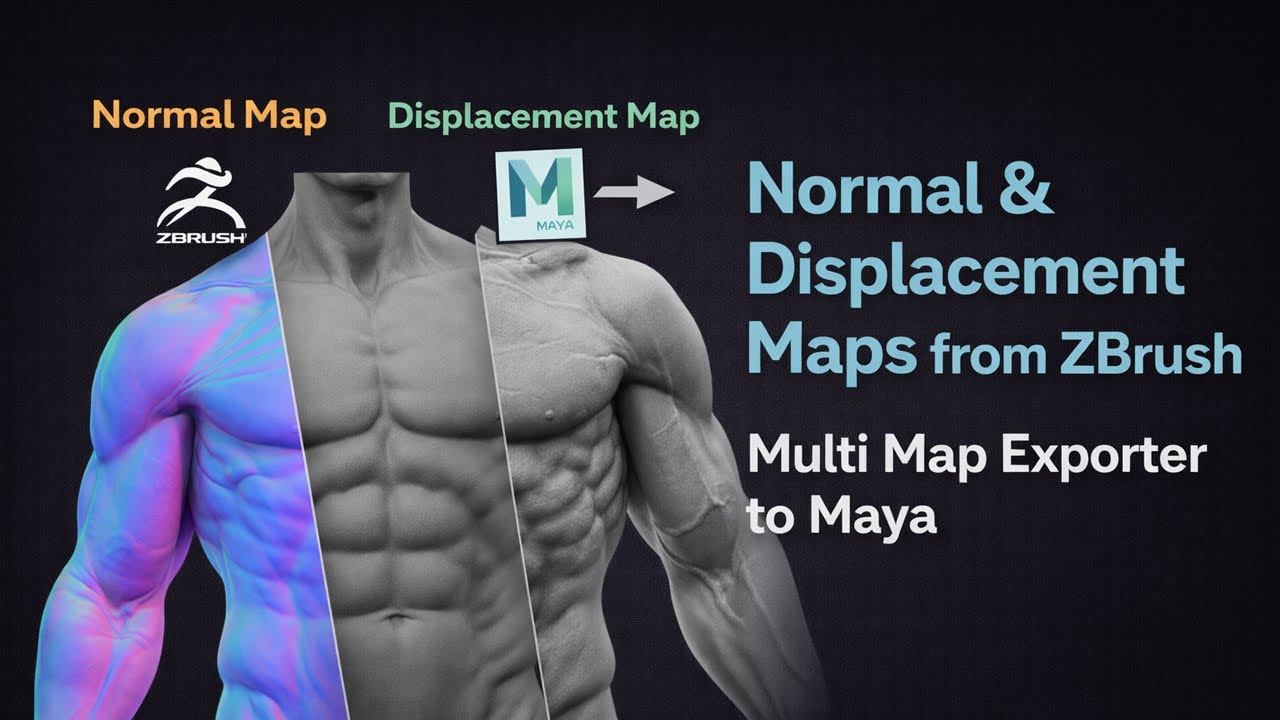
In this video, I demonstrate how to generate normal and displacement maps in ZBrush using Multi Map Exporter, and then properly set those maps up in Maya so they display and render correctly.
This lesson bridges sculpting and shading, ensuring that the detail you worked for actually shows up in your final asset—whether it’s headed for games, film, or portfolio presentation.
In this video, you’ll learn:
How to use ZBrush Multi Map Exporter
Generating normal maps from a high-poly sculpt
Creating displacement maps correctly
Proper map settings and export considerations
Setting up normal and displacement maps in Maya
Common issues that cause shading or detail loss
This workflow follows real production standards, not guesswork or trial-and-error setups.
This video is part of my Mastering Human Anatomy for 3D Artists course, where we take a sculpt through retopology, UVs, projection, map generation, and final presentation.
👉 Full course here:
https://www.udemy.com/course/masterin...
Who this video is for:
Artists transitioning from sculpt to production assets
Students confused by normal vs displacement maps
Anyone struggling to get sculpt detail to show in Maya
Game and film artists preparing portfolio-ready characters
If your maps are wrong, everything looks wrong — this step matters.
Доступные форматы для скачивания:
Скачать видео mp4
-
Информация по загрузке:


