DISASSEMBLY - WE M4A1 LOWER | AIRSOFT
Автор: Special Weapons And Plastic
Загружено: 2018-07-12
Просмотров: 23406
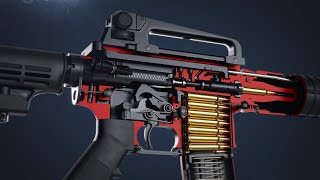
DISASSEMBLY - WE M4A1 LOWER | AIRSOFT
Today I will disassemble the lower on my Wei-Tech M4A1. So I can let loose my destructive behaviour, in a controlled environment.
Share this video:
• DISASSEMBLY - WE M4A1 LOWER | AIRSOFT
Support us on Patreon and get access to 3d-printing files:
/ specialweaponsandplastic
Follow us on facebook for Deals and more:
/ specialweaponsandplastic
Visit our website:
www.SpecialWeaponsAndPlastic.com
The only parts I won't disassemble down to the bare bones are the stock and the trigger guard, since it is better to just buy the entire assembly if you want or need new ones.
And the trigger group will be covered in a separate video since it is an intricate and complex part, in and of itself.
STEP 1:
I begin by divorcing the lower from the upper.
Two pushed pins later, and I’m done.
I remove the stock by pulling down the adjustment tab and dragging the entire stock off the tube.
STEP 2:
Next I push the buffer retaining pin down, and pull out the buffer and recoil spring.
Using the included disassembly tool, I loosen the buffer tube nut, while holding down the end plate. Then I unscrew the buffer tube, remove it, and carefully remove the end plate, since there’s a small spring, and detent behind it.
STEP 3:
When these parts are removed, the rear takedown pin on the receiver becomes loose, and can be taken out.
I now remove the buffer retaining pin with a screwdriver, and remove the small components.
STEP 4:
To remove the pistol grip I use a Philips head screwdriver. I’m careful with the spring, since it is necessary for a functional fire selector.
Next I punch out the pin holding the bolt catch in place. I punch it out from front, to back, since it is knurled on one end.
This frees the bolt catch spring, and bolt catch.
Almost forgot the fire selector detent.
STEP 5:
In order to remove the mag catch, I hold in the mag catch button, on the right side, grab the mag catch, on the left side, with some pliers and turn it counter clockwise until it's free.
The bolt catch button and spring will come out on the right side.
STEP 6:
Making sure the hammer is cocked, I push the hammer and auto sear together, then pull out the fire selector. Some help with a small screwdriver might be necessary.
STEP 7:
The trigger group is held in place with a screw on the back, and a pin through the receiver.
I remove the screw.
Then place the receiver on a roll of tape, and punch out the pin from right to left.
Note that the two other pins are fake, and only cosmetic.
STEP 8:
Now I Place the lower in a plastic box, then I pull the trigger group out of the receiver.
This is because of part number 67. A small, wiley spring, that will run away from you if you're not careful.
STEP 9:
To remove the front takedown pin, I place a small screwdriver in the slot of the pin, push in the detent, and turn the pin 90 degrees, then pull it out.
The detent, and a small spring, will shoot out on their own accord or in my case they needed help by tilting the lower.
STEP 10:
Lastly I remove the trigger guard by the punching out the rear pin, from right, to left, and pushing in the detent with a small screwdriver,
and I’m done!
Note that I’m performing these modifications at my own risk. These alterations can go very wrong if you lack the skills, tools and knowledge required, and can damage your equipment and parts as well as cause injury on your person if you attempt them yourself.

Доступные форматы для скачивания:
Скачать видео mp4
-
Информация по загрузке: