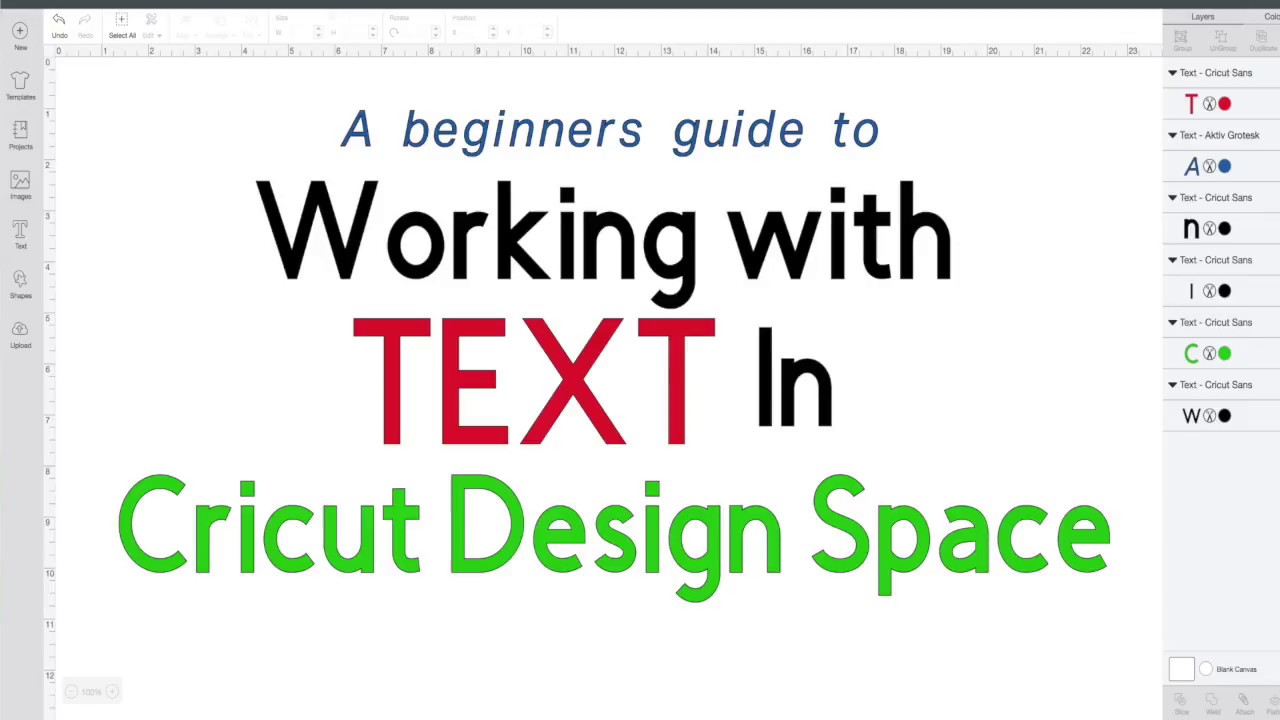
HOW TO UPLOAD AN IMAGE INTO DESIGN SPACE | Print then Cut or Layer Your Image!
Автор: The Craft Scraps
Загружено: 2019-01-30
Просмотров: 6339
This video will show you how to upload an image from the internet into design space. You can either save it as a Print then Cut Image or Layer it! Step by Step instructions below! Don't forget to like and subscribe to my channel! Thank you for the support xo
*Shop all my Amazon favorites here: https://www.amazon.com/shop/thecraft_...
*Shop all things Cricut with my affiliate link here: https://home.cricut.com/?sscid=11k3_c...
*Shop all things Auntie Tay - www.shopauntietay.com | Use my code “thecraftscraps” for 10% off!!)
*Note: I do receive a small commission if you use my Auntie Tay code or Amazon link to support the channel! Thank you!
Step By Step Instructions - How to Upload an Image from the Internet
1) Open Design Space (this is the software that comes with your cricut)
2) Open a new project in Design Space
3) Find an image online that you want to work with – right click the image and save it to your computer
4) Go back to Design Space
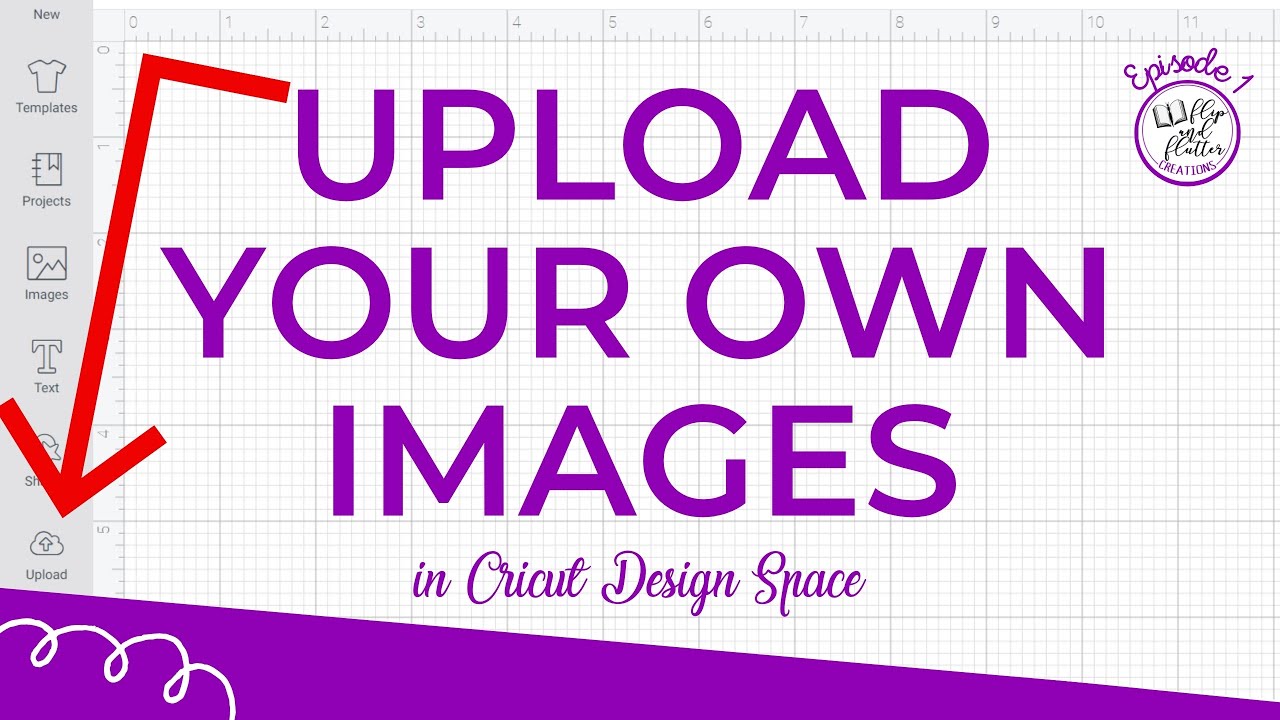
5) Go to Upload (bottom left corner)
6) Click Upload Image
7) Click Browse – find your image on your computer and click open
8) Once you have your image, click how you want your image to show up – simple, moderately complex, or complex. I usually do complex, but if your image is very basic, simple would work. Its up to you
9) If you are using PRINT THEN CUT – CLICK CONTINUE, AND SAVE AS A PRINT THEN CUT IMAGE. Then, all you need to do is insert it to your project (click the image, and click insert in the bottom right corner) – then you are done!
10) If you are wanting to LAYER YOUR IMAGE (i.e. piece together the different colors with vinyl, iron on, or cardstock), you will need to save each color/layer one by one
11) First (for this image), I like to save a solid bottom black layer (this works great for cardstock because it gives you a foundation to layer your cardstock). To do this, don’t get rid of any of the colors yet, just click continue, and save it as a cut file (it will look like a solid grey outline of your image).
12) Next, click Upload Image again, click Browse again – find your image on your computer and click open again, click complex (or whatever you originally chose during step 8)
13) Choose which color/layer you are going to focus on – I started with yellow – using the wand or eraser get rid of everything that is not the color/layer you are focusing on (i.e. I get rid of everything that is not yellow)
14) Once everything is gone besides the color/layer you are focusing on, click continue, and save as cut file – this is your second layer
15) Next, follow steps 12 and 13 until you have saved all of your colors/layer individually (I do red for the shirt, then dark pink for piglet, then light pink)
16) Once you have all of your layers saved, click each layer and insert it onto your project
17) Once they are on your project, change your colors accordingly for each layer by clicking your layer, going up to the tool bar, and changing the color
18) Move/layer your colors/layers ONTO the solid black foundation that you have – this will give you a good baseline of where things should go
19) You’re done! Now you can Make it!

Доступные форматы для скачивания:
Скачать видео mp4
-
Информация по загрузке: