Updated Nail Patching Routine | DIY Nail Repair Tutorial
Автор: My Simple Little Pleasures
Загружено: 2016-10-09
Просмотров: 30515
Today I'll be showing you how to patch your nails to repair a break and let it grow out. Products used are linked below.
See more nail art Tips & Tricks: http://goo.gl/X6P7Gr
Subscribe for new videos every week: http://goo.gl/JJaoHC
I get questions on the darker stripe on my right middle nail - it's just excess pigmentation in the nail, also known as melanonychia - it's common in darker-skinned people and I've always had it. I keep an eye on it for any changes that might require a biopsy or something as in rare cases it can lead to melanoma but I've never had any trouble.
My patching technique has evolved over the years, but I think even my older videos still have some good tips:
How to Repair a Broken Corner: • How to Fix a Broken Corner | DIY Nail Repa...
How to Repair a Full Break: • How to Patch a Full Break | DIY Nail Repai...
Patching Product Update: • How I Patch My Nails - Product Update
My Original Patching Tutorial: • How To Apply A Silk Patch | DIY Nail Repai...
►Products used◄
-Swiss Silk Self-Adhesive tabs: http://amzn.to/1XhHiS1 (or you can even use a piece of tea bag if you don't have this)
-Tweezers: http://amzn.to/1Y533TL
-Cuticle Scissors: http://amzn.to/1TlyERI
-Glue - ibd Brush-On Nail Glue: http://amzn.to/1iiMZiq (or any kind of nail glue is fine)
-ASP - Light-less Gel: http://amzn.to/1iiNbOL
-ASP - Gel Cure: http://amzn.to/1hURPCR
-4 Way Nail File & Buffer: http://amzn.to/2e5Ecn4
-100% acetone: http://amzn.to/1TlzxtI
-Q-tips cotton swabs: http://amzn.to/2c0WkJ1
►Step-by-Step◄
-Start out with clean, dry nails and glue your break together
-Apply a silk wrap over the break and over about half of your nail - cut edges or tip if neccesary
-Apply glue just over the silk wrap area and allow to dry
-File off any excess patch if necessary
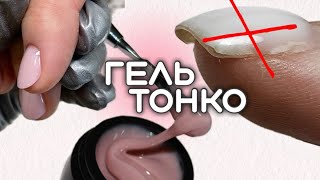
-Apply gel over most of the nail, leaving a gap at the cuticle
-Spray the gel cure and allow around a minute to dry
-Buff the finished patch with the blue side & then the pink side of the file
-Finish with a swipe of acetone to completely smooth the patch and you're done
►Equipment Details◄
I record tutorials with a Canon PowerShot ELPH 510 HS: http://amzn.to/1POIjwt
Vlogging/Faceshots with a Logitech Webcam C310: http://amzn.to/1Wz7Tsg
For lighting I use 3 flexible desk lamps: http://amzn.to/1kUkybe
With LED daylight bulbs: http://amzn.to/1QsFX58
I edit with Windows Movie Maker: http://windows.microsoft.com/en-us/wi...
Adobe Premiere Elements: http://amzn.to/1POJ60q
And Adobe Photoshop (thumbnails): http://amzn.to/1mK3aIg
►Check me out on these sites too!◄
FACEBOOK: http://goo.gl/Z89gjW
INSTAGRAM: http://goo.gl/1jqT8E
TWITTER: https://goo.gl/xYxLKM
PINTEREST: http://goo.gl/PeOOed
BLOG: http://goo.gl/DXTHPo
►Main YouTube Links◄
My Channel: http://goo.gl/Lqr3Fo
Tips & Tricks Playlist: http://goo.gl/X6P7Gr
Water Marble Tutorials Playlist: http://goo.gl/DPpKba
Nail Art Tutorials Playlist: http://goo.gl/zmNZWJ
My Vlog Channel: http://goo.gl/qwOCJo
★Disclaimer: Some links above are affiliate links

Доступные форматы для скачивания:
Скачать видео mp4
-
Информация по загрузке:


![Как я изменила форму этих ногтей с распущенных на овальные. [Мастер маникюра объясняет]](https://ricktube.ru/thumbnail/ZD7uZdFOG9I/mqdefault.jpg)


![How to Shape Uneven Nails [Nail Shaping Lesson]](https://ricktube.ru/thumbnail/N4PW8mSeDoQ/mqdefault.jpg)


