etrailer | Set up: WeatherTech Mud Flaps on a 2022 Ram 1500
Автор: etrailer
Загружено: 2022-12-11
Просмотров: 1608
Click for more info and reviews of this WeatherTech Mud Flaps:
https://www.etrailer.com/Mud-Flaps/We...
Check out some similar Mud Flaps options:
https://www.etrailer.com/mudflaps.htm
Search for other popular Ram 1500 parts and accessories:
https://www.etrailer.com/vehicle/2022...
https://www.etrailer.com
Don’t forget to subscribe!
/ etrailertv
Full transcript: https://www.etrailer.com/tv-install-w...
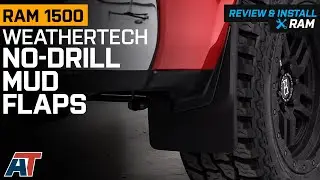
Hi, everyone. Aiden here with etrailer.com. Today, we're taking a look at and showing you how to install these Weathertech No-Drill Mud Flaps on our 2022 Ram 1500. We've got them on the rear in the set as well as on the front of the vehicle. You can get these as just the front or just the rear, or you can get the complete kit to outfit your entire vehicle for a nice custom fit. Let's check them out.
Now you can really see that custom fit well from the back. You can see this line matches and contours around what's already existing on the vehicle here. Now if yours is a little bit different than this, don't worry. There's three different kits that are custom fit for the Ram. So it's just a matter of what trim you have and which one's going to match your truck.
We'll touch on that a little bit more in the install though, so stay tuned. Each one uses existing factory holes to attach. So there's no drilling involved. And you've got the RH or LH to determine whether it's a passenger or driver's side. So they're really easy to get installed.
It's gonna be a thermal plastic construction. It's nice and durable, and it's gonna keep your vehicle protected from dirt and debris from kicking up or maybe even a trailer behind you or even another car. And like I said, the install is really straightforward, no drilling required, and it uses factory holes. Let's check out that process now. Whether you went with the kit for the front and back or just the front or just the back, install process is gonna be pretty much the exact same.
You also wanna make sure you pick up the proper pair. There are a couple of different fits depending on our trim level. So for ours today, we're using this one because it matches up with what's here on the factory. You can see, slotting it up, everything aligns with the factory holes. And just to show you a bit of the other options kind of side by side, you can see how these cutouts differ from one another. So before you get these, just go and check what's on your truck already, see what lines up to these different fits, and make sure you pick up the right pair. So we have a plastic fastener we need to remove first that we can just use a trim removal tool. And then we've got some screws, one, two and three up in the wheel well that we'll use a 5/16th socket to remove. Now when you're removing these, be careful because you do want to reuse them later when we install the mud flap. Now as we remove this last screw, this portion may want to kind of fall off. It's gonna hold itself in place because of one other fastener, but just remember, you need to keep this in place because that does fit and contour around this piece for the mud flap. Once all those fasteners are removed though we can get things lined up. And I'm gonna start by securing it loosely with a screw in the top hole, just kind of hand tight to hold everything in place. And then I can do my plastic fastener in the very last hole towards the inside here. Get that secured in. Then I'm gonna fully tighten this top screw putting some pressure on the mud flap to keep it aligned properly. And then we can go back through and tighten up all the other screws. Once everything is firmly in place and tightened down you can do the same thing for the driver's side. And then if you've got the full kit, you can start on the rear. And for the rear, the only thing that's different is you don't have that plastic fastener. When we line it up, we've just got these three holes that align with the three screws that we're removed and reinstalled. And that was our look at the Weathertech No-Drill Mud Flaps on our 2022 Ram 1500..
Доступные форматы для скачивания:
Скачать видео mp4
-
Информация по загрузке: