DIY
Автор: Caroline Arthur
Загружено: 2025-02-16
Просмотров: 516
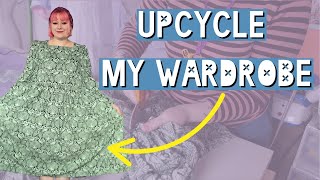
Welcome back to my wonderful world of wedding dress repurposing! Today, I’m going to show you how to use SANDPAPER to upcycle your old bridal gown!
If you have an old satin wedding dress tucked away in your loft
You may be able to just chop the bottom off with some scissors
Turn it into suedette using some sandpaper
Chuck it in a dye bath and
Make it into a cool bomber jacket that you might actually wear.
WHY on earth would you use sandpaper on your wedding dress?
The answer = to make it less BRIDAL. There is a danger that even if you were to dye all or part of your old wedding dress in order to be able to wear it again, the fabric itself can still look very bridal and that sometimes makes the garment you make from it, less versatile.
This simple sandpaper method is really fun, easy to do, and transforms the fabric into something that is less formal and more easy to wear.
The dress I used was a satin fishtail dress with a long train.
I started by cutting off the bottom, because I could see if the dress was shorter, it would be more wearable after the wedding.
I took the offcut train and used Ritmore synthetic dye to change the colour, and went through my usual method of washing the train first, then keeping the fabric moving in the hot dye bath
The next step was to test the sandpaper on the dyed fabric, so here’s a demo of me doing that. I’ll show you more about this later in the video. Listen to that lovely crunchy sound.
The sandpaper I used was a 180 coarseness but you could just try whatever you have in the garage. You have to be quite firm with it, but it’s not difficult.
The sandpapered effect looks great and feels lovely and soft to the touch.
The other bits I used to make the jacket were this ribbed jersey edging which you can buy online. I self-drafted a pattern for the jacket but you can just buy a paper pattern and it tells you how much of the ribbed edging to use and how to insert it.
I also wanted to add a slogan to the jacked, so used this heat n bond product which is a double sided iron-on interfacing. I ironed it first onto the satin, and then cut out the letters once I’d worked out what I wanted it to say, and then ironed it carefully onto the jacket. It comes with instructions.
I wanted to make sure that you could use sandpaper on any kind of satin, so I tested it on a few different pieces of satin that I had at my bridal studio. I tried it on duchesse satin and floppy crepe satin, both silk and polyester, and happily, it worked on every single one.
I strongly recommend you use a test patch first though and I’ll show you now how to do that now. You don’t want to create huge snags across your dress, so if you’re keen to try sandpaper, then test it out first on a small offcut.
These are the various satins I tried, and these are the results after I’d sandpapered them. Let’s have a look at a couple of them so you can see in more detail how the satin reacted to being sandpapered..
I used a tailor’s ham for the job and also my trusty pins on their magnetic pin holder.
The first satin was a duchesse satin which is fairly stiff. I started by pinning the test patch onto the ham and then started with the sandpaper.
I unpinned it from the ham and just held it up to the light to examine it –what do you think?
Leave me a comment if you like this soft texture.
The next satin was a floppy crepe satin which is very drapey. Again, I pinned the test patch onto the ham and when I started with the sandpaper, the results were instant. It almost looked like a knitwear sort of effect, so you never know how it’s going to look – hence the importance of doing a test piece.
What do you think?
I was interested to see the variation between satins. The satin I used for my jacket came from a polyester duchesse satin dress, and I was really pleased with the results.
I’ll show you in another video how I made the dress that goes with the jacket.
Before we wrap up, I’d just like to encourage you to think about getting your old dress out of your loft – or your mum’s or your granny’s if their dresses are lurking up there. Repurposing an old wedding dress is a wonderful way of getting it back into your life again and keeping it in circulation.
My final tip is just to suggest that whatever you do with your dress, if you can, do keep some offcuts of the original dress in its original colour and state. You may use some of the fabric to upcycle into a new garment, and once the fabric has been dyed or sandpapered, it does change quite a bit. So it’s lovely to have a few pieces of the original to have as mementos and keepsakes, and maybe to share in the future or even make into a Christmas bauble??!!
Enjoy my other videos about repurposing your wedding dress, let me know how you got on with the sandpaper and I’ll see you next time.

Доступные форматы для скачивания:
Скачать видео mp4
-
Информация по загрузке: