Популярное

Музыка Кино и Анимация Автомобили Животные Спорт Путешествия Игры Юмор

Интересные видео

2025 Сериалы Трейлеры Новости Как сделать Видеоуроки Diy своими руками

Топ запросов

смотреть а4 schoolboy runaway турецкий сериал смотреть мультфильмы эдисон
dTub
Скачать

Fitting Instructions for Rear Crank Seal Modification (UE7488KIT)

Автор: Flying Spares

Загружено: 2015-03-19

Просмотров: 50936

Описание:

Suitable for: All V8 engine cars from Silver Cloud II / S2 through to late Silver Shadow II / T2 (introduction of B series engine)

You will require the following items:
Hammer
Punch
Pry bar/chisel
7/16” socket
Ratchet
Extension for ratchet
3/16” Allen key and socket
UE7488LOAN tool

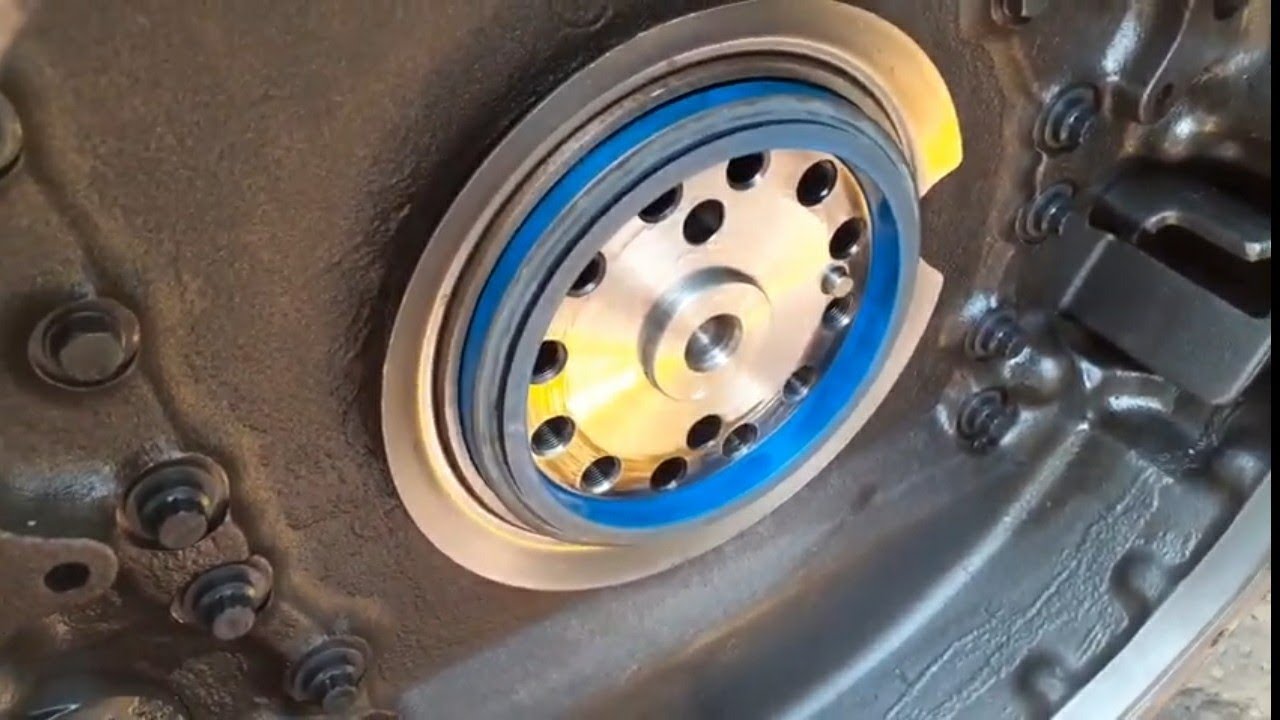
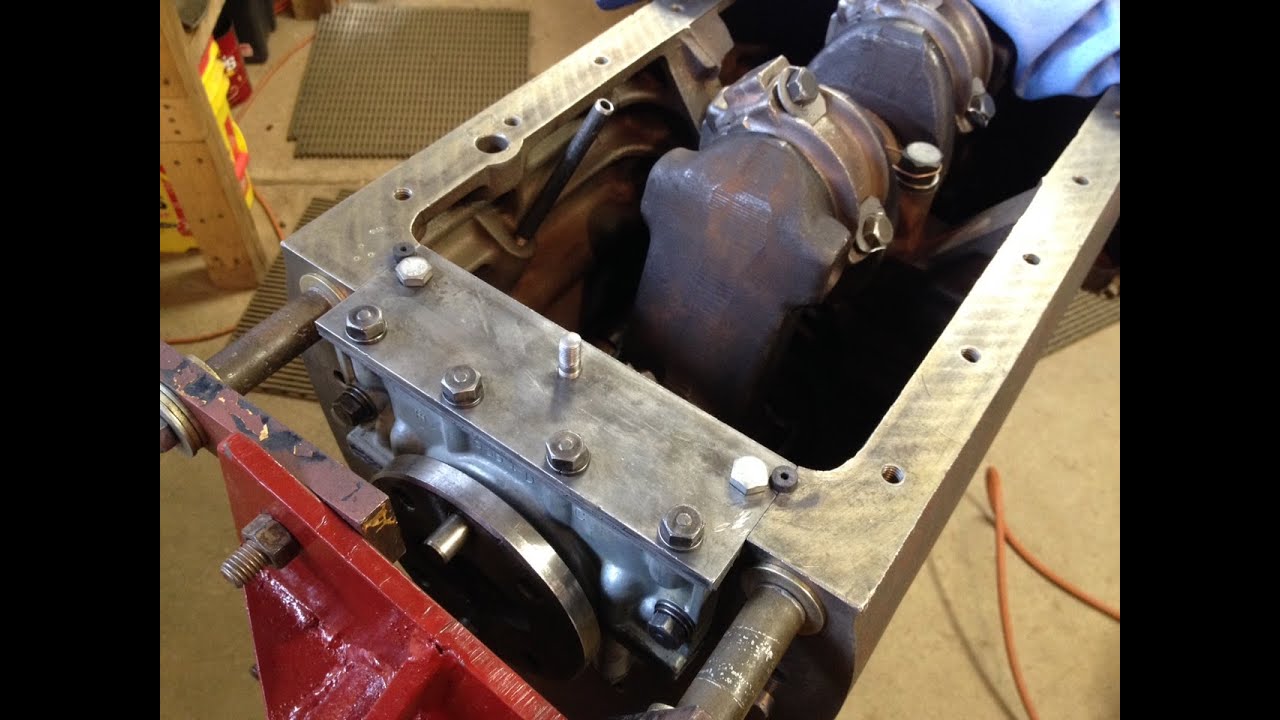
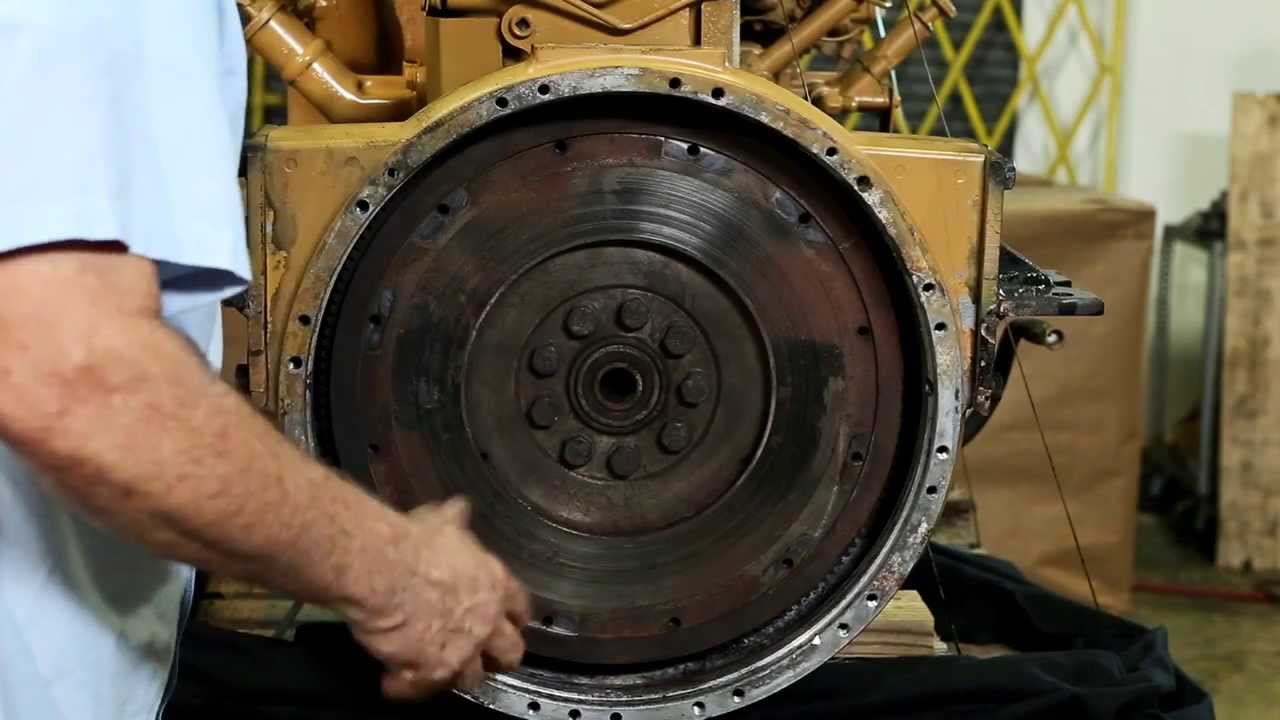
1 - Once you have removed the gearbox and ring gear this is the existing set up for the rear of the crank.Remove the 7 fixing bolts between the crankshaft cover (UE7488) and the crankcase.

2 - Remove the 2 bolts between the sump and the crankshaft cover. We recommend that the sump is removed and a new gasket (included in RH10046P kit) fitted.

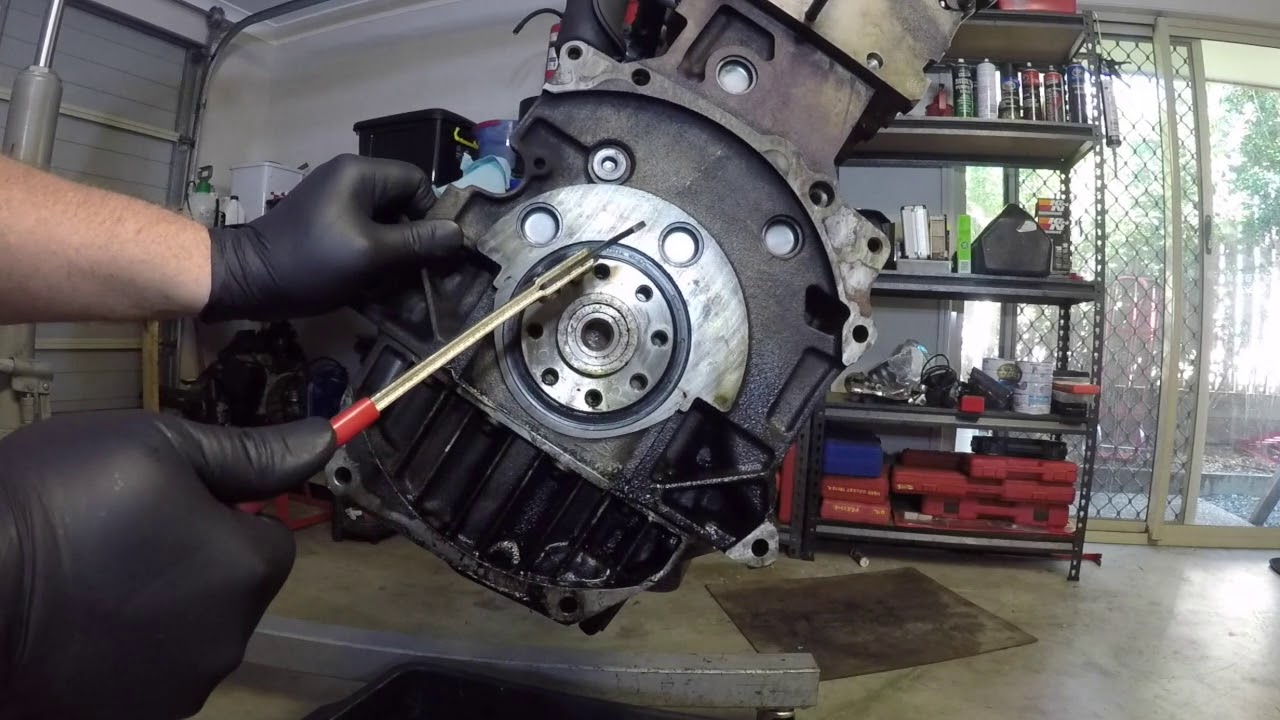
3 - Remove the crankshaft cover (UE7488)

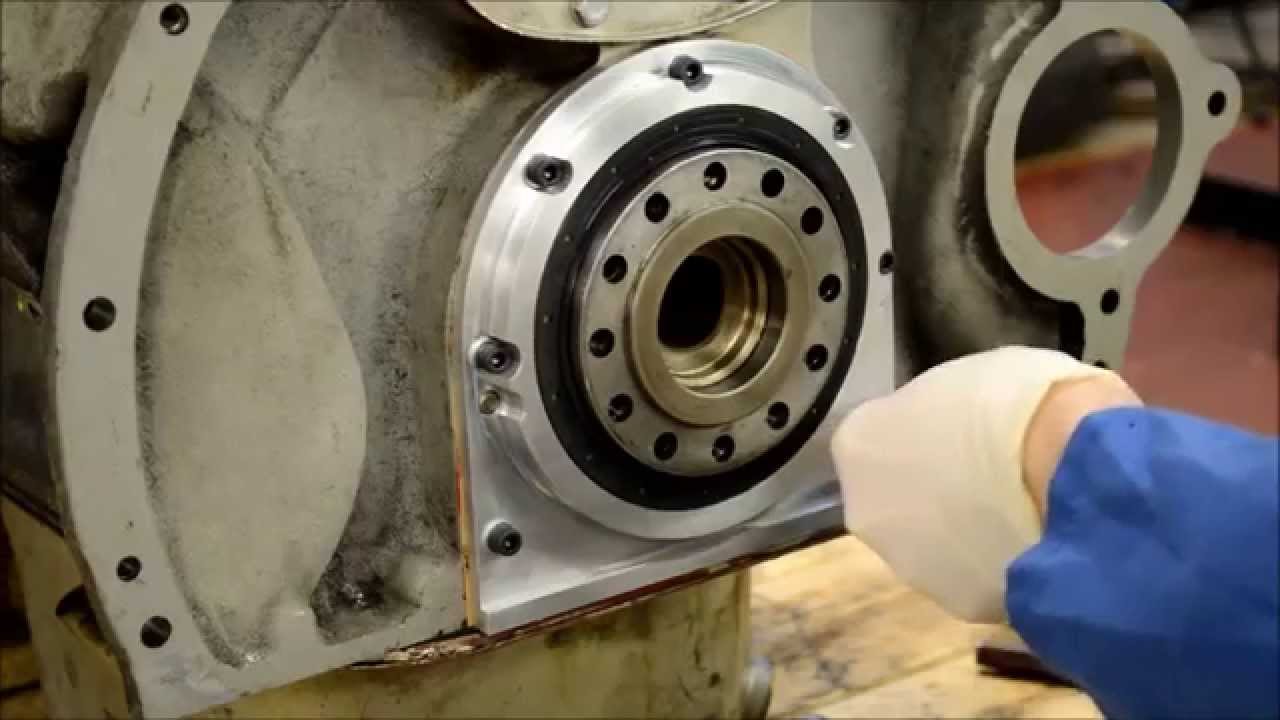
4 - Clean off mounting surface on rear of crankcase and fit new horseshoe gasket UE5214. Place rear crank seal mounting tool UE7488LOAN into rear of crankshaft. Fix UE7488LOAN tool in place
using 2 ring gear bolts

5 - Slide new seal UE44273P and cover UE7488P over tool UE7488LOAN

6 - Remove tool UE7488LOAN

7 - Fit new allen bolts (by hand, tighten after dowels are located)

8 - Knock in the two locating dowels

9 - Replace the sump bolts by hand

10 - Tighten 3/16” allen bolts & sump bolts using a Ratchet


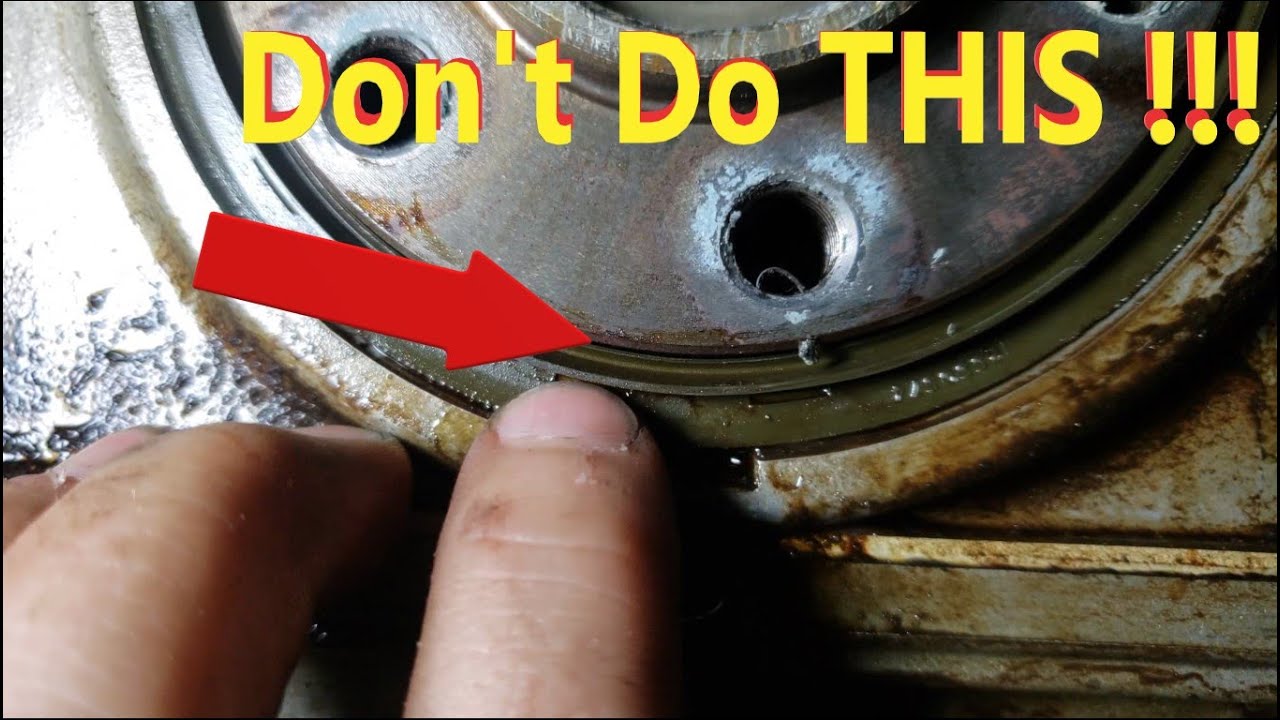
Please be aware that this kit is different to Bentley kit UE41408, which requires the thrower on the rear of the crankshaft to be removed and a new sleeve fitted, which requires the crankshaft to be removed from the engine. Our kit does not require this so can be fitted in situ without the need to remove the crankshaft.

We supply the modified backplate UE7488P as part of a kit UE7488KIT which includes all of the gaskets and seals that are required for the bottom and the rear of the engine. We recommend that all seals and gaskets are replaced as part of this modification.

Fitting Instructions for Rear Crank Seal Modification (UE7488KIT)

Поделиться в:

Доступные форматы для скачивания:

Скачать видео mp4

  • Информация по загрузке:

Скачать аудио mp3

Похожие видео

1964 TR4 - Part 11 - Liners, Crank and Rear Seal Assembling

1964 TR4 - Part 11 - Liners, Crank and Rear Seal Assembling

🔧 Rear Main Seal Fitment | Land Rover 2.25 Petrol Engine Rebuild | Workshop Mods

🔧 Rear Main Seal Fitment | Land Rover 2.25 Petrol Engine Rebuild | Workshop Mods

HOW TO REPLACE REAR CRANKSHAFT OIL SEAL #leaking #oil #CrankShaft #Seal

HOW TO REPLACE REAR CRANKSHAFT OIL SEAL #leaking #oil #CrankShaft #Seal

QK6000 Cummins Rear Crankshaft Seal Installation

QK6000 Cummins Rear Crankshaft Seal Installation

How to instal C15 engine rear crankshaft  seal.

How to instal C15 engine rear crankshaft seal.

Installing Rope Seals

Installing Rope Seals

Опасная установка точильного станка в 1971 году

Опасная установка точильного станка в 1971 году

LS Rear Main Seal Warning! Don't Do This!

LS Rear Main Seal Warning! Don't Do This!

РЕАЛЬНЫЙ ОБЗОР: Устранение течи заднего главного сальника

РЕАЛЬНЫЙ ОБЗОР: Устранение течи заднего главного сальника

Cummins Front Crankshaft Seal Install

Cummins Front Crankshaft Seal Install

Замена заднего главного сальника. Легко своими руками.

Замена заднего главного сальника. Легко своими руками.

Отвечаю на вопросы, почему я купил новый китайский станок, продав ТВ4

Отвечаю на вопросы, почему я купил новый китайский станок, продав ТВ4

Как установить задний главный сальник на дизельный двигатель Caterpillar C7

Как установить задний главный сальник на дизельный двигатель Caterpillar C7

Как установить коленчатый вал в K24 | Сборка MR2

Как установить коленчатый вал в K24 | Сборка MR2

Ремонтный протез для поломанного шкива, диаметром 200мм.

Ремонтный протез для поломанного шкива, диаметром 200мм.

Camshaft & Crankshaft Seal Toolkit

Camshaft & Crankshaft Seal Toolkit

No More Leaky Rope Seal! 4.2L Jaguar Crankshaft Seal Modification

No More Leaky Rope Seal! 4.2L Jaguar Crankshaft Seal Modification

Farmall Super M Rebuild Ep.25: Assembling & Installing The Rear Main Seal

Farmall Super M Rebuild Ep.25: Assembling & Installing The Rear Main Seal

Как заменить задний коренной сальник — замена сальника коленвала, как устранить утечку своими руками

Как заменить задний коренной сальник — замена сальника коленвала, как устранить утечку своими руками

Установка заднего сальника коленчатого вала

Установка заднего сальника коленчатого вала

© 2025 dtub. Все права защищены.


  • Контакты
  • О нас
  • Политика конфиденциальности


Контакты для правообладателей: infodtube@gmail.com