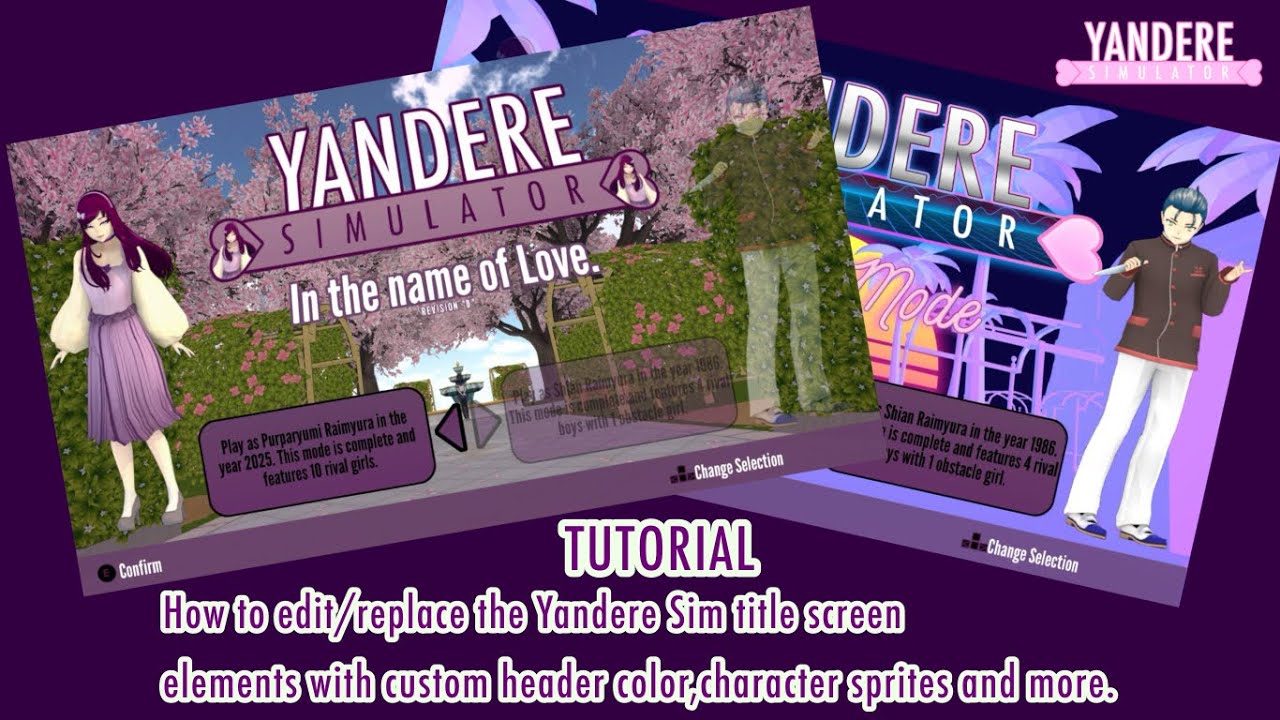
TUTORIAL|How to change the title screen with custom elements|Yandere Simulator 💚
Автор: Purpyy Raimyu Cozmic
Загружено: 18 янв. 2024 г.
Просмотров: 14 603 просмотра
Hello everyone! I'm here today with a short tutorial on how i changed my title screen! I am not an expert in recording tutorials and i tried my best to record with whatever i could and know. I hope this tutorial helped you to customize some of the title screen elements like the logo,text and sprites color💜. Sorry if it took me long enough to make a tutorial like this.
The most basic commands for the title screen customization are as mentioned here:
ReplaceSubtitle:DEMO:Your custom title
RefScale:DEMO:0.6:0.6:0.6
ReplaceSubtitle:REVISION "E":Beta
UiLabelText:OtherPanels/ChooseMode/1980/1980sLabel: Your custom text goes here.
UiLabelText:OtherPanels/ChooseMode/Demo/DemoLabel: Your custom text goes here.
SetUITexture:OtherPanels/ChooseMode/1980/Ryoba:RyobaImageReplacement.png
SetUITexture:OtherPanels/ChooseMode/Demo/Ayano:AyanoImageReplacement.png
allspritescolor:0:0:0
alllabelseffectcolor:0:0:0
RefScale:Logo:2.5:0.9:2.5
OpenTexture:YourCustomLogoTex.png
Texture3:0:Logo
Activate:Sun:false
-----------
To change in game ui text elements:
AllLabelsGradientBottomColor:0:0:0 (Type in the values you want)
AllLabelsGradientTopColor:0:0:0 (Type in the values you want)
For 1980's logo:
SetUlTexture:Ul Panel/
1980sLogo:YOUR_IMAGE_NAME.png
(Thanks to @J0s3H.3LL for commenting down the command!)
.......................
⚠️ you can experiment with the colors and logo pics. You can also find the rgb color values on any paint program like ibis paint x or fire alpaca. The correct size for both ayano and ryoba replacement character sprites are 249 by 720, please keep the same size,don't alter the resolution in any way as it will give out a deformed image output.⚠️
Доступные форматы для скачивания:
Скачать видео mp4
-
Информация по загрузке:


