How to install solar protection (critter guard) with Spiffy Solar Clips. | 2021
Автор: Spiffy Solar
Загружено: 2020-05-15
Просмотров: 12931
Prevent squirrels and pigeons from damaging solar panels with the Spiffy Solar panel critter guard system, the preferred option of solar installers, solar O&M companies, and pest control specialists.
Purchase solar screening mesh and Spiffy Clip attachment hardware, direct from the manufacturer at: https://www.spiffysolar.com/
_________________
There is a serious problem with residential solar installations. Owners have been surprised to discover wildlife nesting beneath their solar panels. Noise, animal waste, roof damage and the potential for electrical fire from chewed wires are problems that must be addressed. However, the solution should not harm the solar equipment or the homeowners roof.
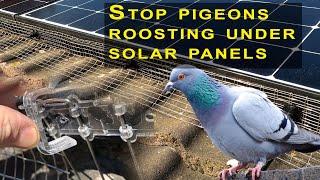
The Spiffy Clip is designed for ease of use and speed of installation. It installs from the outside, eliminating the need to reach awkwardly behind the screen. This is safer and quicker for installers. Keep watching these tips for a secure and lasting installation.
About Spiffy Clips
Spiffy Clips come in two parts. Many installers prefer to assemble the clips as they work. This way they can carry more parts in their tool belts.
Unlike similar products, Spiffy Clips are manufactured from two different aluminum alloys. One hard and one soft. This ensures that the prongs on the one-directional washer bite into the hook wire and stay in place. This composition also means that the hardware expands and contracts at the same rate as the panel where it is attached. The hardware won’t work loose over time, due to the extreme temperature changes found on a roof.
Assembling the Clips
To assemble the two parts of the Spiffy Clip. Simply insert the straight portion of the hook into the hole in the washer. Note that the hook can only be inserted one way. It’s best to grip the wire firmly, close to the straight end, and push them together. Don’t rock or wiggle the parts. This may deform the washer and prevent it from holding tight. Insert the wire only far enough to leave room to grip it with lineman’s pliers.
Using tin snips, cut off a manageable length of our PVC coated screen. While longer pieces can be used at the top and sides of the installation, shorter pieces work better at the bottom. Proper installation requires screen which is taller than the gap being covered.
Begin by putting the screen in place and counting the number of squares that extend above the panel frame. Place the screen on the face of the solar module, with that number of squares hanging over the edge. Fold the screen down to approximately 90 degrees and flip into position. You are now ready for your hardware.
While exerting downward and inward pressure on the screen, insert an assembled Spiffy Clip hook into the nearest opening created at the bottom edge of the module frame. Rotate the hook and pull back so that it catches on the inner lip of the frame. When the screen is properly installed the upward tension, pushing against the wire hook, keeps the screen secure. You can now let go of the clip. When mounted correctly, the screen will stay in place even before the washer is pushed tight. This is a good way to double check your installation technique. The product will not perform properly if not fitted in this manner.
In snowy climates, it is important that the screen not stick up above the surface of the panel. Installing the screen at least 1/8 inch below the frame will ensure that sliding ice and snow will not catch on the screen.
To finally secure the screen hold the hook firmly while pushing the washer into position. Trim the excess wire from the clip and move on to the next attachment point.
Navigating Corners
Creating neat corners will require a bit of practice. Essentially, the goal is to remove portions of the screen that prevent folding, while not creating gaps. Usually this is done with two 45 degree angle cuts meeting at the desired bend. A gap of even one square inch may allow entry by the critters we’re trying to keep out. You may want to make the corners separately.
Working Around Obstructions
While not as challenging as corners, be careful working around obstructions such as rails and clamps. Avoid accidental gaps which may be large enough to allow entry for birds, squirrels or other vermin. Remember, a good rule of thumb is to not leave any holes which are larger than 1 inch square.
Calculating your Material Needs
Calculate the screen width needed by adding two inches to the measurement of the gap between the roof and the frame. For length, measure the total perimeter of your solar array. This is the length of screen you’ll need.
Typically, clips are spaced eighteen inches apart. Areas around corners, rails, and other obstructions will usually require additional clips. To estimate the number of clips needed for a basic, rectangular installation, multiply your linear foot measure by point seven five. Systems with multiple sections or irregular shapes may require additional clips.
Доступные форматы для скачивания:
Скачать видео mp4
-
Информация по загрузке:


![Solar Panel Bird Deterrent Installation [Step-by-Step] - Bird B Gone, Inc.](https://ricktube.ru/thumbnail/L-L3Mn0Ysdw/mqdefault.jpg)