Pewter And Blue Nautilus- Come learn this technique with me at FAE!
Автор: Nate Bright Art
Загружено: 2022-10-11
Просмотров: 2672
Thank you for stopping by my channel - I hope you enjoy this video! Don't forget to give me a THUMBS UP and SUBSCRIBE if you'd like to see more. Thanks again for watching - leave me a comment before you go!
If you'd like to learn the Nautilus or Wing Pours... come paint with me in Dallas in November! Classes are filling up fast!
www.fluidartexperience.com
And just look at this AMAZING LINEUP of incredible artists you can also take classes with!
@MasseArtStudio @COZCreationsArt @Colescolor @WinterStromArt @KanellaCiracoArt @PiecesofTaraArtistry @MinaVillegasArt @MixedMediaGirl
Check out these videos from my Tuesday premier train partners!
@LoriHoustonArt
• #105 Breast Cancer Awareness - Fluid Art...
@CamileAmoyArt
• Why These Two Colors Dominate Beauty (Purp...
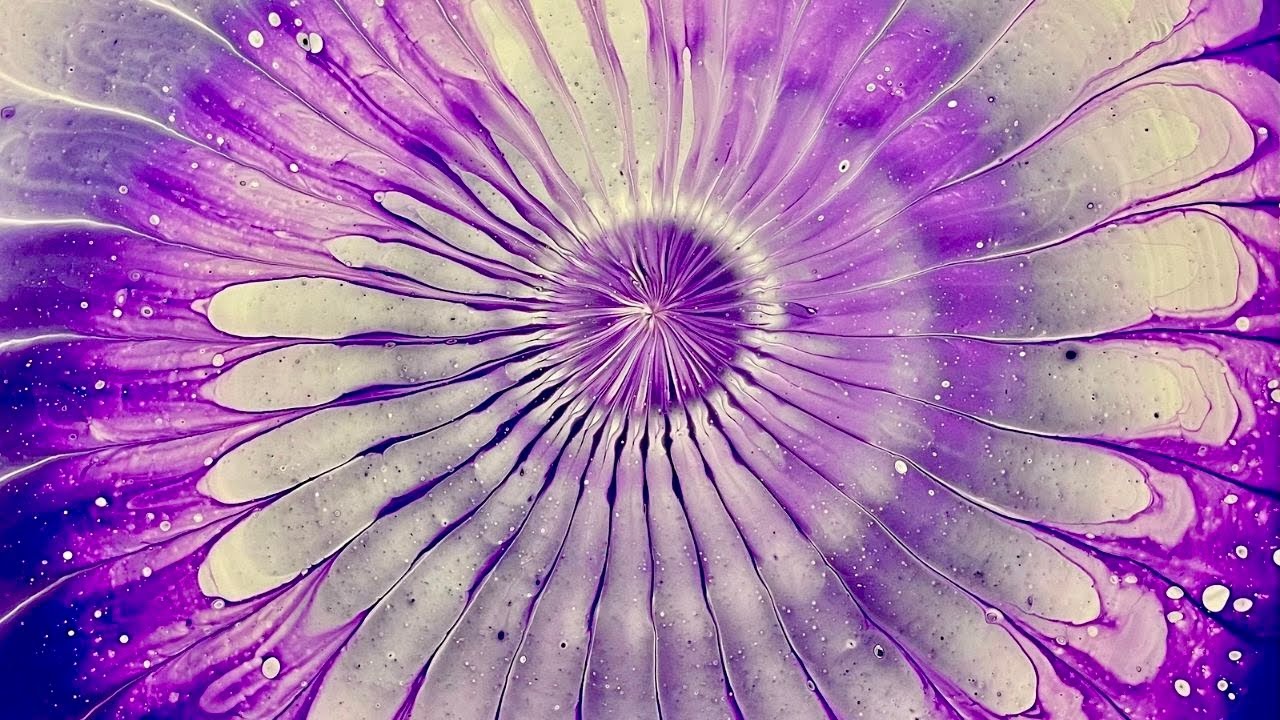
Here are my Keys to Success for a Nautilus Pour using a dish strainer:
1. The consistency of your mixed paints should be thick - it should leave a mound-on-a-mound when drizzled off of your stir stick. If your paints are too thin, you'll loose line and color definition, especially after you start spinning or tilting.
2. Mix your paints at least 24 hours before using them to reduce the amount of air bubbles when you pour. As a general rule, the thicker the consistency of your paints, the longer it takes for the bubbles to rise through the paint and release.
3. If using a transparent color as your base, I highly recommend pre-painting the sides of your canvas in that color with a brush to avoid the white canvas from showing through. The surface is not as important, but definitely the sides.
3. This technique works best with a limited color palette with strong contrast.
4. The holes in your dish strainer need to be fairly large if they are round, or long (tall) if they are narrow.
5. If you don't put a base coat on your canvas, you may lose some of your composition, and you will still need a flow extender to get that thick paint to move to the canvas edges.
6. It's important to get as close to center as possible when placing your strainer on the canvas. I use a string dipped from corner to corner in my base color to find the center.
7. Pour slowly in the center of the strainer in tight circles. If you need to stop and add more paint to your split cup, no problem. Just start again in the same spot you stopped and it will not affect the pattern.
8. While pouring with one hand, use the other to SLOWLY turn the canvas on the spinner. This is the key to creating the spiral. It doesn't take as much coordination as you might think! Pour with your dominant hand and spin gently with the other. The faster you spin, the more spirals you will get. I intentionally spun the canvas VERY slowly to get one large spiral - both effects are beautiful.
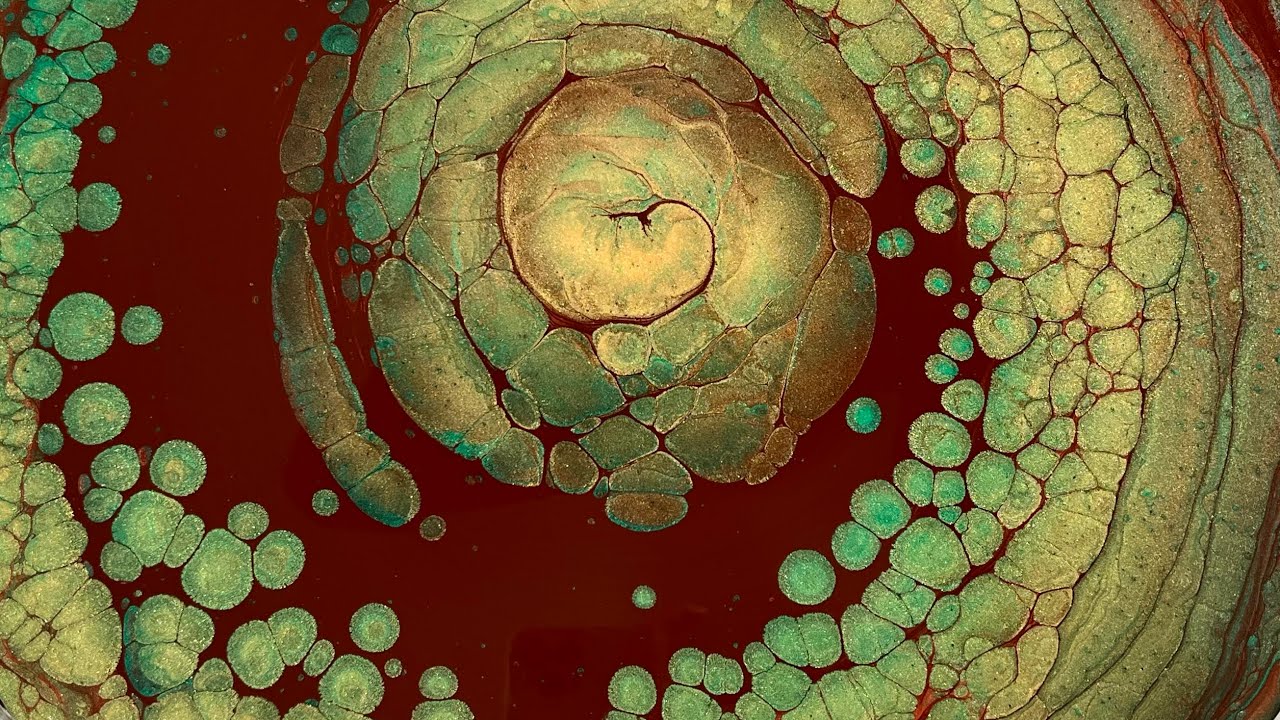
9. DON'T REMOVE YOUR STRAINER RIGHT AWAY. When you are done pouring, let the paint continue to ooze out of the strainer. I let mine sit for a couple of minutes. Give the canvas a couple of gentle spins to create space for more paint to exit the strainer. This is an important step if you want that 3D effect! And waiting a bit will allow more air bubbles to rise through the thick paints and cells to form.
10. When removing the strainer - commit to the movement. Once you start lifting, don't stop! And put your hand or a piece of paper or cardboard under it right away to avoid any drips ruining your pattern when you take it away.
11. If the lines in the center aren't straight, it's easy to fix - just gently dip your finger or the back end of a paint brush in the center and lift slowly. The lines will collect and meet to create that clean focal point. Dipping a balloon works too!
12. Give it a couple of good spins to get that thick paint to move! This is where having a base coat or flow extender is really important. It allows your pour to float across rather than stick to the canvas.
13. I think this technique looks great with negative space, but it's also beautiful when spun out to completely cover all the corners.
14. To avoid cracking when it dries, make sure to leave 4-6 inches of space from the bottom of the canvas to the tabletop - air needs to flow underneath so that the surface and the underside dry at the same time, especially when using thicker consistency paints. I always prop my canvases up on large plastic cups for a couple of days until it's dry to the touch.
Colors used:
Amsterdam Titanium White
Amsterdam Prussian Blue, Greenish Blue and Primary Cyan
DecoArt Metallics Pewter
My pouring medium is Mix Pour - 7 parts medium to 1 part paint. You can order Mix Pour by emailing krista8974@gmail.com.
Thanks again for stopping by - I hope to see you here again soon!
www.instagram.com/N8_Bright_Art

Доступные форматы для скачивания:
Скачать видео mp4
-
Информация по загрузке: