Quick Guide How to use the TEC DG 1000 on the Duct Test
Автор: Wollin Group, Inc
Загружено: 2016-12-02
Просмотров: 5806
Sign up for the next class: https://wollingroup.com
Step #1 Connect the Duct Blaster to the return. Make sure that it has proper seal around the return grill so that there are no leaks.
Step #2 Seal all supply registers.
Step #3 Find the nearest outlet and plug in the TEC Cruise Control switch.
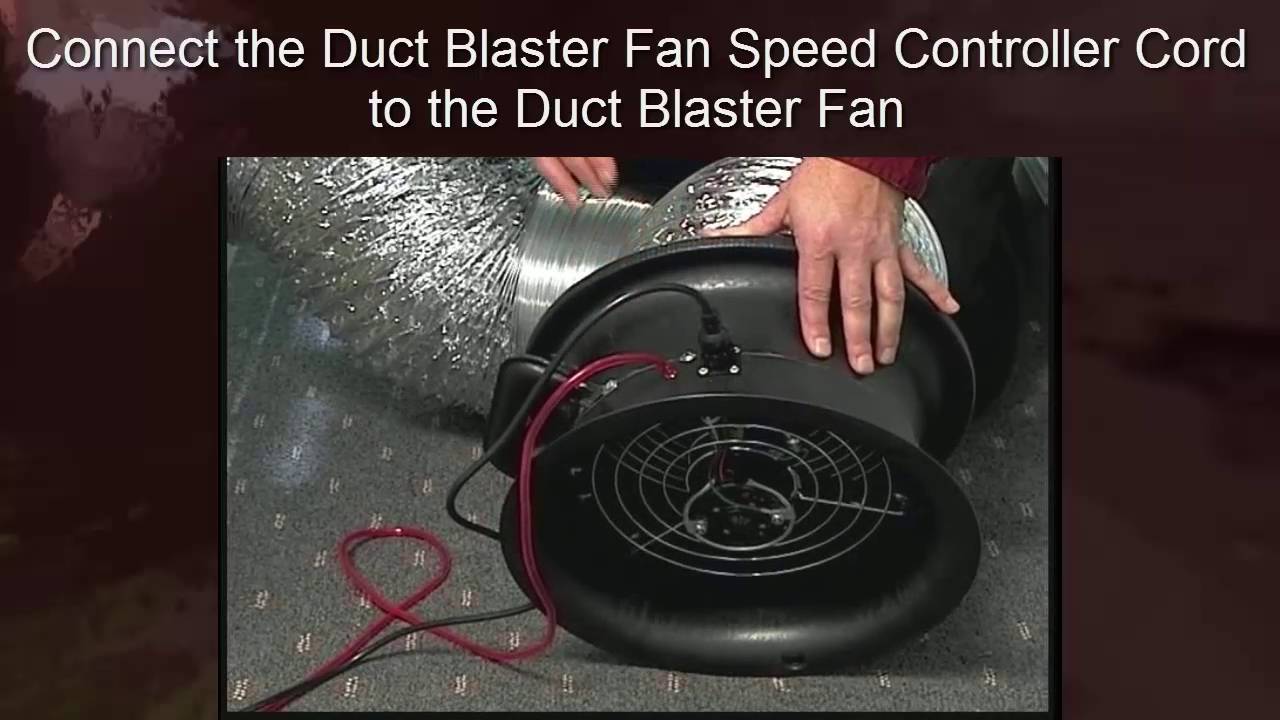
Step #4 Plug the TEC Cruise Control switch in the Duct Blaster.
Step #5 Take one of the TEC plastic tubes and attach it to the Duct Blaster. Connect TEC Ring to the Duct Blaster. Make sure the Duct Blaster fan trim is tightly secure around the TEC Ring and Blaster.
Step #6 Turn on your DG-1000 and make sure to update your software before using it.
Step #7 Click on Gauge, next click on the bottom Then click on DEVICES Section until it reads DB/B. on the bottom. Now click on PA Section on the top right-hand side and click on 25pa. Next on the right-side bottom of the screen click on Ring Size Section, pick the right one that is on your Duct Blaster. Next make sure it reads Flow (CFM. Grab the second tube and attach it to the A side (Footnote@) of the DG700.
Step #8 Connect the plastic tube that is attach to the Duct Blaster to the Top B side DG-1000. Now connect the second tube and attach it to the A side of the DG-1000. Now with second plastic tube connected to the A side of the DG-1000, attach the metal extension tube and then find the nearest supply register to put it into.
Step #9 Turn on the TEC Cruise Control Switch. Connect the DG-1000 to the TEC Cruise Control Switch. Once connected now press the play button on your DG-1000 on the top right-side of the screen.

Доступные форматы для скачивания:
Скачать видео mp4
-
Информация по загрузке: