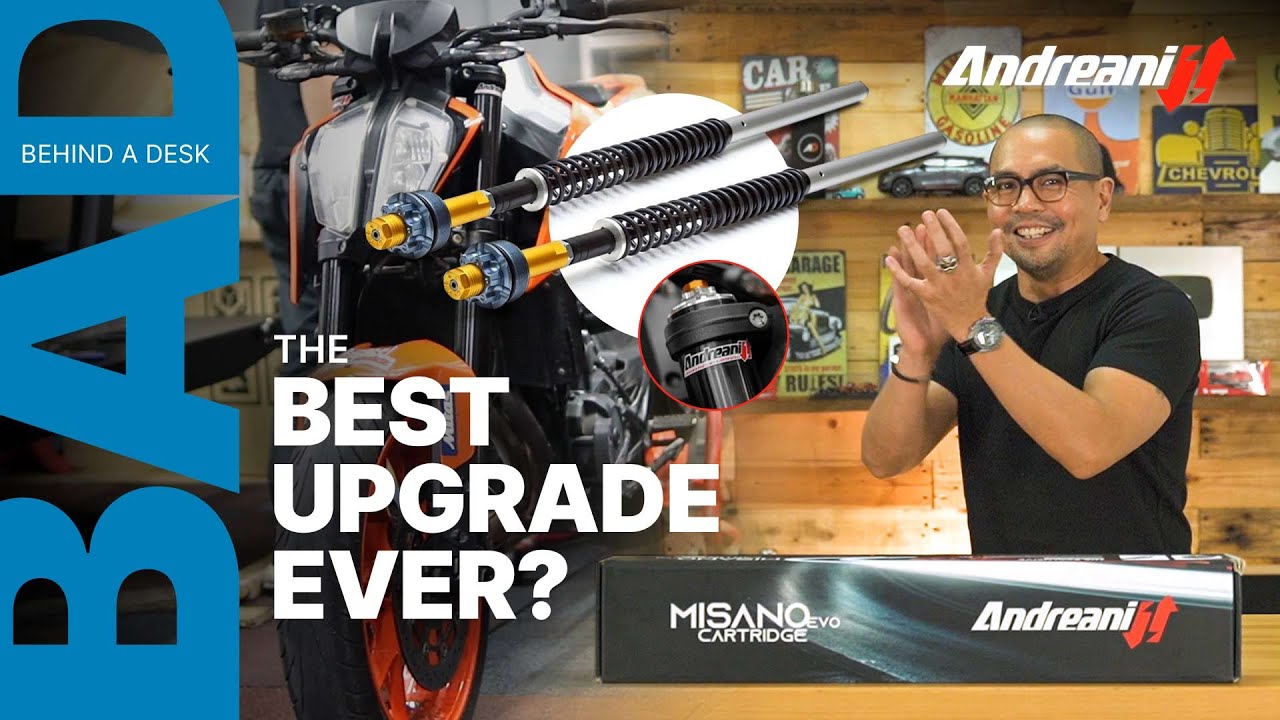
Andreani Misano Evo II cartridge install on 2025 Ninja 500
Автор: Randy 227
Загружено: 2025-10-12
Просмотров: 813
This is a video summary of the steps to install the Andreani Misano Evo II cartridge on a 2025 Ninja 500. The sources I used were
*** the installation manual
*** the Andreani YouTube video: • Andreani USA - Andreani Cartridge "Misano ...
*** a how-to writeup on Ninja400riders.com: https://www.ninja400riders.com/thread...
I recommend reviewing all of them prior to doing an install to fully understand the steps. This is really just a summary of steps that I followed. I am not a mechanic or suspension guru so use the info at your own risk. If you're not comfortable working on your own suspension, take it to a qualified technician.
Torque specs can be found here: https://www.ninja400riders.com/thread...
Parts Diagram can be found here: https://www.ninja400riders.com/thread...
Tools you will need include:
Fork Spring Compression Tool and Fork Oil Level Tool
Fork Seal Driver
17mm open end wrench
14mm & 25mm sockets
3mm, 5mm, & 6mm Hex Keys (5mm & 6mm must be long enough to reach the bolt on the bottom of the fork)
Flat tip screwdriver
Threadlocker
Fork Oil (manual calls for Ohlins 1309)
You may want Suspension cleaner, suspension grease, new fork seals and bushings
Specialty tools:
Fork Cap Tool - https://andreaniusa.com/product/andre...
(I used channel locks with electrical tape in the video)
Cartridge Installation Tool - https://andreaniusa.com/product/andre...
I used 1" electrical conduit in the video - https://www.homedepot.com/p/1-in-x-10...
Installation Steps:
Remove fairings and fender
Remove the front tire
Remove the brake
Move the coolant reservoir and voltage regulator out of the way to access the clamp bolts behind them
Loosen the fork cap while the fork is secure using a 25mm socket
Loosen the allen bolts on the handlebar, upper clamp and lower clamp using 6mm hex keys
Slide out the fork tube
Remove the loosened fork cap
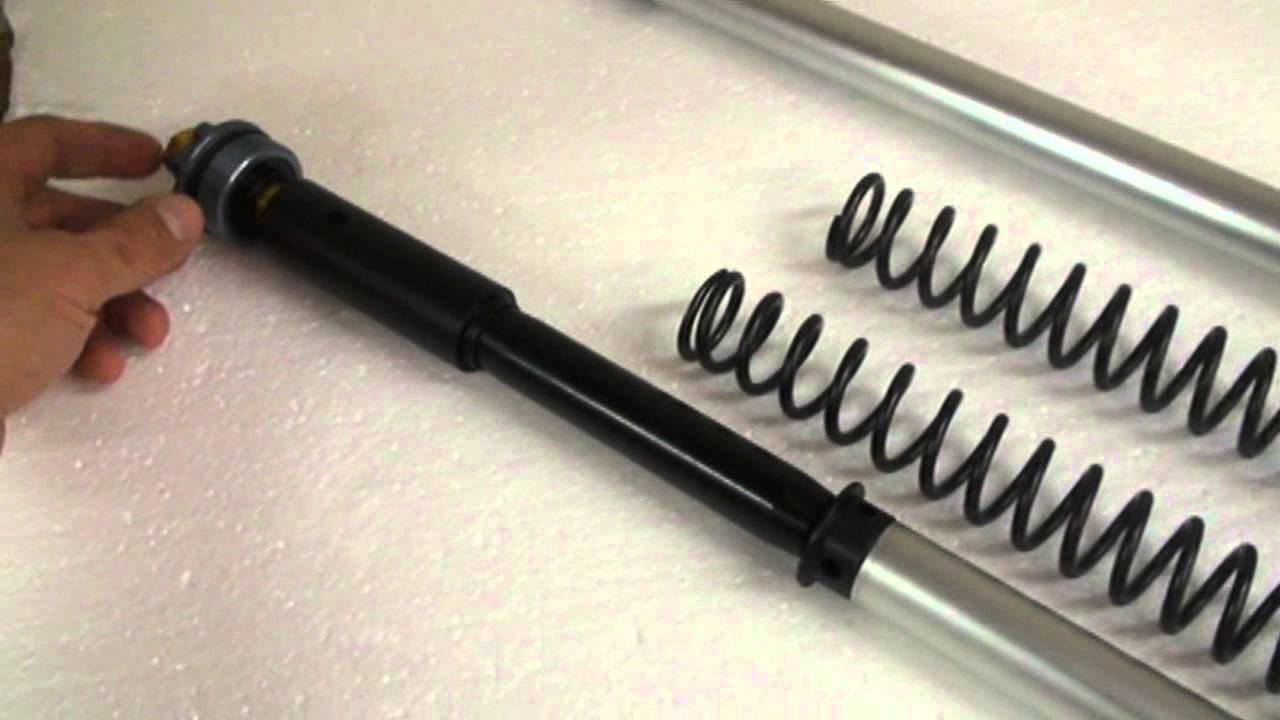
Dump the fluid, inner sleeve and spring into a pan or bucket, allow the fork tube to drain completely.
Remove the allen bolt from the bottom of the fork using a 6mm hex key. Secure it in a vise and use straight even pressure to break the bolt free. It takes a good amount of force so be careful to keep the key straight and even to avoid stripping the bolt.
With the bolt remove, the cartridge and spring can be removed from the tube.
Remove the dust cover. You can also remove the fork guard if you want, but it's not necessay.
Remove the snap ring.
Separate the upper and lower tubes. This takes quite a bit of force and probably several attempts, so it's best to have it well secured in a vise.
With the inner and outer separated, the spacer can be removed from the lower. This is the last of the stock internals.
Reinstall or replace the bushings, washer and seal on the inner tube.
Reinstall the inner fork tube into the outer tube.
Use a seal driver to seat the fork seal. When it is seated, it should feel bottomed out and you will be able to see all of the recess for the snap ring.
Reinstall the snap ring. It should click into place.
Reinstall the fork guard if removed, reinstall the dust cover.
Install the Andreani cartridge kit.
Apply threadlocker to the bottom bolt and torque to 15ft/lbs.
With the inner fork tube pushed down to the bottom, add fork oil. Bleed the cartridge by compressing the plunger several times.
Use the fork oil level tool to remove the excess oil from the fork.
Raise the plunger and use the o-ring to keep it in place. Install the spring and spacer. Use the fork spring compression tool to compress the spring and insert the holder tool to keep it compressed.
Use a 3mm hex key to completely back out the damping screw (counter clockwise). Do not use excessive force, just turn it until it stops.
Turn the damping screw clockwise 4 turns to set the proper height for installation.
Thread the cap onto the cartridge until it is snug. There should be a gap between the bottom of the cap and the lock jam nut on the rod. Use a 17mm wrench and 14mm socket to set the lockjam nut. Don't use excessive force.
Turn the damping screw counter clockwise 2 turns to set it to the manufacturer's suggested base setting. (Watch the Andreani video for a better explanation of phase setting and adjustment).
Screw the cap onto the inner fork tube.
Replace the fork into the clamps and tighten the clamp bolts: upper clamp 15 ft/lbs, lower clamp 17 ft/lbs, handlebar 18 ft/lbs
Put everything else back together (regulator, reservoir, brakes, tire, fender and fairings).

Доступные форматы для скачивания:
Скачать видео mp4
-
Информация по загрузке: