etrailer | Setting up the Curt Trailer Hitch Receiver on your 2003 Mercedes-Benz E-Class
Автор: etrailer
Загружено: 2017-12-28
Просмотров: 18554
Click for more info and reviews of this CURT Trailer Hitch:
https://www.etrailer.com/Trailer-Hitc...
Check out some similar Trailer Hitch options:
https://www.etrailer.com/fitguide.htm
Click for more info and reviews of this CURT Trailer Hitch:
https://www.etrailer.com/Trailer-Hitc...
Check out some similar Trailer Hitch options:
https://www.etrailer.com/fitguide.htm
Click for more info and reviews of this CURT Trailer Hitch:
https://www.etrailer.com/Trailer-Hitc...
Check out some similar Trailer Hitch options:
https://www.etrailer.com/fitguide.htm
Click for more info and reviews of this CURT Trailer Hitch:
https://www.etrailer.com/Trailer-Hitc...
Check out some similar Trailer Hitch options:
https://www.etrailer.com/fitguide.htm
Search for other popular Mercedes-Benz E-Class parts and accessories:
https://www.etrailer.com/vehicle/2003...
https://www.etrailer.com
Don’t forget to subscribe!
/ etrailertv
Full transcript: https://www.etrailer.com/tv-install-t...
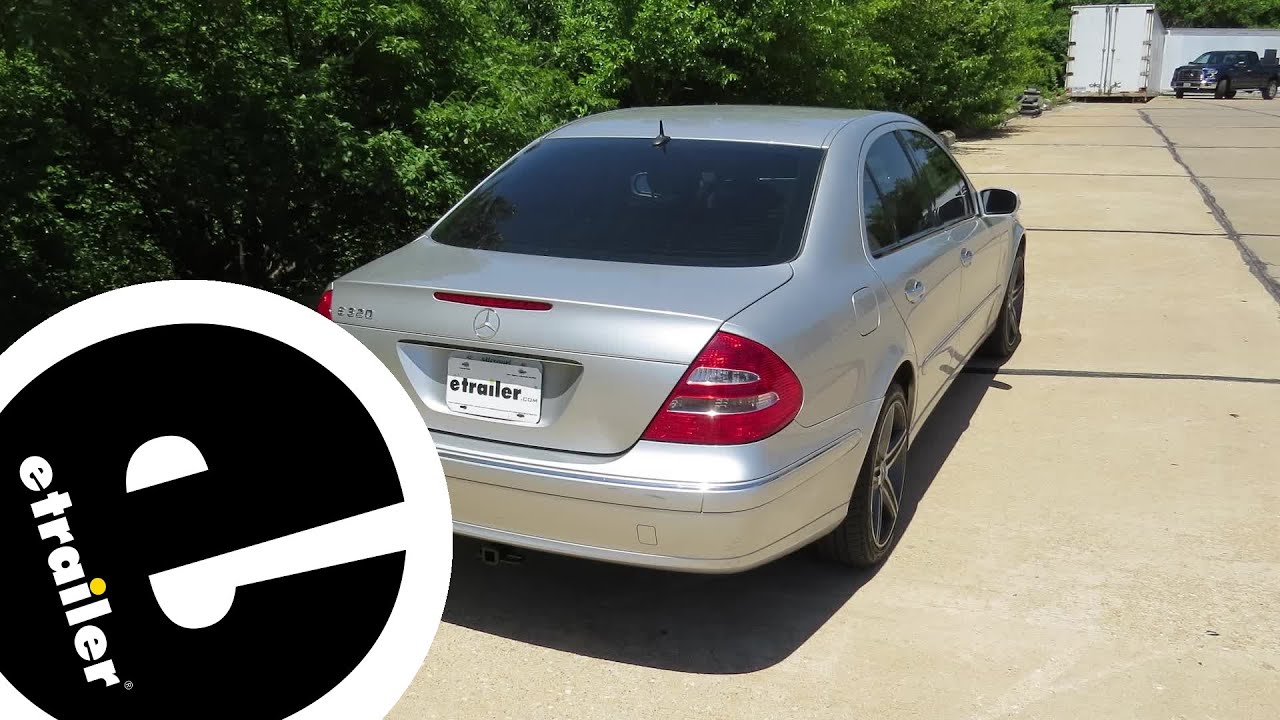
Today on our 2003 Mercedes Benz E-Class, we're going to be taking a look and showing you how to install the CURT Custom Fit Class 1 Trailer Hitch Receiver, part number C11701. So here's what our hitch looks like fully installed. Going to tuck up nicely behind our bumper and all we're going to see sticking out is the receiver tube and it's not going to distract from our Mercedes. This is a Class 1 hitch so it's going to give us that 1-1/4" by 1-1/4" receiver tube opening and it's going to feature a reinforced collar giving it added strength and a nice clean look. Our hitch is going to use a standard 1/2" pin and clip which are included in the kit. The safety chains are going to be a rolled steel stock style welded to the bottom of the receiver tube. And as you can see, we're not going to have too much trouble getting most sized hooks on or off. Our hitch is going to feature a 250 lb tongue weight along with a 2,500 lb gross trailer weight rating. Now I want to mention you always want to double-check your vehicle's owners manual to make sure that your care can handle pulling that amount of weight.
Also, our manufacturer of the hitch recommends that you use a stabilization strap for any non-trailer loads, such as a bike rack, cargo carrier or anything that doesn't have wheels on it. Now I'd like to give you a few measurements to help you when you're deciding for accessories for your new hitch, such as a bike rack or even a cargo carrier. From the center of the hitch pin hole to the outermost edge of the bumper, it's going to be 4-1/2". Now from the ground to the inside top edge of the receiver tube opening it's going to be right about 12-1/4". Now let me go over some of the feature, let's show you how we get it installed. To being our installation, we're going to need to get inside of our trunk because we are going to need to remove our rear fascia. Now we're going to go ahead and pull out the center section here of the carpet of our trunk and we're going to set it aside.
We're going to remove the panel that's above our spare tire, along with our spare tire. Now the foam piece right in front of our spare tire, we're going to pull that out as well. Underneath the foam we're going to have two bolts that are holding this plastic cover in place and we'll be using a 10mm socket to remove it. Now we're not going to pull this cover completely out. We just want to lift up on it and make sure it's loose from the vehicle. Now here on the driver's side of my trunk, where we're going to see the arm that attaches to the trunk lid, we're going to have a plastic fastener right behind it and then if we come up where our trunk meets our windshield, we're going to have one towards the top here also.
We're going to be using a trim panel tool. You're going to go underneath the center section of the plastic fastener and pop that out first which will allow the bottom section of the fastener to come out. Now we're going to repeat that for the other fastener that's back here, as well as on the right side. We're going to have to remove our cargo anchors, one at the very back of our trunk, and then one towards the front. Now I'm going to be using a T-20 TORX bit to remove those bolts. With the left side removed, we're going to remove the right side as well.
Our threshold is going to have to come out. We're going to have three plastic fasteners holding in on each side, one in the center on the flat piece of our threshold, and then two on the inside going towards the top. Now the way we're going to remove them is we're going to take a flathead screwdriver and we're going to pry up, again, on the center section, which that's going to release the tension off of the clip and will allow the whole clip to come out. Now we're going to repeat that for all the remaining clips. We come to th
Доступные форматы для скачивания:
Скачать видео mp4
-
Информация по загрузке:


![Kuinka vaihtaa etupyöränlaakerit MERCEDES-BENZ (W211) E-Sarja -merkkiseen autoon [AUTODOC]](https://imager.clipsaver.ru/yPu8WW_df5g/max.jpg)