Build Your Own NAS Server on a Budget Up to 40 TB
Автор: Sean Aslam
Загружено: 2025-05-17
Просмотров: 222312
Want to build your own NAS server on a budget? In this video, we'll show you how to set up a NAS system in your home lab with up to 40 TB of storage!
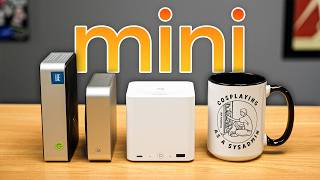
This video guides you through building a powerful and efficient mini NAS server using a Beelink S13 Mini PC. We’ll walk you through every step, from selecting the hardware (including a fast NVMe SSD and a dual-bay external enclosure) and choosing your operating system – we’re opting for the beginner-friendly CasaOS – to setting up data redundancy with RAID 1. Learn how to install CasaOS using Ventoy, test network speeds, and explore the intuitive interface for installing apps like Jellyfin and Nextcloud.
Check out my latest NAS video:
• Home Lab
💵 Product Links
Mini Server Used - https://amzn.to/49jnY3F it is a Beelink S13 Mini but you can use any mini pc as long it as 4 cores at least.
HDD Raid 1 Enclosure - https://amzn.to/4oK6B0A
Other Product Links:
Camera: https://amzn.to/47cbuJI
Camera Lens: https://amzn.to/4oboncO
Studio Light: https://amzn.to/47gwwH2
Tripod: https://amzn.to/42ZLmzk
Monitor: https://amzn.to/3LdqX3B
Mouse: https://amzn.to/3Wvz2D9
Keyboard: https://amzn.to/3WtHW4a
Lightbar: https://amzn.to/4hwZHsR
Speakers: https://amzn.to/3X0IKxr
Desk Mat: https://amzn.to/4nM7ODD
Dock: https://amzn.to/4ocvxNZ
Macbook Pro: https://amzn.to/47tg84V
MacBook Pro Stand: https://amzn.to/4nrg4Zq
M4 Mac Mini: https://amzn.to/3Wv7Hkx
🌐 SOCIAL MEDIA LINKS
📸 Instagram: / aslamsean
T I M E S T A M P S
0:00 Intro
1:13 Hardware & Specs
3:16 Different NAS Options
4:38 Installing Ubuntu
8:53 Mounting the 4TB Drive
15:04 Install NAS Software
16:33 Setting up NAS
17:56 Showing how to use NAS
22:18 Installing Apps
23:27 Conclusion
Instructions for Mounting Drive
**List All Drives
sudo fdisk -l
**Create a GPT partition on the blank drive
sudo parted /dev/sdb -- mklabel gpt
**Create one big partition
sudo parted -a opt /dev/sdb -- mkpart primary ext4 0% 100%
**Format the partition as ext4
sudo mkfs.ext4 /dev/sdb1
**Get the UUID of the new partition
sudo blkid /dev/sda1
Example
/dev/sdb1: UUID="15266543-6711-45fa-8b20-91a5e9103116" BLOCK_SIZE="4096" TYPE="ext4" PARTLABEL="primary" PARTUUID="0352cb02-e368-4c8b-9371-fe44344ec2c6"
**Create a Mounting Point
sudo mkdir -p /mnt/data
**Add the mount info to /etc/fstab
sudo nano /etc/fstab
Example - Add the line with correct UUID
UUID=15266543-6711-45fa-8b20-91a5e9103116 /mnt/data ext4 defaults 0 2
*Test it works*
sudo mount -a
** check if it works by running df -h
** For installing Casa OS
curl -fsSL https://get.casaos.io/v0.4.9 | sudo bash
Disclaimer: Some of the above links are affiliate links, and I may receive a small commission (at no additional cost to you) if you make a purchase.

Доступные форматы для скачивания:
Скачать видео mp4
-
Информация по загрузке: