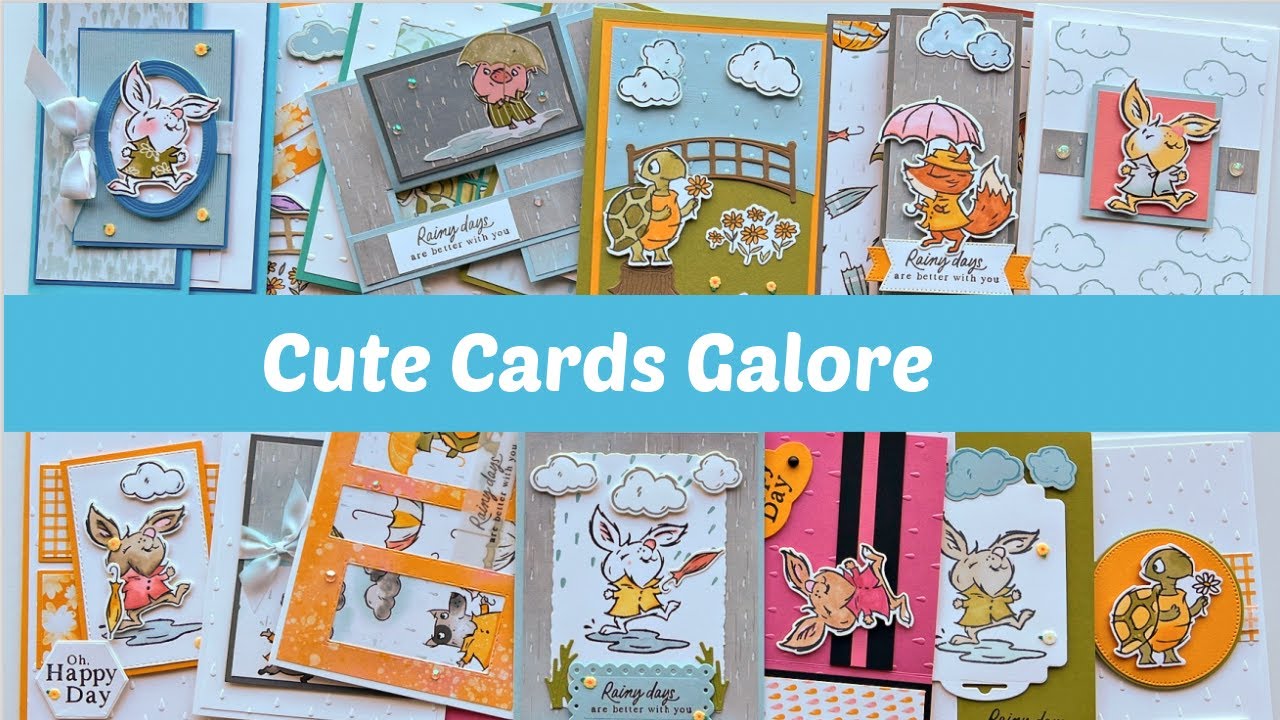
Fun Fold Friday with Playing in the Rain from Stampin' Up!
Автор: Sonia Ranger
Загружено: 2023-02-27
Просмотров: 91
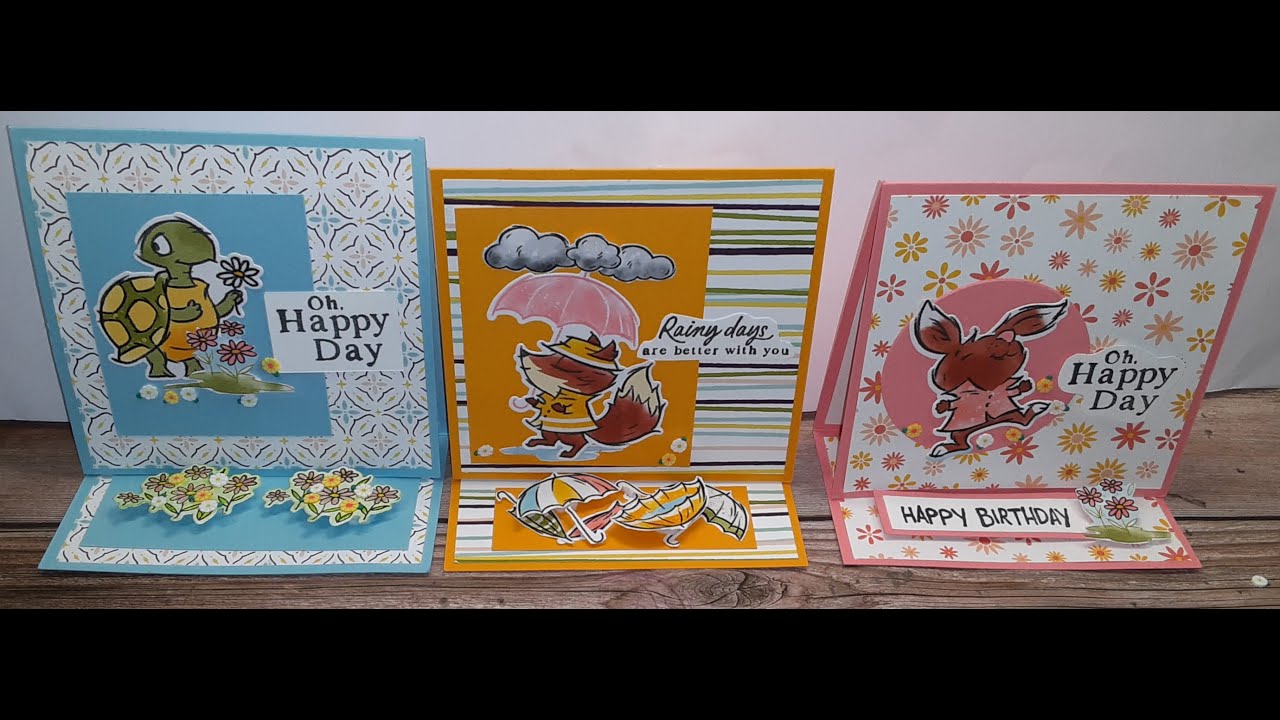
This video shows how to make the Tented Easel Card.
(I got the original info from Lisa Curcio)
Sonia’s Stampin' Up! Website: https://stamproundthetable.stampinup....
Facebook Page: Stamping Round the Dining Room Table
SUPPLIES
Playing in the Rain Suite 160556
-Playing in the Rain Bundle 160551
*Stamp Set 160542
*Dies 160550
*Raindrops Embossing Folder 160554
*Loose Daisy Embellishments 160555
*Rain or Shine SDSP 160540
-Coordinating Cardstock: Balmy Blue 146982, Basic Black 121045,
Basic White 159276, Cajun Craze 119684, Flirty Flamingo 141416,
Mango Melody 146989, Old Olive 100702
-Coordinating Stamp Pads: Balmy Blue 147105, Cajun Craze 147085,
Flirty Flamingo 147052, Mango Melody 147093, Old Olive 147090,
and Memento Tuxedo Black 132708
-Die-Cutting machine of choice: I used the Stampin’ Cut & Emboss 149653
-Adhesives of choice: Multipurpose Liquid Glue 110755, Stampin’ Seal
152813, Stampin’ Dimensionals 104430
-Embellishments of Choice: I used the Loose Daisy Embellishments listed
above.
All cards are basically the same, I just changed up colors of the
cardstock/DSP.
I did not give specific measurements for the Stopper as it depends on
what you choose to use: die cuts, sentiments, combination, etc.
CARD BASE: 4 ¼” x 11”
Originally Scored At: 4 ¼” and 8 ½”
My version scored at: 4 3/16” and 8 ½”
DSP (FRONT OF CARD)
Original version: 4” x 4”
My version: 4” x 3 15/16”
INSIDE OF CARD
Basic White: 4” x 4” (same for both versions)
DSP 2 ¼” x 4” (same for both versions)
STOPPER- (This is to provide a stopping point(stopper) for the front of
the card, thus creating and “easel”.)
The measurements for this vary depending on what image(s) and/or
sentiment(s) you use. It can be 1 or 2 layers under the popped-up
items.
I used die cuts and sentiments on the front of my card. You can also
stamp and color images if you choose.
-Stamp sentiment of choice on to appropriately sized Basic White scrap
and adhere to the front of the card.
-Stamp sentiment(s)/image(s) of choice to the 4” x 4” Basic White and
adhere to the inside of the card.
-Embellish the front of the card and envelope as desired.
Доступные форматы для скачивания:
Скачать видео mp4
-
Информация по загрузке: