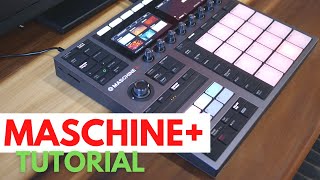
How to save a beat from Akai S900 to Maschine Plus/Mk3
Автор: vubeatz
Загружено: 2025-07-04
Просмотров: 644
So my second channel is / @rozmowyobitach show some love!
You can find me or my music here:
Sampling Library App iOS: https://apps.apple.com/us/app/sample-...
Sampling Library Web: https://samplelibrary.pl
Twitch: / vubeatz2
Spotify Artist Page: https://open.spotify.com/artist/0qD12...
Facebook Page: / vuthebeatmaker
Instagram Page: / vubeatz
Bandcamp Page: https://vubeatz.bandcamp.com
Transcript:
Hi everyone, Vu here.
Last time, I made a tutorial on how to connect the Akai S900 with Maschine+. Using that setup, I created a new drum kit that sounds like this:
[playback of drum sound]
With this setup, I can sequence everything on the Maschine+ and keep the sounds on the Akai S900. That works fine—but it’s way easier to just sample the sounds into Maschine+ and save the whole project on one device.
That’s where the Auto-Sampler comes in handy.
Auto-samplers are usually presented as a way to turn synth patches or presets into playable instruments—whether you’re using a newer MPC or Maschine. But you can also use them with hardware samplers like the S900. So let’s do that.
Step 1: Sound Placement
Just like last time, my sounds are placed on C3, C#3, and D3.
It’s really important to know where your sounds are before using the auto-sampler.
Step 2: Set Up Auto-Sampler
Go to the Sampling page, and under Recording Mode, choose Auto.
I have a snare loaded that includes a reverb tail, so I’ll record around 1.2 seconds of each sound.
Step 3: Configure Inputs
Next page:
Under Input Source, choose where you're sampling from. In my case, it’s External Mono (Left Channel).
For MIDI, make sure the signal is coming from Maschine+, in my case that's MIDI 1 (the default).
Step 4: Note Range & Stride
Then select the note range. Like I said, my sounds go from C3 to D3.
Make sure to keep the stride set to 1—this means we’ll record every note individually without trying to stretch one note across the keyboard.
If you change the stride or extend the range, your first and last samples would get pitched up or down, which we don’t want here.
Step 5: Sampling Settings
On the next page:
Set Velocity to 127 (full velocity).
Turn off "Find Loop".
Don’t trim silence—I want to keep the natural reverb tail in my snare.
No normalization—we can do that later if needed.
On the last page, enable Monitor so you can hear what’s being sampled.
Now hit Start to begin sampling.
Step 6: Final Tweaks
Once the sampling is done, there are two quick things to do:
The sampled sound is already loaded into your plugin and is active.
But you still have MIDI output enabled on that channel—so turn off MIDI Out, or else you'll trigger both the plugin and the external hardware.
Now you can play the sampled sound inside Maschine+.
By default, the sampler is set to ADSR mode.
You might want to switch it to One-Shot, depending on how you want to play it.
And now everything’s ready—you can play with your newly sampled sounds directly inside Maschine+.
Thanks for watching—and see you in the next one!
#maschine #s900 #sampling

Доступные форматы для скачивания:
Скачать видео mp4
-
Информация по загрузке:


![Создание бита с нуля | The Alchemist (предварительный обзор) [СКИДКА 50%👇]](https://ricktube.ru/thumbnail/FiL_jnwa4Cg/mqdefault.jpg)


