Tower of Doom Premium 7, 15 Turns - Mario + Rabbids Sparks of Hope
Автор: JaRoH
Загружено: 2024-12-30
Просмотров: 676
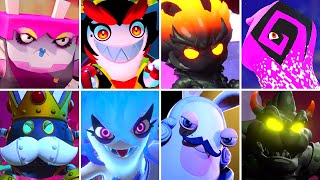
Tower of Doom Premium 7 completed in 15 turns. Every battle is cleared in 1 turn except for the midboss, which is cleared in 6 turns.
This Tower of Doom generation featured a generous selection of heroes, Sparks, and skill prisms to allow us to clear every battle in as few turns as possible. Some battles were trivial, but others required more sophisticated strategies. Battles 1, 2, 3, 6, 9, and 10 were the trickiest levels.
Timestamps:
Battle 1 - 0:34
Battle 2 (Final Attempt) - 7:21
Battle 3 - 13:21
Battle 4 - 19:48
Battle 5 - 24:05
Battle 6 - 30:58
Battle 7 - 34:20
Battle 8 - 36:37
Battle 9 - 39:11
Battle 10 - 47:01
Characters:
Rabbid Rosalina - Ennui was used to stop enemies in battle 5 and stop an enemy from being affected by Screech in the final battle. Kaboomer does high damage, which is helpful for defeating a couple enemies. She also has more ground movement than Bowser.
Luigi - His movement abilities allowed him to work with various team strategies in nearly every battle. Steely Stare is used to defeat high HP enemies, including the Giant Goomba.
Bowser - Mechakoopas and Damage Landing are used to destroy Darkmess Eyes and deal damage to certain enemies.
Cryogeddon - Used primarily to destroy Darkmess Eyes, but also dealt damage to enemies in the first two battles. It dealt supereffective damage to the Squashettes of battle 1.
Glitter - Lured in enemies to be taken out by Steely Stare in battle 5. Attack Master provided a boost in weapon damage for battle 10.
Zephyrdash - Dealt supereffective damage to an Oozer in battle 2, which was helpful when paired with Multi Dash.
Vampastra - Boosted Luigi's weapon damage to defeat high HP enemies.
Pulser - Not needed.
Reflector - Attack Master increased weapon damage for battle 10.
Exosphere - Athlete increased the power of Bowser's Damage Landing for battle 10.
Screech - Triggered movement on the Giant Goomba, which activated Steely Stare shots.
Aquanox - Not needed.
Zephyrstar - Not needed.
Toxiquake - Destroyed Darkmess Eyes in battle 9 that Cryogeddon couldn't reach.
Notes:
-The Strongman needed to give different boosts depending on the battle it was used in. Battle 1 required at least a 100% increase, though other RNG such as the Burn barrels could still mess up the battle from there. Battle 2 needed a 150% boost. Battle 6 needed at least 150% with two rolls. Lastly, battle 10 depends on how many critical hits Luigi lands and whether he activates Spark Energy, but you generally want a 250% boost with two rolls.
-Luigi attacks the Sea Stooge in battle 2 with a normal dash instead of Zephyrdash so the Sea Stooge can remain in range of the two Frostbite barrels. Gust pushes from Zephyrdash can be tricky to control in general.
-Armored Goombas stand back up after throwing them, which normally forces you to dash them again. This is worked around by setting them down near a Darkmess Eye and throwing a Mechakoopa on top of them. They will not stand back up after being hurt by the explosion, making this a powerful way of destroying out-of-the-way Darkmess Eyes.
-Bowser can destroy four Darkmess Eyes with his Damage Landing in battle 4. However, it's tricky to get the precise positioning for that to happen without being too far away or landing on a Darkmess Eye, thus canceling the ground pound. A second POW Block is brought as back up in case the ground pound fails.
-Bowser lands on the half cover fence in battle 8 to cancel his Damage Landing. This saves the attack for when he lands from jump pad jump, which is in range for the Darkmess Eyes.
-The reach area mission on floor 9 was the easiest mission of that floor. However, taking that level would mean losing one more skill prism. Luigi doesn't want to sacrifice any of his skills for battle 10, not even range. Without the first range upgrade, he can only land two shots on the Giant Goomba as it moves from Screech or Glitter.

Доступные форматы для скачивания:
Скачать видео mp4
-
Информация по загрузке:


![Mario + Rabbids Versus: LosT [7/7/25]](https://ricktube.ru/thumbnail/lRjpyKKXGDE/mqdefault.jpg)


![Lp. Мастерская [47] • #14 КРИЗИС ДОВЕРИЯ [Хороший/Плохой Союзник] • Майнкрафт](https://ricktube.ru/thumbnail/HSlzDYvTNN8/mqdefault.jpg)


