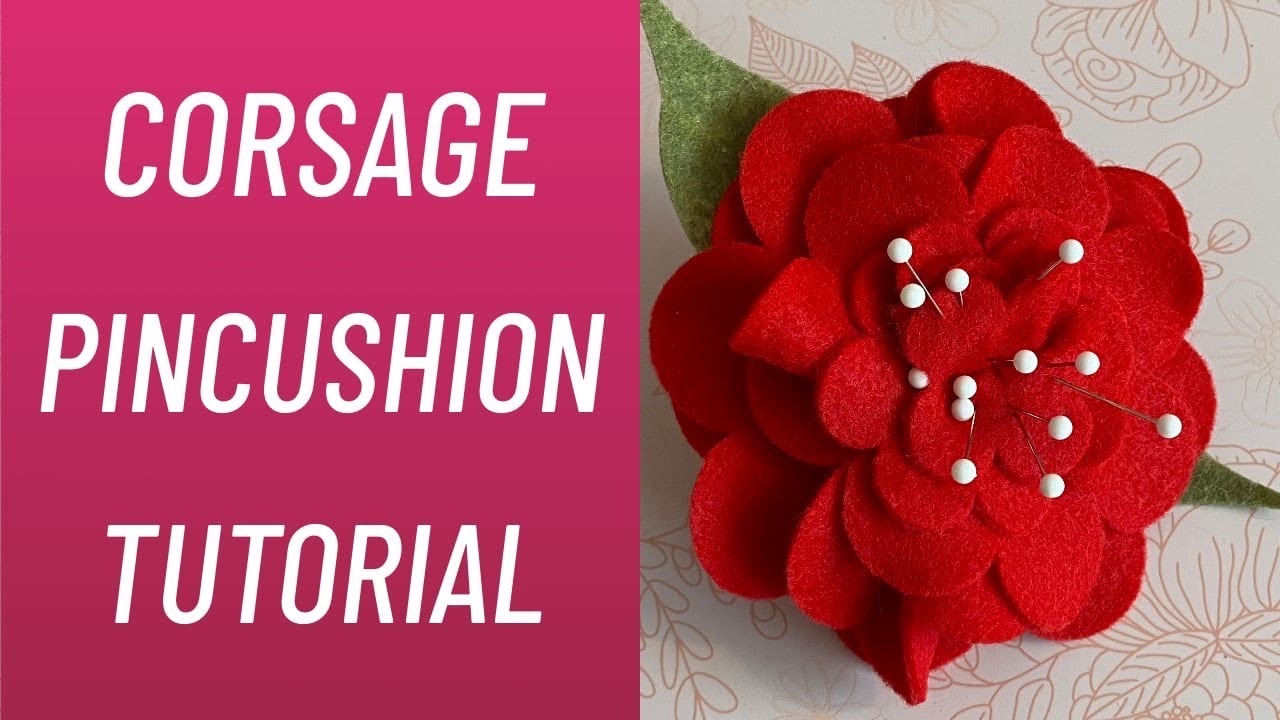
Lady Disdain's Wrist Corsage Pincushion: really quick and easy DIY
Автор: My Lady Disdain
Загружено: 2020-04-20
Просмотров: 1106
DIY easy wrist pincushion with more flair than the standard tomato! Features cutting instructions for Cricut machines as well as hand cutting tips. Please please tag me on Instagram with your makes! @my_lady_disdain. Don't forget to subscribe.
Chapter Markers:
1. Intro - 00:00
2. Tools & Materials - 02:01
3. Cutting on the Cricut - 04:39
4. Cutting by Hand - 05:54
5. Making the Base - 09:30
6. Adding the Leaves - 12:07
7. Adding Elastic - 14:26
8. Building the Flower - 17:42
9. Making it Yours - 24:14
10. Outro - 26:43
Required Materials List:
2 pieces of (at least) 9” by 12” felt (one color for flower and one for leaves)
Fabric elastic
Needle and Thread ( or hot glue gun)
A cuff bracelet (or enough elastic to make a wrist sized loop)
Scissors
Pinking Shears (optional)
Compass or other circular items (for hand cutting. see video)
Instructions:
For Cricut Project:
https://design.cricut.com/landing/pro...
1)With Cricut:Using rotary cutting blade (best) or fine point blade cut out the 2 mat layers. First mat is flower, second is leaves and cushion base.
For hand cutting: See video
2) BASE: Stack the 2 base circles and stitch around the edge leaving about a 2 inch section for turning and stuffing. Turn and stuff with remaining scraps of felt. (Cut into small pieces for ease of stuffing) Stitch base closed.
3)LEAVES: If desired, attach the 2 leaves to the base at the center of the circle. Consider how you want them to lay on your wrist. Setting one of the largest petal layers on top to test will help you determine this. Hand stitch leaves to the base at the center of the base. When secured, do not cut thread. Proceed to next step.
4) ELASTIC: (at least 1/2" recommended) If attaching your flower to a bracelet, cut a piece of elastic long enough to wrap tightly around the width of the bracelet. (for my bracelet it was about 1.5 inches) This elastic gets secured to the bottom of the base in the center, as a loop. (Almost like you could slip it onto your finger like a ring). Push your needle and thread from the leaf side, through the center of the base and secure your elastic to the bottom. Pay attention to how the loop faces because you want to make sure your leaves are facing in the direction that you wanted them. If you still have plenty of thread, push your thread back through the center to the leaf side, or secure and tie off. Note: if you wish to use elastic as your bracelet just cut the wrist size you need and secure it instead of making the small loop.
5) PETALS: There should be 6 petals. 2 large, 2 medium and 2 small.
First, lay the largest petal flat on top of your leaves and secure with your needle and thread.
Next, take the other large petal and pinch slightly in the center (about an eighth of an inch) between your fingers to give the petal some height and dimension. With the fabric pinched between your fingers, place the “lips” down onto the base, as though the flower is kissing the leaves. Stitch to secure. Stitches do not have to be pretty. They will be covered.
Next, continue with the remaining medium and small petals, criss crossing your pinches as you stitch each one down. Bring your needle back through your petals and secure and tie off. Attach to bracelet and fill with pins. Enjoy!!
To see Evelyn Wood's pin cushion tutorial:
• How to make a wrist pin cushion - DIY wris...
Cricut Design Space Link:
https://design.cricut.com/landing/pro...
Доступные форматы для скачивания:
Скачать видео mp4
-
Информация по загрузке:


![DIY Wrist Pin Cushion | How To Make Pin Cushion Bracelet | Scrap Fabric Sewing Projects [P15]](https://imager.clipsaver.ru/lmV6CBX7ihI/max.jpg)