Clockmaking - How To Make A Clock - Part 9 - Etching, Waxing And Silvering A Chapter Ring
Автор: Clickspring
Загружено: 2015-06-23
Просмотров: 635581
How To Make A Clock In The Home Machine Shop, Part 9, by Clickspring.
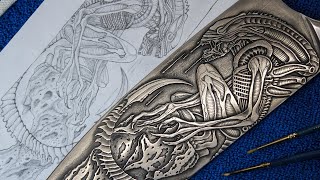
In this episode I use some relatively unusual techniques to make one of the most viewed parts of the clock: The chapter ring.
I show the chemical etching process, using photo resist and ferric chloride, as well as the traditional method of waxing and silvering a clock dial.
Thanks for watching. If you enjoyed the video please give a thumbs up, and leave me a comment.
Join YouTube Channel Memberships here: / @clickspring
Become a Clickspring Patron here: / membership
You can also help me make these videos by purchasing via the following Amazon Affiliate links:
Cameras used in this video:
Panasonic GH5 - https://amzn.to/2rEzhh2
Panasonic X920 - https://amzn.to/2wzxxdT
Tools & Shop Products:
Dykem 80300 Steel Blue Layout Fluid, Brush-in-Cap (4oz): http://amzn.to/2HGPaJJ
"Solidworks 2013 Bible": http://amzn.to/2FObS1D
"Machinery's handbook": http://amzn.to/2pi7XE5
For more info on this build, as well as other tool making info and plans, visit http://www.clickspringprojects.com
Other Videos to Watch:
How To Make A Clock In The Home Machine Shop - Part 8 - Making The Barrel Arbor
• Clockmaking - How To Make A Clock In The H...
Home Machine Shop Tool Making - Machining A Pinion Head Depthing Tool - Part 1
• Home Machine Shop Tool Making - Machining ...
Ask Me A Question:
http://www.clickspringprojects.com/co...
Abbreviated Transcript:
00:40 I'll be using photoresist film to mark out the design, and it needs a completely clean alkili free surface to do its thing. So I scrubbed the surface with emery paper and household vinegar and then cleaned it off with acetone. The result was a clean fresh metal surface.
01:01 I'm going to need this later on, so I'm mixing up the developer solution now. It's a mild alkiline solution thats used to dissolve the unexposed photoresist. The photoresist reacts to UV light, so all work from here on must be done under a yellow light.
01:30 And this is the photoresist. It's a thin light sensitive film, slightly sticky to the touch. It has 3 layers: The photosensitive layer is sandwiched between 2 removable coatings.
02:23 Now if all of the preparation has gone well, then the bond will be strong, and the resist will be well attached across the entire surface of the metal. I've made a simple light box to expose the resist, and a sheet of glass sits on top to position the work.
02 The dial artwork has been printed onto a clear film.
03:52 For the most part, the exposed resist forms a nice crisp line, but inevitably there are small printing flaws that need to be removed like these small dots. I scraped these off with the sharp point of the scriber.
04:22 I glued some small plastic risers on the corners to keep the plate above the bottom surface of the etchant bath, and I've also used clear tape to seal off all of the other surfaces. This center punch mark will help me position the work on the lathe, later on.
04:44 So after all of that preparation, it's finally time to do some etching, and the etchant that I'm using is ferric chloride.
05:15 After sitting in the etch solution for about an hour and a half, the surface is nicely etched, and its ready for the next step. A strong alkaline solution is normally specified to remove the resist, but have a look at what a great job acetone does, its hard to beat that. OK so that's the etching process complete.
05:47 The etched surface is quite pitted, but the edges are crisp, and the overall depth is perfect for accepting the shellac wax. What I need to do now is trim off this excess brass, and form the ring shape. Another job for a super glue arbor on the lathe.
06:39 Traditional dial wax is basically a colored shellac, so in its natural state its quite hard and brittle. But it melts to a sort of maple syrup consistency under a gentle heat. While its in that fluid state, it can be worked into all of the lines and numerals.
07:11 And that brings me to the final step that really makes the chapter ring come to life: The silvering.
07:34 The silvering compound was mixed with a small amount of water, to form a thin paste, and then it was applied by hand. And then it was followed in a similar way with the finishing compound. A gentle heat with the torch finishes off the process, by melting the sanded wax surface, and making it shiny again. A single coat of lacquer, and it's done.
References:
Tony Moss's Excellent Sundial Etching Series:
• Lindisun photo etching Part 1.m4v
• Lindisun photo etching Part 2.m4v
John Wilding "Large Wheel Skeleton Clock" construction book can be purchased online from Ian T Cobb:
http://www.clockmaking-brass.co.uk/cl...
How To Make A Clock In The Home Machine Shop, Part 9, by Clickspring.

Доступные форматы для скачивания:
Скачать видео mp4
-
Информация по загрузке:


![Clockmaking - [BONUS VIDEO] Chill Out Edit - 1000 Hours in 12 Minutes](https://ricktube.ru/thumbnail/dU7iKNmQBIs/mqdefault.jpg)


