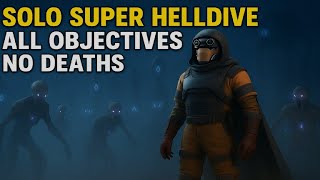
Automatons Solo Super Helldive
Автор: Crukih
Загружено: 2025-10-23
Просмотров: 27
***************************** USEFUL TIMESTAMPS *****************************
0:00 – Intro
2:10 – First Command Bunker
8:30 – Second Command Bunker
12:10 – Fortress
23:30 – Lord Help I’m Legally Blind
23:50 – Third Bunker
28:30 – Fourth Bunker
37:10 – Extraction Defence
***************************** HYPERLINKS *****************************
Crukih: / @crukih7527
Tuldun: / @tuldun336
Tatoni: / @tatoni3602
Discord: / discord
***************************** DESCRIPTION *****************************
Compared to the Illuminate, I found myself adjusting my build far more against the Automatons depending on the mission objectives. With the Illuminate, I usually run the same setup because it’s simply more effective. I’ll do a stratagem tier list soon to cover my thoughts in detail, but for now here’s a quick breakdown of what I used and why.
The core strategy is to create breathing room using two turrets, letting us snipe everything within about 200 metres with the Spear. We use them interchangeably to “leapfrog” through the map while benefitting from their support fire.
Armour: UF-50 Bloodhound – I love extra padding as a passive, and this is a lighter take on that idea. 125 armour gives good mobility while being tanky enough to survive the odd mine (not that that happened…). We trade 25 armour for two passives: half the Scout passive, revealing enemies via radar pings, and Unflinching, reducing recoil from hits by 95%. That alone saved countless runs where flinching cost me at the worst time. I used to run the FS-23 Battle Master, but even with its 50% explosive resistance, Scout Strider rockets still one-shot me, and the Heavy Armour slowdown wasn’t worth it.
Primary: R-36 Eruptor – Yes, it’s the Eruptor again. It’s just too good to replace. The huge AOE can stun entire patrols, it can hurt heavy armour, and it’s explosive enough to close Bot Fabricators. The only drawback is the manual cocking between shots. Missing can be fatal. So Unflinching is perfect synergy here. Take angled foregrip and iron sights to maximise ergonomics.
Secondary: LAS-58 Talon – Pairs perfectly with the Eruptor’s short-range weakness. One of only two true S-tier sidearms (with the Ultimatum), it has medium armour penetration, 200 damage per shot, and infinite ammo thanks to its energy design. It one-shots light Automatons and downs medium ones with headshots, perfect for close calls or stragglers.
Throwable: G-123 Thermite – The only true anti-tank grenade, and it earns that title. War Striders, Hulks, Bot Fabricators, even tanks, one grenade each. Limited to three, but the value is unmatched. The long fuse is annoying, but nothing else fills its role, so it stays top-tier.
Stratagem 1: FAF-14 Spear – Normally not my favourite. Low ammo, unreliable lock-on, and you can’t target weak spots. But solo, its downsides fade. With full access to supply crates, ammo isn’t an issue, and with good defences you can safely snipe every heavy in sight. It two-shots Command Bunkers and reliably takes out dropships. Just wait for them to slow before firing. It still cannot lock-on to smaller base turrets however, which does make these quite an issue.
Stratagem 2: Orbital Walking Barrage – It’s basically the 380mm HE Barrage but better. I will die on this hill. Same damage, same number of shots, same cooldown, far more control. It “walks” forward from impact, letting you direct the destruction. Around a 90% success rate on Command Bunkers and Detection Towers takedowns, and safe to use from distance. Hugely underrated for breaking entrenched positions.
Stratagem 3: A/MLS-4X Rocket Sentry – The best turret for Automatons. Longest range (100m), 40 rockets, and strong anti-tank damage. Great for overwatch if placed high. Just don’t let enemies get too close. It can’t shoot at point-blank range, and the cooldown hurts if it’s destroyed early.
Stratagem 4: A/AC-8 Autocannon Sentry – Deals less per shot and burns ammo faster, but compensates with higher DPS. One of the few turrets that can still handle heavy armour. Together, the Rocket and Autocannon sentries complement each other perfectly: one for area control, the other for brute-force takedowns.

Доступные форматы для скачивания:
Скачать видео mp4
-
Информация по загрузке:


