I Modded an Arcade Fight Stick for My Nintendo Switch – Street Fighter Feels Just Like Arcade!
Автор: Maximaker_Studio
Загружено: 2025-08-03
Просмотров: 114
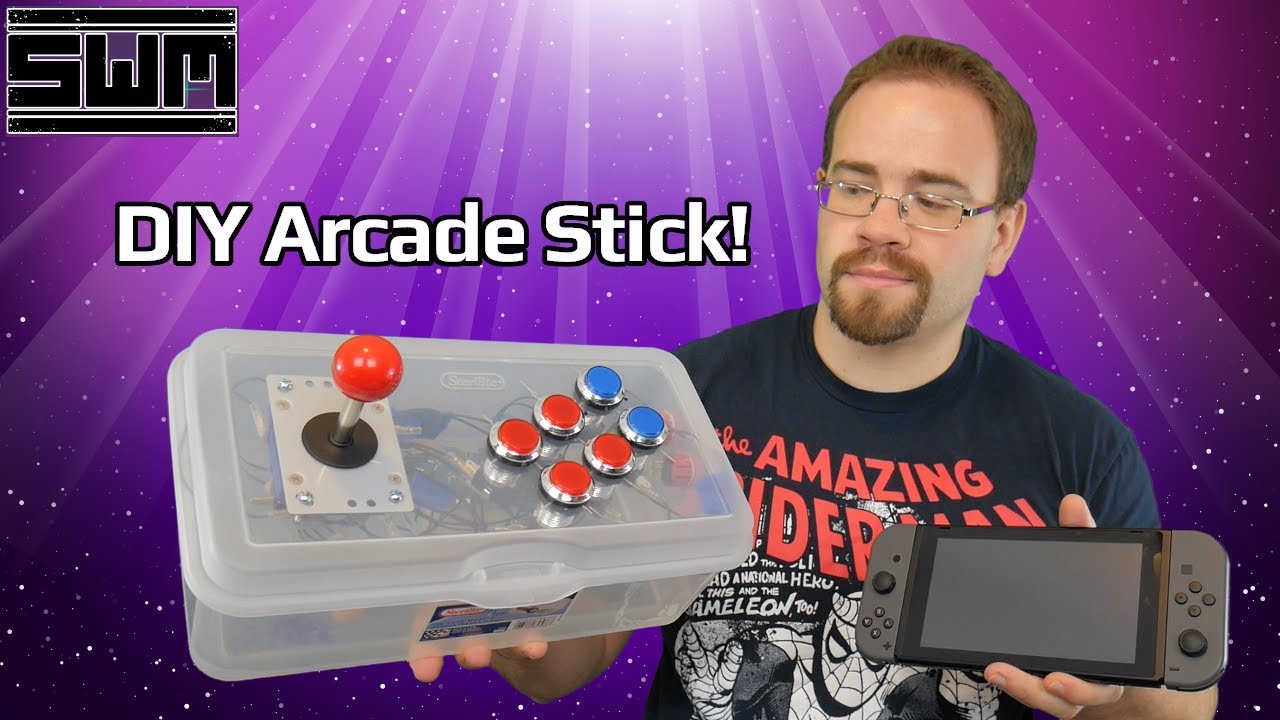
I modified a HORI PS3 arcade stick into a joystick controller compatible with the Nintendo Switch. During the process, I dismantled a broken Switch controller, mounted its mainboard inside the arcade stick, and wired all the buttons to it using jumper wires.
Some of the original buttons on the stick were no longer functional, so I repaired and replaced them. I also installed two 18650 lithium batteries inside as a power source, resulting in very long standby time.
The arcade stick uses microswitch-based joystick and a uniquely positioned button layout, which makes it less suitable for games like The Legend of Zelda. However, the motion sensor (gyroscope) from the original controller still works. Being able to lift the entire arcade stick to aim is surprisingly fun and offers a very unique gaming experience.
#Maximaker #DIY #MOD
------------------------------------------
Please [subscribe] the Maximaker channel and turn on the ringtone to get notifications about new videos🔔. With your help, Maximaker channel will develop better, thank you very much for your support❤️
If you like the video, please like it 👍🏻 or leave a comment, and 📢Share this video with your friends on social networks, and it will be saved on your website.
0:00 Opening
0:53 A HORI brand PS3 arcade stick
1:45 Disassembling the arcade stick
2:20 Wireless module
2:43 Removing buttons and joystick
3:28 Peeling off the surface sticker
3:48 Drilling hole for indicator light
4:01 Installing LED indicator
4:22 A third-party Switch controller
5:16 Disassembling the controller
6:10 Using a 10k resistor
6:32 Drilling hole for Type-C port
7:24 Soldering wires
8:41 Measuring button circuits
9:06 Repairing unresponsive buttons
11:15 Cleaning the surface
11:30 Applying sticker
11:51 Installing buttons
12:15 Mounting the circuit board
12:24 Soldering button connections
12:39 Soldering indicator light wires
12:56 Soldering battery wires
13:15 Fixing with hot glue
13:27 Lubricating the joystick
13:32 Installing the joystick
13:47 Assembly completed
14:03 the Maximaker logo
14:11 Pairing with Switch console
14:22 Before mod
14:32 After mod
15:04 Gameplay test

Доступные форматы для скачивания:
Скачать видео mp4
-
Информация по загрузке:


![¡El Arcade Stick DEFINITIVO! [Nintendo Switch - PS4 - PS3 - PC - Android - Raspberry Pi]](https://imager.clipsaver.ru/RT0d7hqY278/max.jpg)