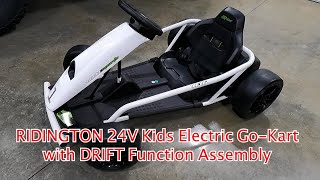
RiiRoo MaxDriftz™ Electric Go Kart 24v Kids Assembly Instructions
Автор: RiiRoo
Загружено: 7 авг. 2020 г.
Просмотров: 46 538 просмотров
Here is the RiiRoo MaxDriftz™ Electric Go Kart 24v Kids Assembly Instructions.
RESOURCES & LINKS:
____________________________________________
For more info on this bike, visit: https://bit.ly/MaxDriftzElectricGoKart
Our ride-on cars - https://riiroo.com/collections/ride-o...
Our ride-on motorbikes - https://riiroo.com/collections/electr...
Our ride-on scooters - https://riiroo.com/collections/riiroo...
____________________________________________
Here are the instructions:
1. Take a look at the parts list and ensure you have all the items to build.
2. Please refer to the parts list in the manual.
3. Disassemble the rear axle as shown.
4. Insert the rear axle through the holes in the body of the car.
5. For the rear wheels ensure the assembly order of hardware is as follows – wheel – washer - & finally the nut.
6. Line up the steering rack with the relevant gaps on the bottom of the car.
7. Secure it with nuts & bolts.
8. Repeat process on the other side.
9. Attach the bush to the wheel.
10. For the front wheels ensure the assembly order of hardware is as follows – washer – wheel – washer - & finally the nut.
11. Repeat process on the other side.
12. Insert the steering wheel column through the hole in the front of the car.
13. Secure it with nuts & bolts.
14. Insert steering rod through the body of the car whilst lining up the hook on the steering rack.
15. Attach the steering wheel to the top of the steering column.
16. Secure it with nuts & bolts.
17. Attach the steering column guard to the relevant gaps on the front of the car.
18. Secure it with screws.
19. Repeat process on the other side.
20. Connect the battery terminal multi-plug.
21. Once battery terminals are connected check to see if the car powers up.
22. Re-secure battery cover with screws.
23. Slide seat on to the brackets.
24. Secure the seat with screws on both sides.
25. Attach the wheel caps by lining up tabs & clicking into place.
26. Repeat process on the other side.
27. Attach the wheel caps by lining up tabs & clicking into place.
28. Repeat process on the other side.
► If you need help choosing a ride-on toy for a present, then check us out @ https://riiroo.com/
►Subscribe: http://bit.ly/RiiRooSubscribe to see more videos on our ride-on toys.
►Find us on Facebook: / riirooltd
#RiiRooMaxDriftz #ElectricGoKart #RiiRoo

Доступные форматы для скачивания:
Скачать видео mp4
-
Информация по загрузке:


![[A] PGL Astana 2025 - Group Stage - Day 4](https://ricktube.ru/thumbnail/q6cCuly0mVI/mqdefault.jpg)