HOW TO INSTALL A FLEECE BACKED EPDM ROOF - FLEXIPROOF®
Автор: The EPDM Academy by FlexiProof®
Загружено: 2025-08-18
Просмотров: 432
In this newly updated video tutorial, you’ll learn how to prepare your project site and correctly install a complete, simple EPDM flat roof with the FlexiProof Fleece Backed EPDM flat roof system.
Be sure to use the right tools, materials, and techniques for the very best results on your EPDM roofing projects.
Contact us with questions or to learn more about our EPDM roofing training: https://www.flexiproof.co.uk/the-epdm...
Learn more about the FlexiProof EPDM flat roof system: https://www.flexiproof.co.uk
00:11 ROOF SURFACE PREPARATION
00:19 Tools required:
• Cordless drill with countersink
• Countersunk screws
• Belt sander
• Leaf blower
00:30 No materials required
00:33 Steps 1 to 4
01:15 MARK THE ROOF PERIMETER AND MEMBRANE FOR CONTACT BONDING ADHESIVE APPLICATION
01:22 Tools required:
• Combination square
• Marker pen
• Heat gun
• Scribe
01:32 Materials required:
• Fleece Backed EPDM Membrane
• Contact Bonding Adhesive
01:35 Steps 1 and 2
02:19 BONDING THE FLEECE BACKED MEMBRANE ONTO THE FLAT ROOF
02:24 Tools required:
• Medium pile paint roller and pole
• Broom
• Craft knife
• Pencil
• Spirit level
• Paint brush
• Silicone roller
• Hammer
• Ringshank nails
02:43 Materials required:
• Water-Based Deck Adhesive for Fleece Backed EPDM
• EPDM Primer
• Contact Bonding Adhesive
• Lengths of Gutter Trim
02:56 Steps 1 to 22
07:47 WEATHERING WALL TERMINATIONS
07:50 Tools required:
• Craft knife
• Scribe
• Scissors
• Paint brush
• Silicone roller
• Penny roller
• Sealant gun
08:08 Materials required:
• 9 Inch Uncured Flashing Tape
• EPDM Primer
• Lap Edge Sealant
08:17 Steps 1 to 8
09:33 INSTALLING ROOF EDGE GUTTER TRIM
09:39 Tools required:
• Hammer
• PolyTop nails
• Fixing pins
09:50 Materials required:
• Lengths of Gutter Trim
09:58 Steps 1 to 3
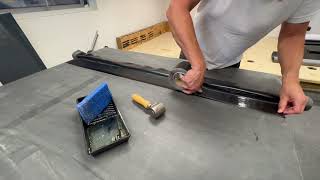
10:15 INSTALLING ROOF EDGE RAISED KERB TRIM
10:21 Tools required:
• Fine tooth hand saw or multi cutter
• Hammer
• Polytop nails
• Fixing pins
10:32 Materials required:
• Lengths of Raised Kerb Trim
10:38 Steps 1 to 7
11:28 INSTALLING ROOF EDGE CORNERS
11:32 Tools required:
• Craft knife
11:38 Materials required:
• Raised Kerb Trim External Corners
• Superglue
• Superglue activator
11:46 Steps 1 to 6
Things to be aware of:
• The prepared roof surface must be clean, dry, and free from dust and contaminants (bitumen, oil, etc).
• Always countersink the screw holes in the roof deck, and sand the joins, to create a flat surface to apply the One Piece EPDM membrane to. Your EPDM flat roofs will be smooth and smart!• Firmly press the membrane into 90 degree angle changes. This will avoid the membrane pulling-away, known as 'tenting', as you lift it up and onto wall upstands.
• Always check Contact Bonding Adhesive is touch dry before applying the membrane. This will prevent any gas bubbles from forming underneath.

Доступные форматы для скачивания:
Скачать видео mp4
-
Информация по загрузке: