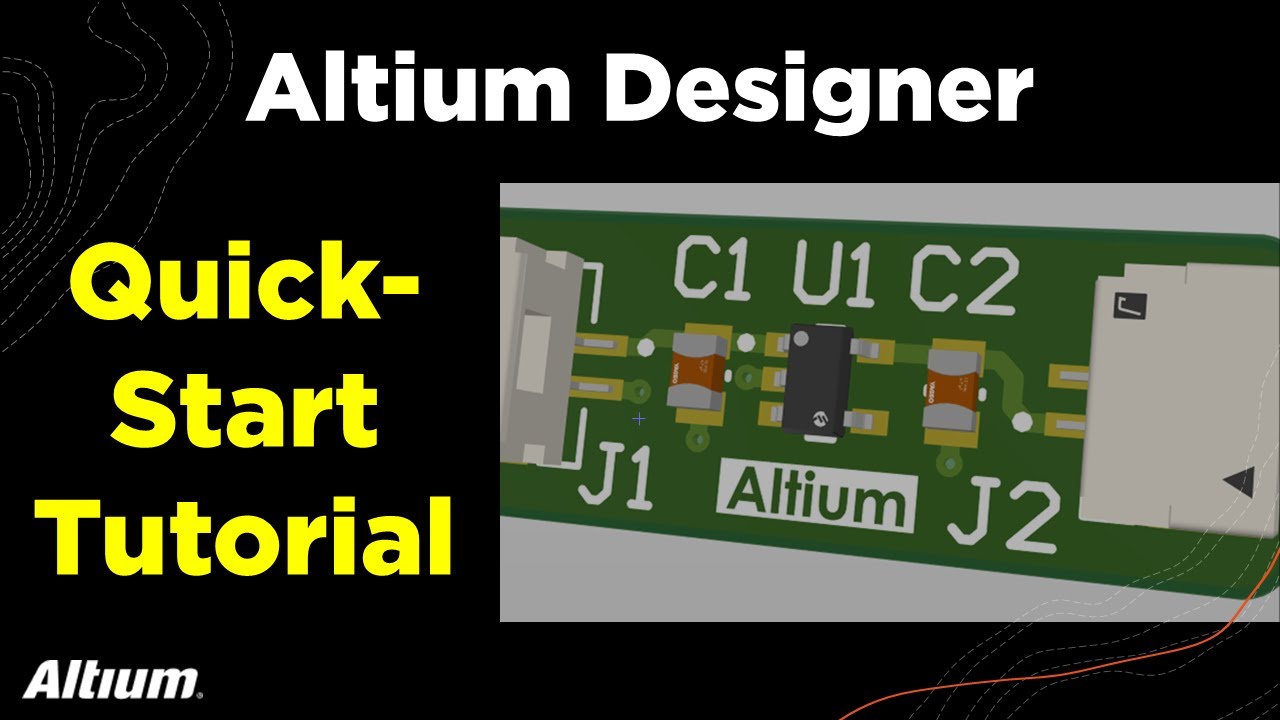
How to make a footprint for a TP4056 module in Altium Designer
Автор: Taste The Code
Загружено: 2022-09-01
Просмотров: 4032
When designing prototype PCBs with Altium (https://www.altium.com/yt/taste_the_code) it is often easier if a certain circuit can be directly used as a module, instead of recreating the entire circuit from scratch.
For an upcoming video, I want to make a general purpose project PCB that will be battery powered so I need a way how to safely charge and use a lithium battery and the TP4056 module is perfect for that.
In order for the module to be neatly placed on the project PCB, I had to create the schematic symbol, as well as the PCB footprint for it and in this video, I'm guiding you through the process of doing that.
After watching the video, you will know how you can create such schematic symbols for any module or part and you will also know the basics of how to create custom footprints for any module or component inside Altium Designer.
You can get your free Altium Designer trial and 25% discount on any license on the link below:
https://www.altium.com/yt/taste_the_code
The full project along with the footprint can be downloaded from my website:
https://www.tastethecode.com/designin...
Useful modules and tools for making electronics projects:
TP4056 Battery charging and protection - https://s.click.aliexpress.com/e/_DkO...
Power bank module - https://s.click.aliexpress.com/e/_Dmx...
3 USBs boost module - https://s.click.aliexpress.com/e/_Dns...
18650 batteries - https://s.click.aliexpress.com/e/_Dml...
18650 1S BMS - https://s.click.aliexpress.com/e/_De5...
18650 UPS 5V/12V - https://s.click.aliexpress.com/e/_DlD...
DC to DC boost converter - https://s.click.aliexpress.com/e/_DDF...
Soldering kit - https://s.click.aliexpress.com/e/_De5...
Multimeter - https://s.click.aliexpress.com/e/_DeP...
Support my work on Patreon so I can continue producing free content and tutorials!
/ taste_the_code
My recording gear:
Canon M50 Mark ii - https://s.click.aliexpress.com/e/_ALp9Sp
GT10 Pro 5G Android Phone - https://s.click.aliexpress.com/e/_oDn...
Dragon Touch 4K Action Camera - https://s.click.aliexpress.com/e/_mrc...
USB Condenser Microphone - https://s.click.aliexpress.com/e/_mq5...
Tripod - https://s.click.aliexpress.com/e/_ooa...
Phone tripod mount - https://s.click.aliexpress.com/e/_s9WaiJ
How to make a footprint for a TP4056 module in Altium Designer
#footprint #symbol #altium #component #pcb #tastethecode
Main Site and blog: https://www.tastethecode.com
Facebook: / tastethecode
Instagram: / taste_the_code
Twitter: / taste_the_code
Get exclusive Taste The Code t-shirts and merch at
https://teespring.com/taste-the-code
Design great PCBs with Altium designer and get great discount!
http://aklam.io/vb3uTw
Click on the link below to get two months of free premium access to Skillshare and start learning today!
https://skl.sh/37LnRua
Get $50 off your order on hosting for all of your website needs and learning projects on Dreamhost!
https://www.dreamhost.com/r.cgi?24057...

Доступные форматы для скачивания:
Скачать видео mp4
-
Информация по загрузке: