Microsoft Dynamics 365 - How to create a field
Автор: Gestisoft
Загружено: 2018-09-23
Просмотров: 17239
Blog : https://bit.ly/2MW8rci
Script : How to add fields in Microsoft Dynamics 365
You’re now at the point where you’re thinking about the fields to add in order to get the data you want.
This blog will show you step by step how to create a field and how to integrate it from a Solution
The best way to create and customize new fields it’s to go through a solution
This allows you to keep track of who did those customizations in your Dynamics 365 CRM.
So, for the first step, click on Settings and choose solutions.
This is the complete list of solutions already present in your Dynamics 365 CRM. To create our fields, we’ll use the solution event manager.
We now must identify which entities we want to integrate our new field into. The field will be linked to this form.
For the demo, we will create this new field inside the account entity.
Here we can see different sections of the solution editor :
Point #1 shows the Account entity
Point #2 are All the fields that we find inside the account entity
Point #3 is What we can see in the available field list. You can see all the fields, the customizable fields and the fields that you have already customized.
Point #4: Represents the different things you can do with the field list.
You can create a new field, delete a field with an unmanaged state, modify an existing field, and another action that allows you to display fields’ dependence and managed proprieties.
These last two topics will be explained in more in detail in an upcoming video because it requires its own training.
So, for this demo we’ll click on the New button, and we’ll create a field Interest that will allow us to generate lists of accounts that are interested in participating in our events.
It’s important to note here that if you create the field in the account form, this same field will have to be recreated in all the other entities.
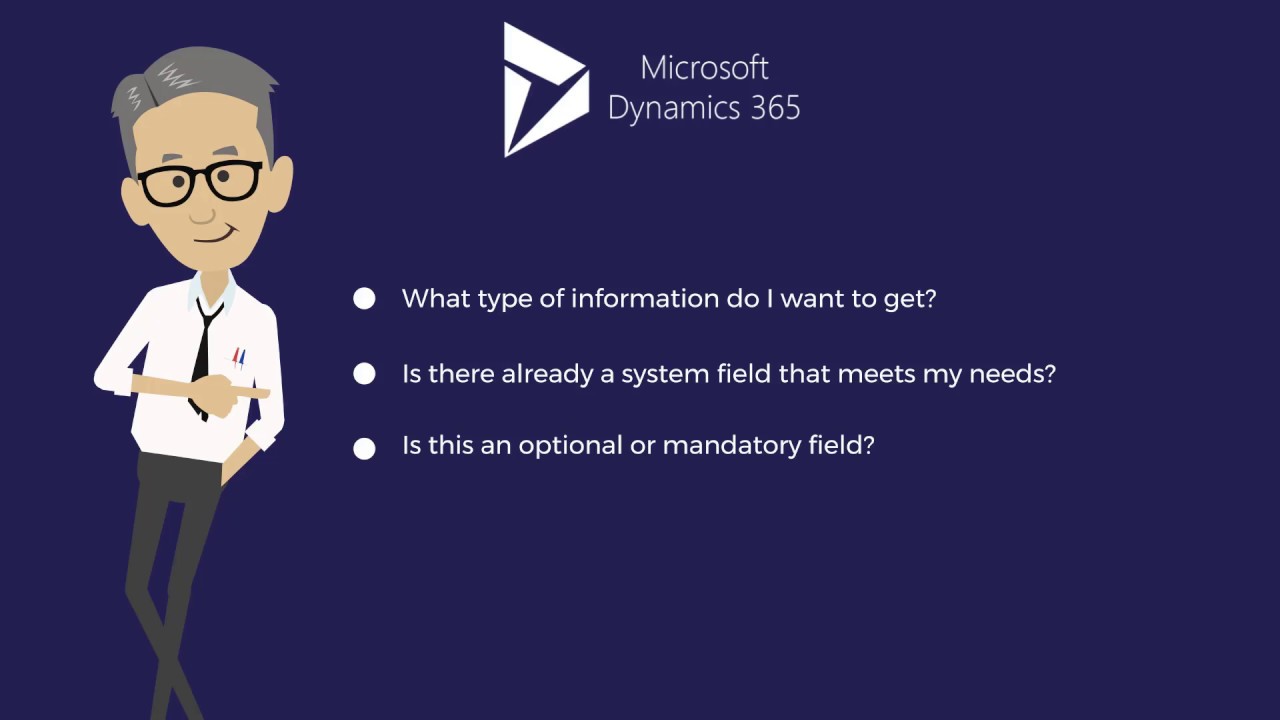
What you are currently seeing on your screen is the field creation interface.
Here’s a point by point explanation of this interface:
1. We find the complete name of the field as it appears in the form
2. Here we define if the field is:
o Optional, so it can remain empty.
o Recommended constraint, so it can stay empty, but it’s strongly recommended that it be filled. We can recognize this type of field by the blue cross.
o Mandatory constraint, which means this form won’t be saved if this field is empty.
3. The name of the field is the identification of the field in the SQL database. We see that the prefix is GS so, this field will be noted as one created by Gestisoft.
4. Search possibilities.
5. The security level for the field is the option to make this field available according to the level of security of the user.
6. Audit: define if this field can be audited.
7. Description of the field function.
8. Activation of the field in a global filter of the user interface. This is an improved interface of the CRM that maintains the same user experience and screen layout in your CRM whether you are on PC, tablet or mobile.
9. Activate availability: whether the field is sorted in the dashboard of the user interface.
10. The data types that we can enter in the field. In this case, we have chosen two options: yes or no. For more details on the data types you can read the blog, “What is a field in Dynamics 365?”
11. Field type. In this case you have the choice between simple, calculated and cumulative.
12. We find the options users can use to fill in the field. In this case, the user can choose “yes” or “no.”
13. The option editor. You can decide which option is presented first. In this case, “no” is offered in first in the list, ‘’Two options.’’ You can also modify these choices.
14. You can set a business rule linked to the field.
When you are done customizing, remember to save the field.
So, you have created your field, ‘’Interest.’’ Now you need now to insert it inside the main Account form by double clicking.
We are now inside the form editor. To learn more about this editor, I recommend watching our video that expands on this subject: How to create or modify a form in Microsoft Dynamics 365.
Go to the right column named Field Explorer, and you’ll find all the available fields that can be added to the form (...)
Доступные форматы для скачивания:
Скачать видео mp4
-
Информация по загрузке: