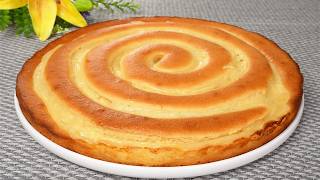
Homemade Flaky Cherry Pie - Crostata con Ciliege Fatta in Casa
Автор: Love What UEAT
Загружено: 2025-07-13
Просмотров: 147
#cherrypie #cherrypiefilling #summerpies
Homemade Flaky Cherry Pie - Crostata con Ciliege Fatta in Casa
Summer is here and cherries are in season ! Let’s make 🍒 🥧!
Homemade cherry pie is a delicious and genuine fruit dessert that we prepare to welcome the summer, when cherries are at their sweetest !
A unique delicacy very simple to make, choreographic effect (due to the lattice technique) and exquisite result, to fall in love with at first bite !
Follow us as we prepare for you our version of this delectable homemade pie, sliceable with a thick cherry pie filling and a golden brown flaky crust.
INGREDIENTS: PIE CRUST - makes for one double crust 9”(23cm) pie
2 cups (500 ml) all purpose flour + extra for dusting work surface
3/4 tsp (4 ml) salt
1 cup (25O ml) Crisco vegetable shortening (for a butter flavoured pie crust use
butter flavoured Crisco)
1 egg 🥚
2 tbsp (30 ml) cold water
1 tbsp (15 ml) white vinegar
Plus one more egg for egg wash
OPTIONAL: Sprinkle of coarse, granulated or turbinado (raw) sugar
DIRECTIONS: PIE CRUST
1) In a large mixing bowl, combine flour & salt. Add in cut shortening.
2) Use a pastry cutter to work the shortening into the mixture until it resembles coarse crumbs.
3) Beat egg, water & vinegar together. Pour all the liquid into the flour mixture. Stir with a fork until mixture is well combined. You may finish it off by hand. NOTE: if dough is too sticky, add a bit more flour.
4) Divide dough in 2 pieces. One 2/3 piece (for the bottom crust) & the remaining for the top strips. Wrap separately in plastic wrap. Place in the fridge until needed.
INGREDIENTS: PIE FILLING
7 cups (approx 980 g) fresh dark cherries (pitted & halved)
5 tbsp (40 g) cornstarch
1/4 tsp (1.5 g) salt
3/4 cup (150 g) sugar
3/4 cup - 1 1/4 cups (175 ml - approx 310 ml) water (depending on amount of juices
released from the cherries)
1/2 tsp (2.5 ml) vanilla extract
Juice of one lemon
Zest of one lemon
DIRECTIONS: CHERRY FILLING
1) Rinse cherries. Remove stems. Pit cherries.
TO AVOID RED STAINED HANDS, we suggest wearing a pair of surgical gloves.
2) Cut cherries in half. This not only helps the baking process, it also ensures that no pit has been left behind.
3) In a large saucepan, over medium/low heat, add the cherries, cornstarch, sugar, salt, lemon juice & zest, vanilla extract & water. Bring to a slight bubbling. Stirring constantly. Lower heat to low. Simmer until juices thicken & become translucent (approx 15-20 mins). If your filling is too thick, add more water.
4) Remove from burner. Let cool to lukewarm.
TIP: To cool faster, pour the filling into a large raised dish.
DIRECTIONS: ASSEMBLING THE PIE - We are using a clear glass pie dish, for visibility during the baking.
Oven temperature: 400F (205 C) for the first 20 mins then
Reduce temperature to 375F (190 C) for 35-40 mins or until filling is bubbling & bottom and top of the pie is golden brown.
1) Preheat oven. Arrange rack on the bottom third of the oven. Prepare a baking sheet lined with aluminum foil or parchment paper.
2) Dust your work surface & rolling pin with flour.Roll out the 2/3 piece of dough into about a 13” (33 cm) disk. Needs to be about 1” (2.5 cm) over the edge of the pie dish.
3) Gently press the pie disk into your pie dish. Pour in the cherry filling.
4) Roll out the remaining dough. Using a pastry cutter, cut out about 1” (2.5 cm) strips.
5) Arrange 4 - 5 strips crosswise over the top of the pie. Pull back the necessary strips to weave 4 - 5 strips to make a lattice.
6) Trim the edges of the lattices. Fold the overlapping pie dough under the edge of the pie dish.
7) Pinch together the edge of the bottom crust with the lattice strips.Crimp the edges, if you like.
8) Brush a thin layer of egg wash over the edge & every lattice, trying to avoid the cherry filling. The egg wash will give the pie a beautiful golden shine.
9) Sprinkle with the sugar.Place on a lined baking sheet.
10) To prevent the edges of the pie crust from burning, cover with aluminum foil for the first 20 minutes of baking. Then remove the foil for the remainder of the baking.
11) Should the top of the pie be golden brown before finishing to bake, cover with aluminum foil & continue baking till the bottom crust is fully baked. This is why we use a glass pie dish to visually see.
12) Cool completely before serving.
13) If refrigerated, the filling might solidify.
To get the pie to a looser texture, place the pie in a preheated 250F(120 C) oven for 15-20 mins. For a single slice, at 300F (150 C) for 10 mins.
FREEZING INSTRUCTIONS:
Cool pie completely. Cover with plastic wrap. Can be kept for 2-3 months.Thaw overnight in the refrigerator. Warm before serving. See step # 13.
Nancy and Franca thank you for viewing this recipe,
and as always, continue to …LOVE WHAT UEAT 🫶😋
RECIPE WEBSITE:https://www.lovewhatueat.net/
INSTAGRAM : / love_what_ueat

Доступные форматы для скачивания:
Скачать видео mp4
-
Информация по загрузке: