DIY Jigs Workbench [MicroJig Compatible] | HW|Designs
Автор: HonestWork Designs
Загружено: 2021-06-15
Просмотров: 69156
For more behind-the-scenes content and to support the channel: / hwdesigns
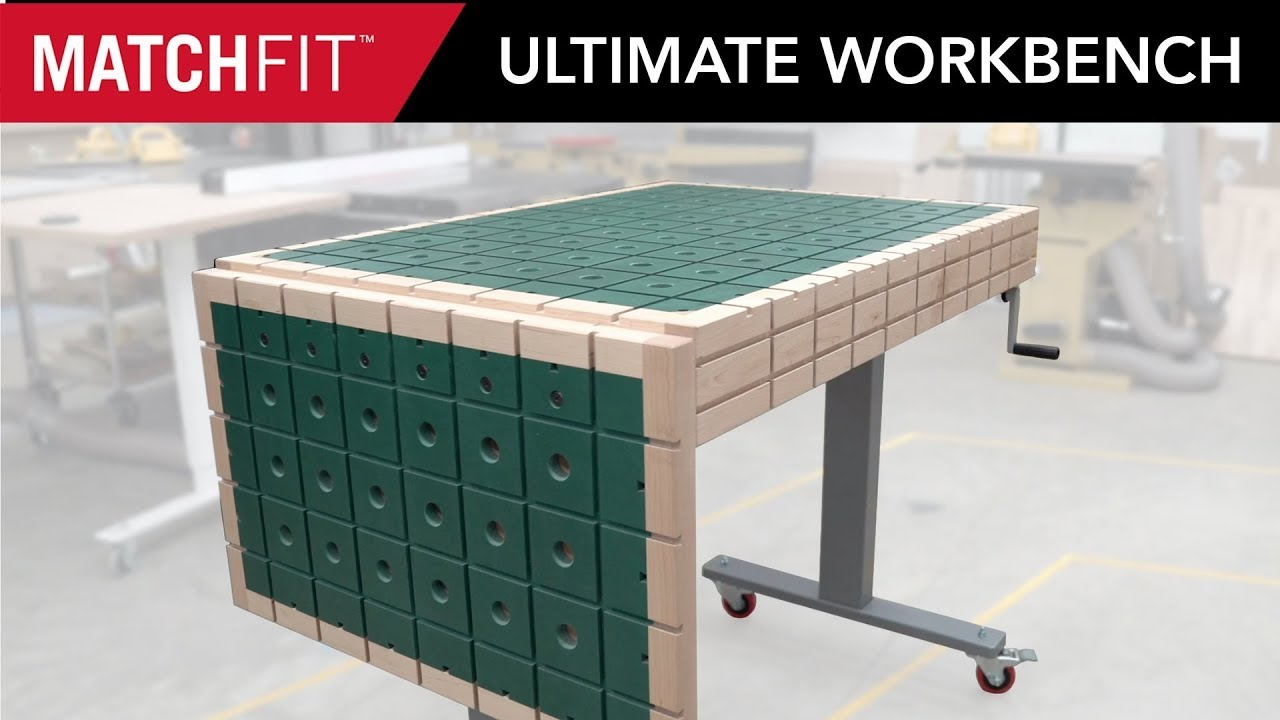
Next on my summer of shop upgrades check list: the all jigs everything work bench.
I decided to go with this cool dovetail track system, and I'm already finding that this table motivates me more to use my router and try more complicated things because its like having an extra pair of hands!
Hope you enjoy!
To support "the show:"
Like
Subscribe
"Ring the Bell"
Follow me: / honestworkdesigns
Music Credits:
Five Tribes
Hunter Quinn
https://player.epidemicsound.com/
Fiddler's Barn
Hunter Quinn
https://player.epidemicsound.com/
The Appalachian Trail
Hunter Quinn
https://player.epidemicsound.com/
Country Gold
Hunter Quinn
https://player.epidemicsound.com/
*Transcript of Voiceover
How to make, or how I made this Jigs Workbench
Let’s get into it
I started by cutting 9 2x4’s down to 54” for the new bench top
With my jointer out of commission at the moment, and confidence that I could get the counter to laminate well enough, I used a stacking method to quote un quote square the edges of the boards
Then, planed the faces.
Is this the perfect way to get planks ready to laminate? No - but given the broken jointer, perfectly fine for my purposes.
With those ready I glued up
Using cauls and brute force to mitigate the fall out of my transgressions.
While that cured, I set about demo-ing the old, used and abused workbench, stripping it for parts I’d use for the upgrade and throwing out what needed pitching.
Using the old ply bench top, I cut new, sturdier top and back frame pieces for the drawer set to help keep the drawers on track better
I cut them wide enough to account for the width of the old drawer boxes, plus 1 in for the new hardware, plus an 1 ½” to cap the perpendicular ply frame pieces.
Then removed the old hardware
After that, I sunk a few pocket holes in the side panels that I’d use to put the drawer frame back together
With the test fit looking good and the glue cured, I turned back to the bench top, planing away squeeze out and lamination variation
Then, gave it a finishing level sand down
With the top tidied up, I trimmed the edges flush
Time for finish, I used a few coats of water based polyurethane.
While that dried, and with the final depth of the counter figured out, I turned trimming the legs of the workbench down about an 1/8th of a inch so the new bench top could still act as one wing of the miter station - sitting adjacent the miter saw.
With those all ready, I affixed the drawer frame to the work bench
Then measured and marked the lines for the new drawer hardware
And got to reinstalling the drawers
With those done, I went through the same laminating/planing/sanding/finishing process to prep the small tracked board for the face of the workbench.
Once it cured, I clamped it roughly into place, so I could then clamp and anchor the workbench top to sit flush with the face board.
To anchor the faceboard into place, I used a scrap piece of the old workbench, anchored to the bench leg, to set the placement for an additional upright
Then, anchored that upright to the top and bottom of the bench
Then removed the scrap.
I didn’t anchor the face board into place yet,
Instead I turned to measuring and marking the placement of the tracks for the top of the table.
I chose spacing that I thought would work for just about any average sized work piece. With a few closer placed tracks toward one end incase I came up with something a little less than average in the future.
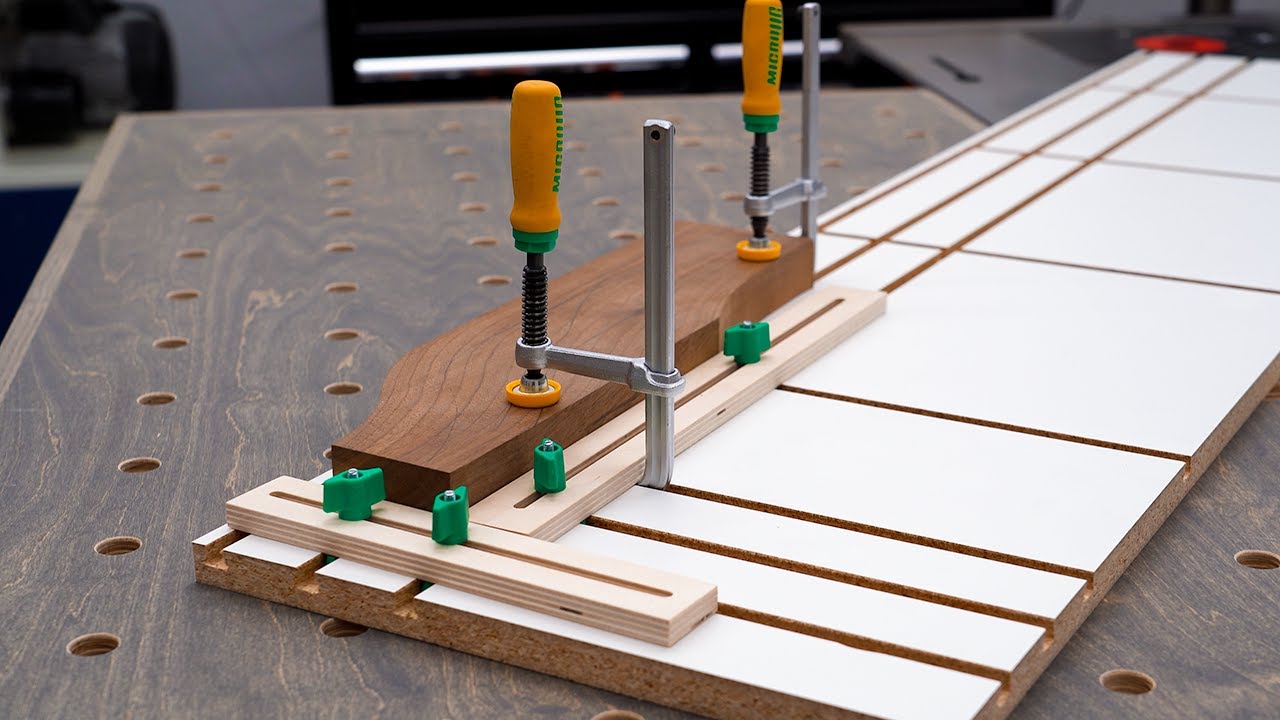
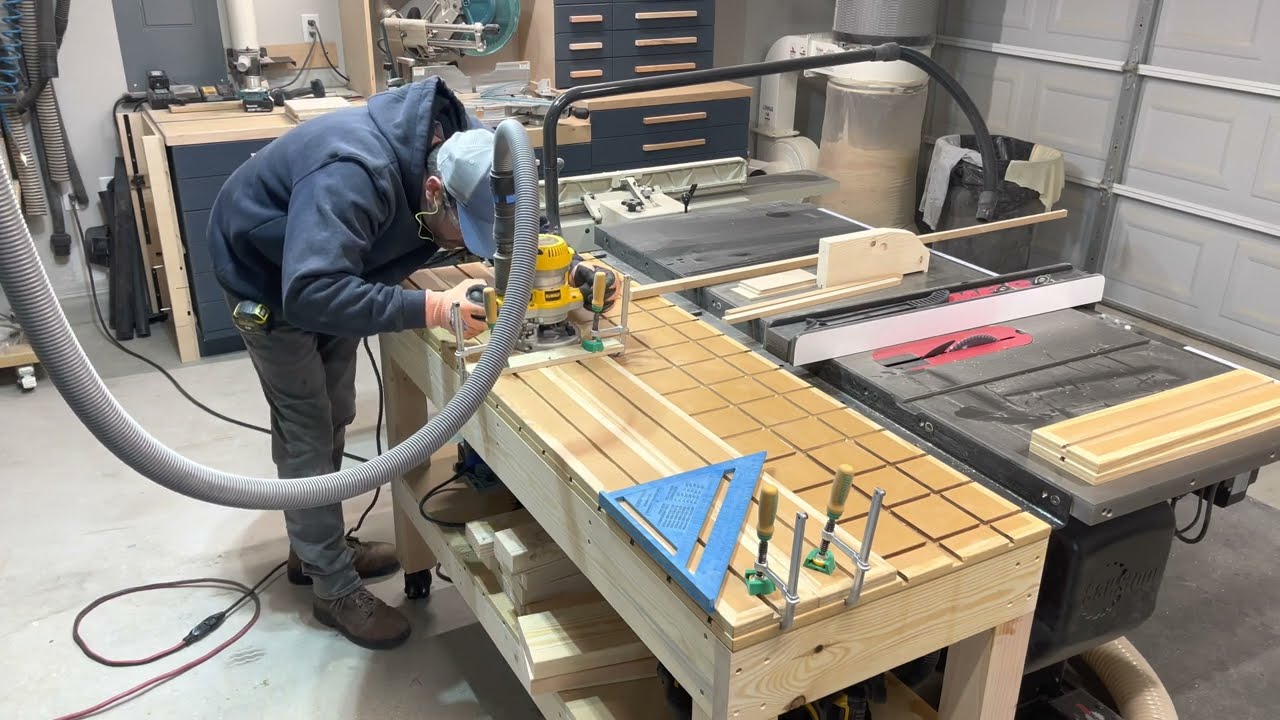
I used the bench top track marks as guides for the face board, before temporarily removing it while I cut out the dove tale tracks.
Using a trim router and edge guide, I cut the tracks in 3 passes - 2 with a straight bit to clear the way, and once with the dovetail at the final depth.
Using the table and new Microjig gear, I did the same for the faceboard.
Then, anchored it into place
And that’s a wrap
If you want to see how I made this nifty dust port, or other behind the scenes content, join us over on patreon. We like to have a good time. Link below.
Next time, I wrap of this series of shop upgrades with a drill press cart and jig ready table
Until next time.
![DIY Jigs Workbench [MicroJig Compatible] | HW|Designs](https://imager.clipsaver.ru/lOF0fXfMX8g/max.jpg)
Доступные форматы для скачивания:
Скачать видео mp4
-
Информация по загрузке: