Yamaha Virago Carb Cleaning (PART 2) - 1984 Virago XV1000
Автор: KensWorld Restorations
Загружено: 13 авг. 2021 г.
Просмотров: 4 849 просмотров
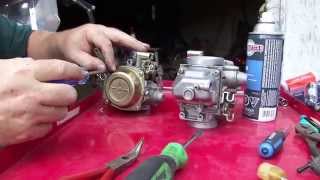
Second part of my Virago (Hitachi HSC40) carb cleaning and overhaul process. I bought a 15 litre ultrasonic cleaner for the restoration and got to use the carbs as my guinea pig. First round of cleaning was just a soaking and brushing with a good degreaser and getting most of the crap off the outside. Round two of the cleaning process uses the ultrasonic cleaner which cleans out all the small fuel and air passages and makes all the parts look like new.
In this video I also install the two K&L carb kits, reassemble the carbs, check the float height and get them ready to go back into the bike.
NOTE: In this video around the 16:20 mark I put the little rubber o-ring on the needle (air) jet on first. The shop manual draws it this way. As someone noted in the comments, the order should be the spring, washer and the o-ring last. The o-ring is there to make the seal and the washer is to ensure the spring edge doesn't damage the o-ring when installing and adjusting the jet.

Доступные форматы для скачивания:
Скачать видео mp4
-
Информация по загрузке: