Blacklisting Strategies in Genesys Cloud
Автор: Genesys Cloud with Logan
Загружено: 2025-12-05
Просмотров: 80
Blacklisting Phone Numbers in Genesys Cloud: Step-by-Step Implementation
!!CHECK TO HIT THE SUBSCRIBE BUTTON!!
Please feel free to send queries, in person trainings FOR FULL COURSE WITH HANDS-ON EXPERIENCE when you are interested.!
Contact me through My email:LOGAN.SUPPARAYAN@GMAIL.COM
This strategy uses a Data Table as a dynamic list to block unwanted callers (e.g., spammers, nuisance callers) early in the inbound flow.
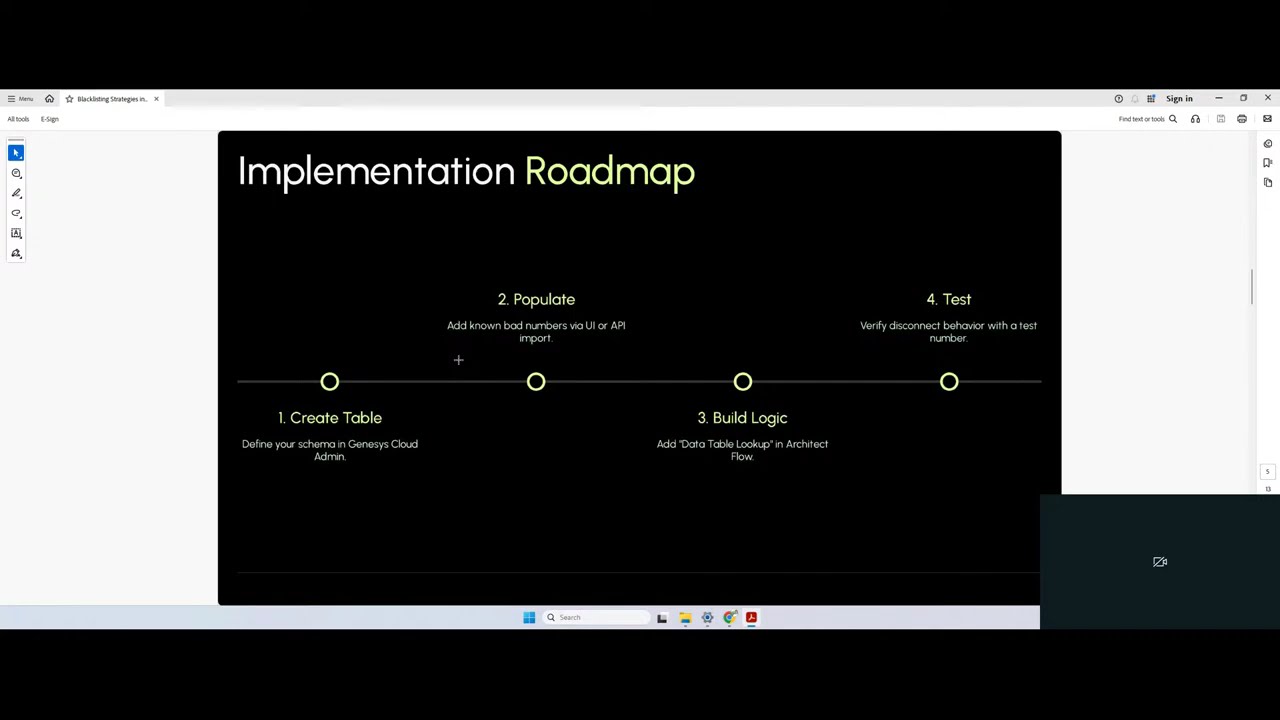
Phase 1: Create the Data Table (The Blacklist)
The Data Table will serve as your centralized, easily manageable list of blocked phone numbers.
1. Navigate to Data Tables: In Genesys Cloud Admin, go to Admin Integrations Data Tables.
2. Create New Data Table: Click Add and define the table:
o Name: Blacklist_Phone_Numbers
o Description: Stores phone numbers to be automatically disconnected in Architect flows.
3. Define Primary Key: This must be the field you will use for the lookup.
o Name: phoneNumber
o Type: String (This will store the normalized Caller ID, e.g., +13175550100).
4. Define Additional Columns:
o Column 2: reason (Type: String) - e.g., "Nuisance Caller," "Spam Bot."
o Column 3: dateAdded (Type: Date/Time) - For auditing and cleanup purposes.
5. Save and Publish: Save the table draft and then Publish it to make it available for use in Architect.
Phase 2: Create the Data Action (The Lookup Tool)
The Data Action is the bridge that allows your Architect flow to query the Data Table.
1. Navigate to Data Actions: Go to Admin Integrations Actions (under the "Integrations" section).
2. Create New Action: Select the PureCloud Data Table integration and click Add Action.
3. Configure Action Details:
o Action Name: Check_Blacklist_Entry
o Category: Blacklisting
o Type: Select Read.
o Input Contract: Define a single input:
Name: normalizedPhoneNumber
Type: String
4. Configure Request: This defines the API call to your Data Table.
o Set the Path to: /api/v2/architect/datatables/{tableName}/rows/{normalizedPhoneNumber}
o In the Input section, use the following body template to map your inputs to the API path parameters:
5. {
6. "tableName": "Blacklist_Phone_Numbers",
7. "normalizedPhoneNumber": "${input.normalizedPhoneNumber}"
8. }
9. Configure Response (Minimal): The system just needs to know if a record was found (success) or not (failure/disconnect). A simple output contract is fine:
o Output Name: recordFound (Type: String)
o Success Template (Example):
10. {
11. "recordFound": "True"
12. }
13. Save and Publish: Save the Data Action draft and Publish it to make it available in Architect.
Phase 3: Implement Logic in Architect (The Decision Engine)
This logic is placed at the very beginning of your inbound call flow.
1. Open Inbound Flow: Go to Admin Architect and open your primary Inbound Call Flow (e.g., the flow handling your main DDI).
2. Normalize Phone Number (Initial Block):
o Add a Set Participant Data block at the start of the flow.
o Variable Name: Call.BlacklistNumber
o Expression: Replace(Call.Ani, "tel:", "")
o Purpose: This removes prefixes like tel: or sip: to ensure the number format matches the normalized data table entry (e.g., +13175550100).
3. Call Data Action (Lookup Block):
o Add a Call Data Action block immediately after the Set Participant Data block.
o Data Action: Select the action you created: Blacklisting.Check_Blacklist_Entry.
o Input: Map the flow variable to the action input: input.normalizedPhoneNumber = Call.BlacklistNumber.
4. Handle Success (Blacklisted Path):
o The Success Output path means the number was found in the Data Table (it's blacklisted).
o Action: Add a Disconnect block immediately on this path.
o Optional but Recommended: Add a Set Participant Data block before disconnecting to log the event:
Variable Name: Call.BlockedReason
Value: Blacklisted - Nuisance Call
5. Handle Failure (Normal Routing Path):
o The Failure Output path means the number was not found in the Data Table.
o Action: Connect this path directly to your standard IVR menus, ACD transfer, or normal flow logic. This caller is considered legitimate.
Phase 4: Testing and Maintenance
1. Test Case: In the Blacklist_Phone_Numbers Data Table, manually add your own cell phone number (or a dedicated test line) using the normalized format (e.g., +19025551234).
2. Verify Block: Call your Genesys Cloud number from the test line. The call should connect momentarily and then be disconnected instantly without ringing any agents or hearing the IVR.
3. Maintenance: Regularly review the Data Table contents for accuracy. You can update or remove entries through the Data Table UI as needed.
Доступные форматы для скачивания:
Скачать видео mp4
-
Информация по загрузке: