How to Sew a Post-Mastectomy Drain Bag (shorter)
Автор: Catmoomie
Загружено: 2022-06-02
Просмотров: 1149
Hey all this is my second instructional sewing video! Once again about making a post-mastectomy drain bag, but this one is half the duration and looking down at my surface, a quicker instructional video 😊
Here's a list of what you need but it can vary depending on your level of sewing
Fabric required in Inches
Two 12"x11 1\2" pieces of lightweight fabric (seam allowances included, but go with 11"x11" and then add on your seam allowances!) My allowances are 1/4“ on the sides, 1/4" on the bottom and then 3/4" for the top.
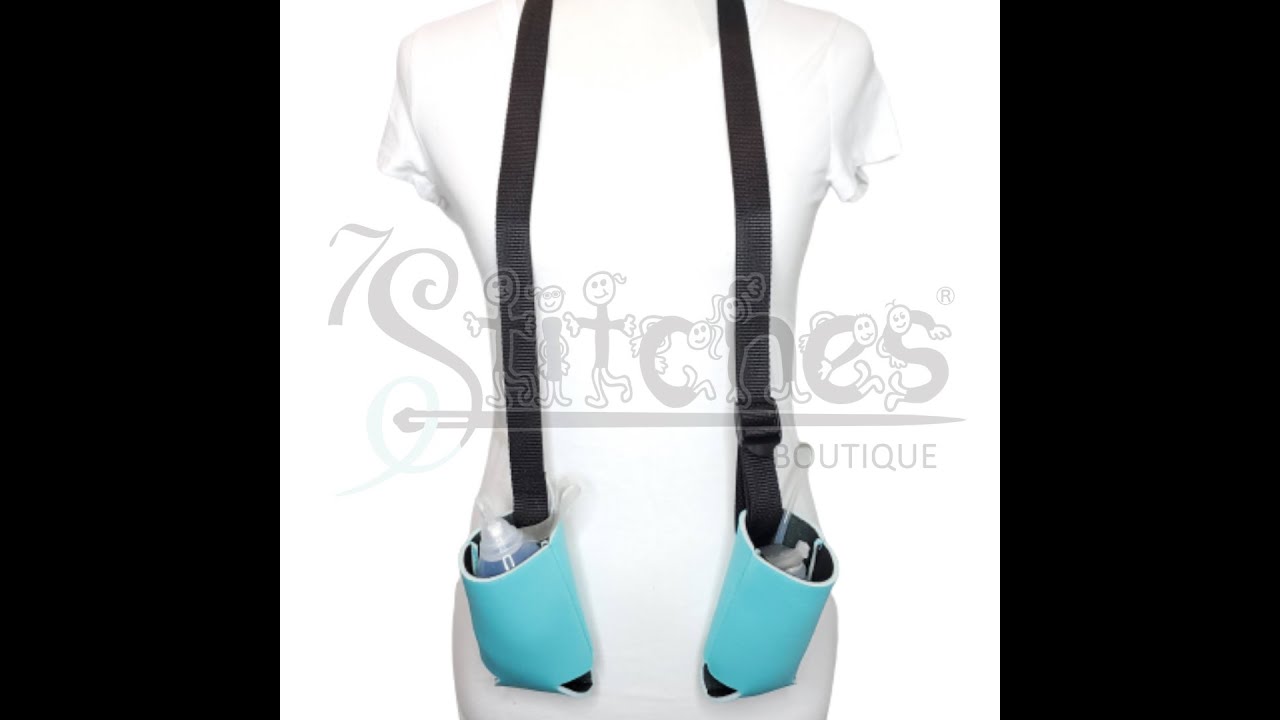
One long strip of fabric for a strap
For mine I went with 38"x2". Using a tape measure position one end at your waist, then bring it across your body, behind your neck and to the waist nearer the back. Then don't forget to add a seam allowance for the ends, mine was about 1". If you're not good with fiddly small seams make sure to make the strap wider so it's easier to tuck them in.
Matching or contrasting thread
Fabric required in centimetres
Two 30.5cm x 29.2cm pieces of lightweight fabric (seam allowances included, but go with 28cm x 28cm and then add on your seam allowances!) My allowances are 6mm on the sides, 6mm on the bottom and then 19mm for the top. (rough conversions)
One long strip of fabric for a strap
For mine I went with 96.5cm x 5cm. Using a tape measure position one end at your waist, then bring it across your body, behind your neck and to the waist nearer the back. Then don't forget to add a seam allowance for the ends, mine was about 2.5cm. If you're not good with fiddly small seams make sure to make the strap wider so it's easier to tuck them in.
Matching or contrasting thread
Equipment
Sewing machine (you could hand sew these)
Tape measure
Iron
Pins/clips
Chopstick/pointy implement
Needle (for tidying any ends)
Not required but useful
Overlocker/serger or overcast/edge foot
Cuppa tea or coffee ❤️
Fabric examples: light canvas, cottons, linen
Instructions
Take your two pieces of fabric (ironed if poss) and place them right sides together. Pin in place.
Sew along three edges leaving the top open, at each corner pivot at your seam allowance and continue sewing to leave gaps to snip the corners
Now snip off the two bottom corners being careful not to snip your stitches!
If you wish to tidy your raw edges up now use your overlocker/serger/overcast foot. If you don't want to do this method you could do French seams instead but it will take a bit longer 😊
Let's go to the strap, iron your strap in half with the wrong sides together.
Now unfold the strap and fold in a small amount to hide the raw edges on both sides, pressing as you go.
Now fold the strap back in half and make sure all the sides meet and give it another press.
Pin the strap up and sew along the open edge close to the edge, encasing the seams.
If you want at this stage you could also sew a symmetrical line on the folded side as well if your fabric doesn't keep it's shape.
Now we have a strap, attaching time!
Go back to the back and fold the top down to the wrong side, folding it down whatever your seam allowance is. And then turn in the raw edge so it's hidden, press along.
Now get your strap and tuck it under the hem, with the strap pointing down, and put it in close to one of the corners of the bag and pin.
Flip the bag over and put the other strap in the same manner on the other side.
Ensure your strap is not twisted at all.
Sew along this edge, encasing the raw edge and bag strap as we want to keep it pointing down at this point, be careful to not have it pointing up.
When top stitching you can back stitch or not, if not ensure to leave long tails so they can be tied together on the wrong sides.
Now flip the strap up so it's where it will naturally sit, once again ensure the strap isn't twisted as there's less to unpick now!
With the strap facing up, pin it in place and sew a x shaped box where the strap overlaps the hem. I start by sewing a line from the top to the bottom, diagonally to the top corner, sew a line down, then a diagonal to the other corner and and the across at the top.
Once you've reinforced both of these straps we then also want to do a row of top stitching along the top of the bag as well.
Now we want to turn the bag around, if you have any thread tails, using a needle pop them through to the wrong side and either snip if they're reinforced with back stitching or tie them together with other tails and snip.
Use your chopstick or other pokey but not sharp implement and poke the corners a little to be nice and sharp.
And there we have a finished bag, this took me 45 minutes while also explaining and recording, with fabric cut and straps made this would be a lot quicker and would be very easy to make a good amount of and donate to your local hospital or where I'm finding out is best.

Доступные форматы для скачивания:
Скачать видео mp4
-
Информация по загрузке: