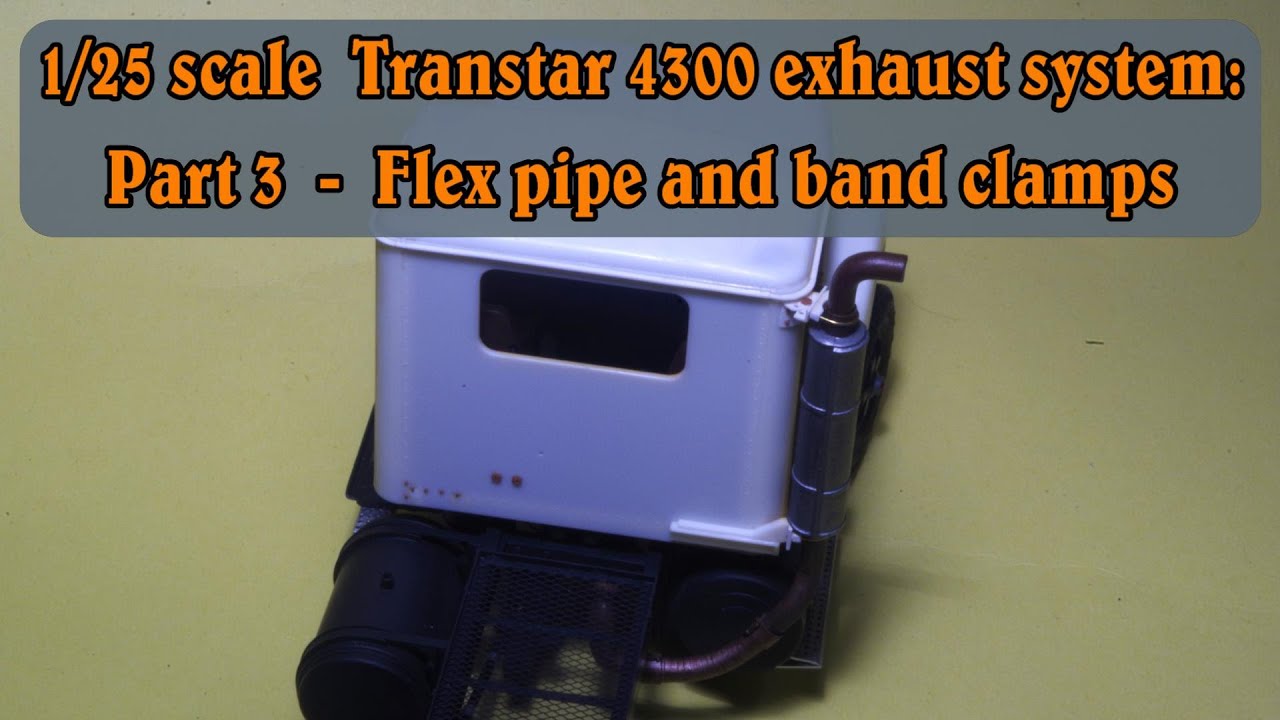
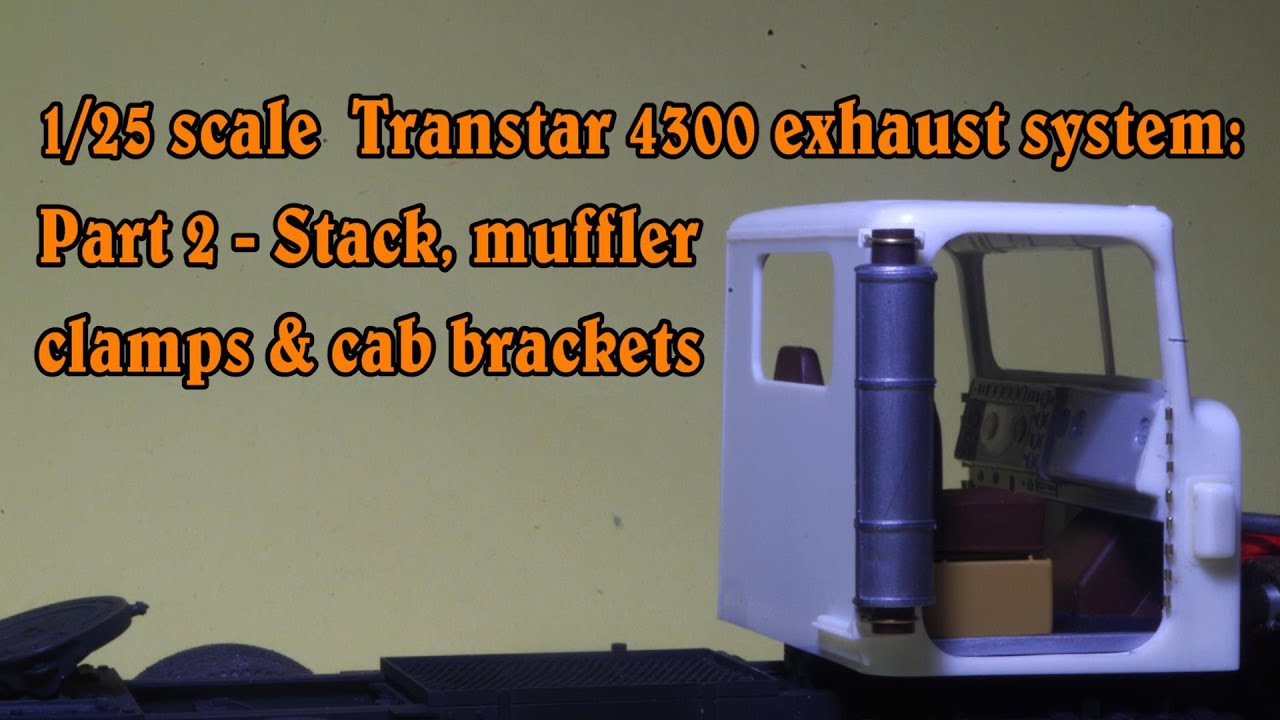
1/25 scale Transtar 4300 exhaust: Part 2 - stack, muffler clamps & cab brackets
Автор: B & R's Northern Horse Journey
Загружено: 2025-03-03
Просмотров: 537
Combining kit parts with scratch building is an approach that works well for many modelling applications. A good example is the exhaust stack on Ertl's (now AMT) Transtar 4300 which is quite accurate in bottom exhaust mounting bracket and muffler, less accurate with the upper attachment point to cab. Upper mounting bracket bracket and U-bolt style muffler clamps are the scratch built parts for this project.
0:15 Per the instructions, muffler/stack assembly is glued together from two halves then attached to a "key" on bottom bracket and a "mount pin" on upper corner of cab.
0:30 Kit bottom bracket is a good match for 1:1 scale. Main difference is flat section to which a U-bolt style muffler clamp is attached, rather than a "key" that fits into bottom of muffler.
0:46 Stock kit part at left, modified part with .030" x .188" (0.75 mm x 4.75 mm) styrene strip added at right.
1:02 Base of muffler clamp is .060" x .060" styrene strip (1.5 mm x 1.5 mm) styrene strip with round notch to fit exhaust pipe. 220 grit sandpaper wrapped around tube that will be used for exhaust pipe (7/32" or 5.5 mm for this model) is an easy way to get a properly sized notch.
1:26 Use the same diameter tube for making U-bolts out of .020" (0.5 mm) brass wire. Make sure the U-bolt legs are parallel...
1:40...because they will be the guide for drilling matching holes in the styrene strip. A #74 drill (.0225" or 0.57 mm) is slightly larger than the .020" wire providing clearance for easy assembly later.
1:54 Glue .010" x .040" (0.25 mm x 1 mm) styrene strip to bottom of muffler clamp base. This will create a slightly recessed area around the base when glued on, making touch-up painting easier later.
2:12 Glue one muffler clamp base to bottom bracket.
2:22 Kit muffler is a good match for 1:1 truck I am building, modifications consist of trimming off stack pipe, removing chrome and filling spots for "key" and "mount pin".
2:38 Drill both ends of muffler for 7/32" (5.5 mm) tube. I used brass on this model because pipes on real truck were rusty. For newer, non-rusted pipes aluminum tube is a good match for colour and does have the advantage of being easier to cut.
2:58 Cut tube to length leaving about .200" (5.1 mm) projecting from each end of muffler and glue in place.
3:14 On-line "for sale" ads, both for complete trucks and separate parts, are a good source of reference photos. This is one type of upper exhaust bracket used on Transtar 4300's which we will replicate in miniature.
3:29 Styrene strip .020" x .188" (0.5 mm x 4.75 mm) is the material used to make curved section. Bend one piece into a curve and glue to strip. Excess length of styrene strip provides a handle for working on this piece...
3:45...which gets three #67 holes (.032" diameter or 0.81 mm) in it.
3:58 220 grit sandpaper held against cab corner is an easy way to sand curved bracket for precise fit.
4:10 Glue bracket to cab, then add four bolt head castings to simulate fasteners holding it on.
4:23 .100" x .100" (2.5 mm x 2.5 mm) styrene angle is the other portion of upper bracket, it also gets three #67 holes and the second muffler clamp clamp base is glued to it.
4:37 Fitting the upper bracket pieces together is best done "by eye" using muffler and cab side as reference points. Doing this with cab on workbench is easiest as gravity is working with you when cab is horizontal. When alignment is good, glue upper part of bracket to the curved piece already on cab. Ream hole(s) if required and glue a bold head casting in to simulate bolt holding this assembly together.
5:07 Vernier caliper depth gauge can be used to set cut length for U-bolt legs, then locked to that setting and serve as a cutting guide as well.
5:23 Add nut/washer casting to underside of bracket, and small bolt heads to muffler clamp base.
5:40 I painted muffler silver, weathered it lightly with powdered pencil graphite, and touched up exhaust pipes with dark red as a base coat for further "rust" effects to be done later.
Part 3 will see the missing pipes added to complete this 1/25 scale exhaust system!
#scalemodeltrucks
#scalemodelling
Tubing and wire: https://ksmetals.com/?srsltid=AfmBOor...
Bolt head castings: https://www.tichytraingroup.com/
Доступные форматы для скачивания:
Скачать видео mp4
-
Информация по загрузке: